01/02
2-10
8825/8830 Printer
LL-90 Overtoned Fault RAP
Status Indicator RAPs
LL-90 Overtoned Fault RAP
NOTE: Go to BSD 9.7 while using this RAP.
The status code LL-90 is displayed when the logic detects that the toner concentration is signif-
icantly greater than the Control Point value.
The Toner Control System is designed to maintain the Toner Concentration within an accept-
able operating range. The Control Point operating range is from 5.2 VDC to 6.0 VDC. The
Toner Sensor continuously senses the Toner Concentration. A change in the Toner Concentra-
tion results in a corresponding change of the Sensor signal. As the toner concentration
increases, the Toner Sensor signal voltage decreases. The logic monitors the Sensor signal.
LL-90 indicates that the logic detected that the toner concentration increased greater than the
allowable limit.
The problem may occur if there is a problem with the toner dispensing or the developer mixing
systems.
Initial Actions
• Clean the Pressure Equalizing Tubes with a vacuum cleaner in order to remove toner
from inside the tubes. Clean the Augers and Magnetic Roll
• Examine the Developer Housing and check for a large amount of toner in the area of the
Toner Dispenser.
• Ensure that the printer is level.
• Ensure that the Toner Cartridge is not damaged and that the seal is secured to the Car-
tridge in the correct location.
• Check that all the connectors between the Toner Sensor, A22Q1, and the Main PWB, A2,
are seated correctly.
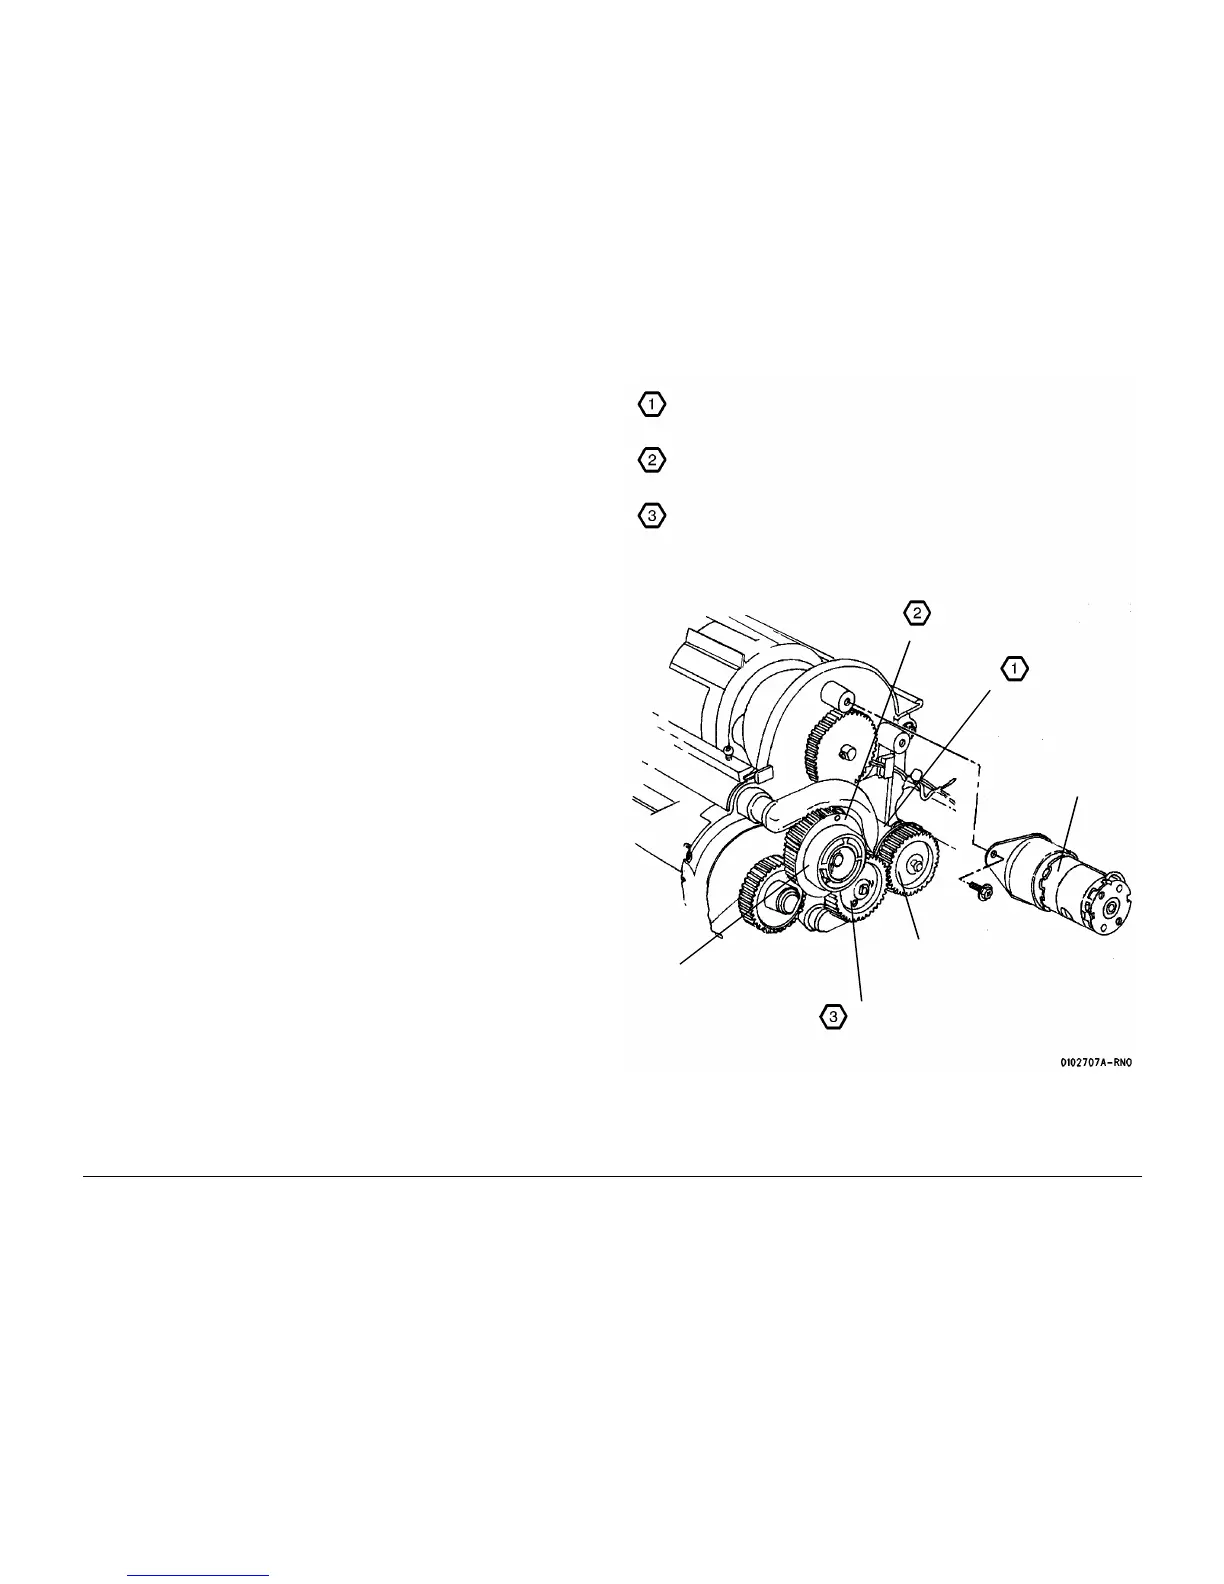
• (Figure 1): Ensure that the Developer Housing Auger and Drive Gears are not damaged
and are installed correctly.
Figure 1 Developer Housing and Auger Drive Gears
Ensure that the Rear Auger Drive Gear is positioned with the flange as shown.
Ensure that the Developer Housing Drive Gear is positioned with the flange as
shown.
Ensure that the Front Auger Drive Gear is captured in position by the Rear Auger
Drive Gear Flange and the Developer Housing Drive Gear flange.
Developer
Housing Drive
Gear
Flange
Flange
Cartridge Drive
Motor removed
for clarity
Rear Auger
Drive Gear
Front Auger Drive Gear

 Loading...


