9. Input & communication unit
9.4 Installation of an input module
The procedure below is applicable to all input modules of the input & communication unit of the projector.
Necessary tools
Phillips screw driver PH1.
How to install an input module into the input & communication unit of the projector ?
1. Switch off the projector and unplug the power cord at the projector side.
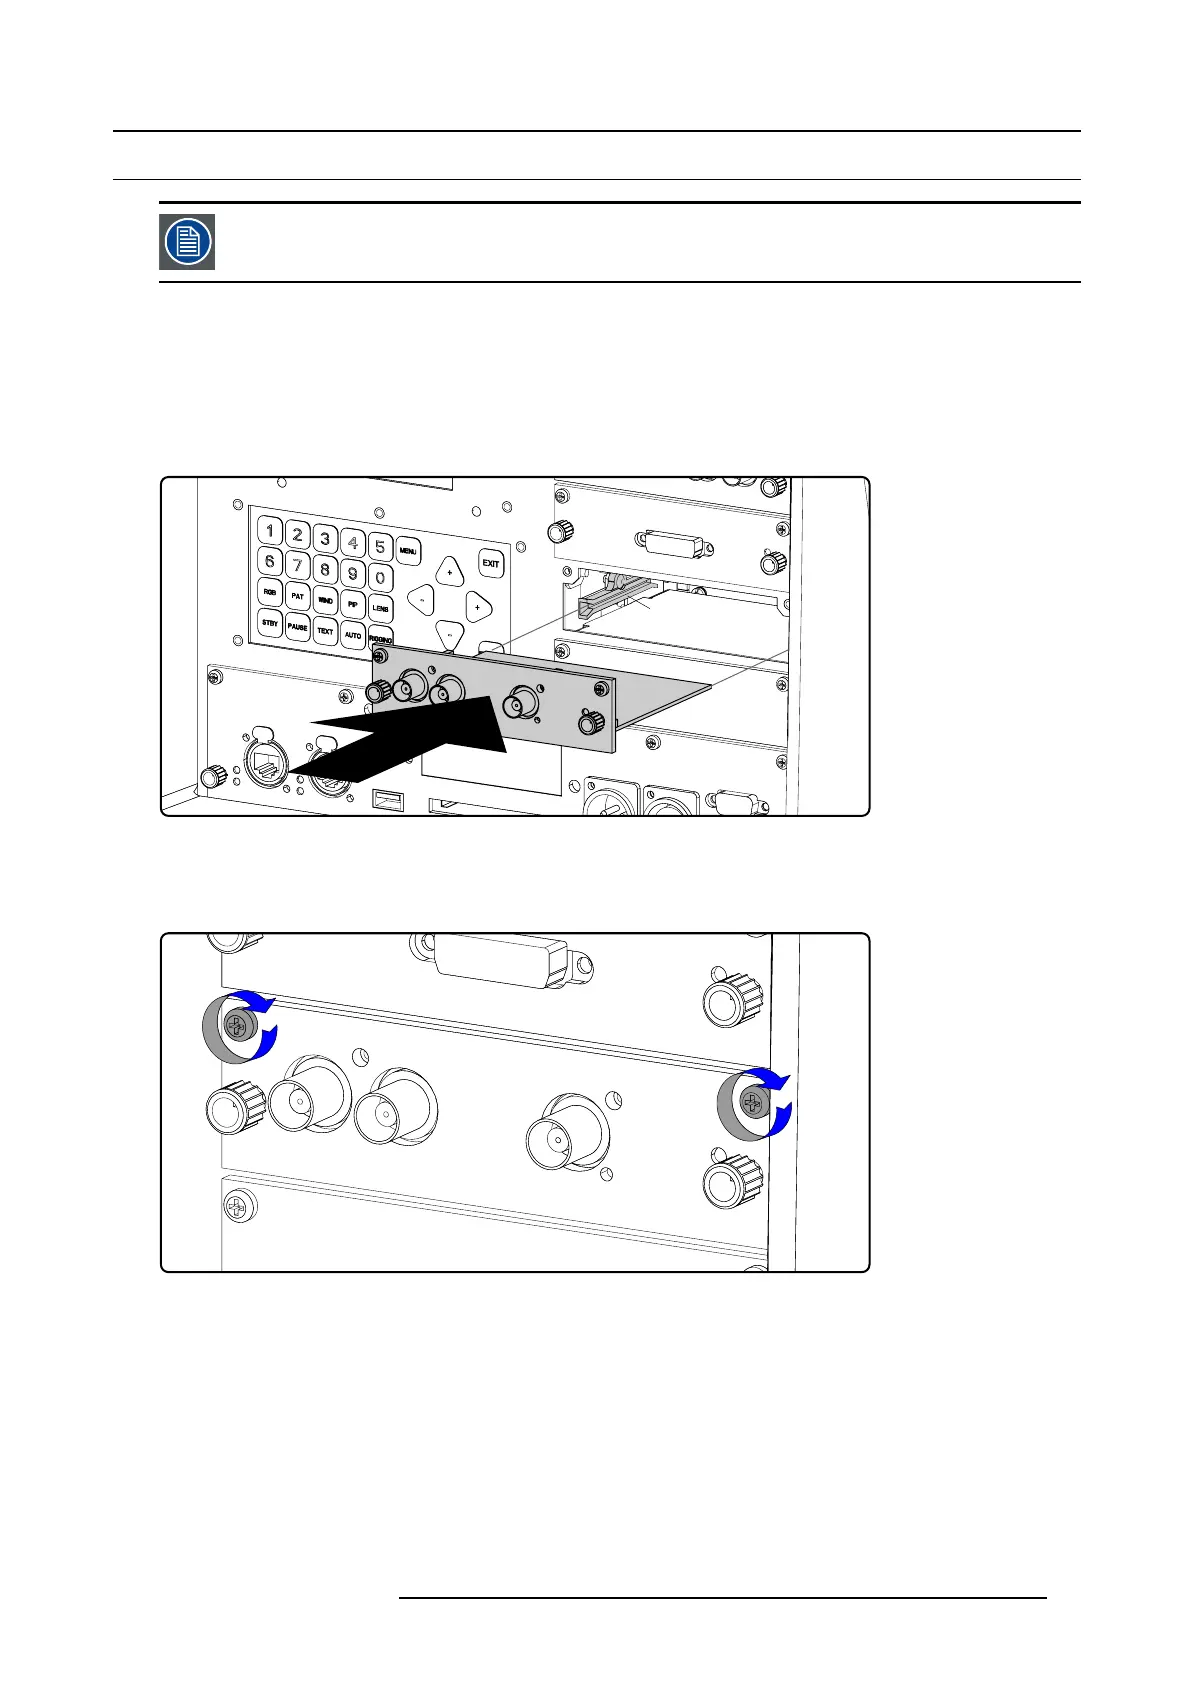
2. Slide the input module into the guides of the input slot.
G
Image 9-8
3. Push the input module forward until you feel that the connector of the input module fit in the socket of the input slot. The back of
the front plate of the module must touch the front plate of the input & communication unit.
4. Secure the input module by fastening both captive screws in the top corners of the module.
Image 9-9
R59770072 FLM SERIES 19/03/2007 99

 Loading...


