14. Lens holder
14.2 Installing the lens holder
Necessary tools
• 5,5 mm nut driver.
•3mmAllenkey.
Necessary parts
Twocableties.
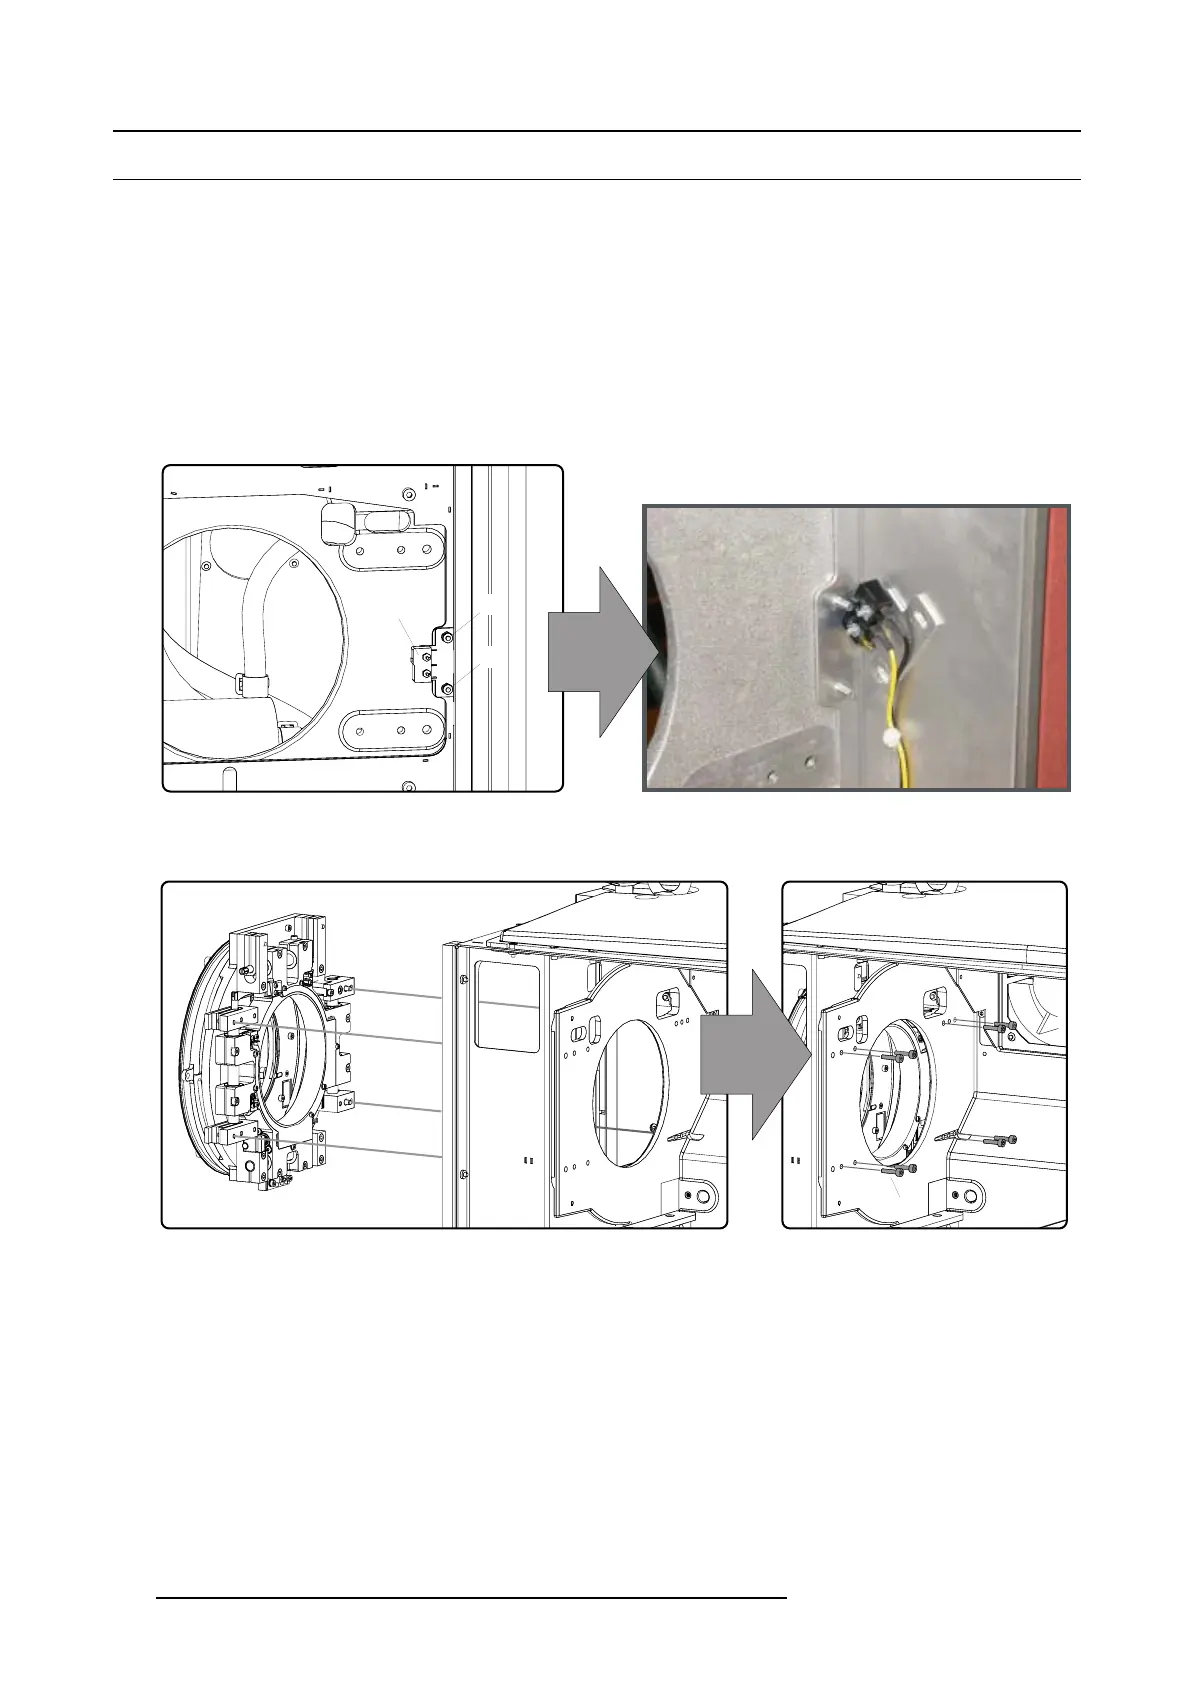
How to install the lens holder ?
1. Release the two screws (C), which fasten the mid position switch (S) to the projector chassis and position the switch as illustrated.
Use a 5,5 mm nut driver.
Note: The mid position switch has to be removed otherwise the switch may damaged while installing the lens holder.
S
C
C
Image 14-5
2. Install the lens holder and secure with 8 hexagon socket screws (F) as illustrated. Usea3mmAllenkey.
Note: Ensure that the positioning pins of the lens holder matches the positioning holes on the projector chassis.
F
Image 14-6
3. Remove the front plate of the lens holder by releasing the three retainer screws (D) and the three fixation screws (E). Use a 3
mm Allen key.
Note: There is a wire unit attached to the front plate and lens holder. So, you won’t be able to remove the front plate but just
shift it a little to the left to gain access to the fixation screws of the mid position switch.
132
R59770072 FLM SERIES 19/03/2007

 Loading...


