26. Power input
26.3.2 Mounting the new mains switch
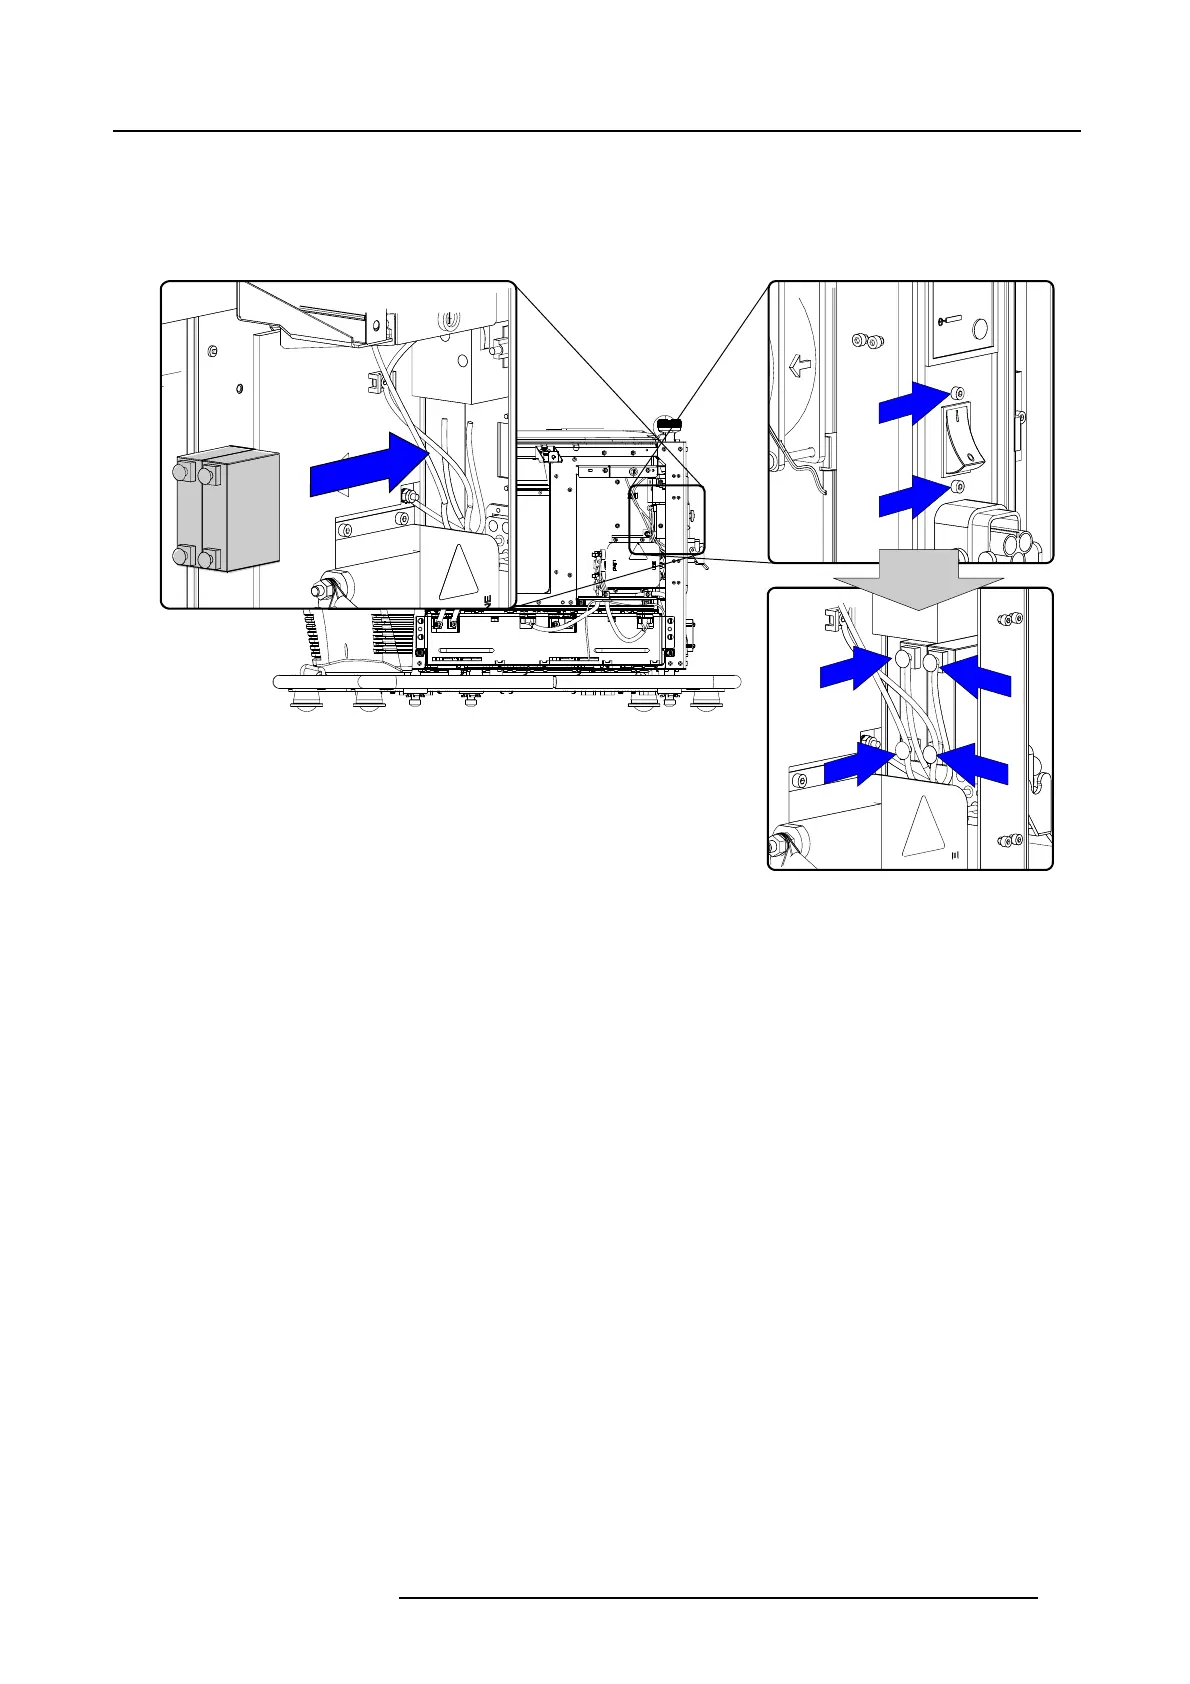
How to mount
1. Slide the new mains switch from the inside of the projector through the cabinet. Make sure that the indication “1” (on state) points
to the top of the projector.
a
b
c
d
Image 26-13
Mounting mains switch
2. Turn in both screws on the outside of the projector.
3. Turn out the first bottom screw (a), slide a lock washer, followed by a washer over the screw. Then slide the first eye connector
coming from the mains input also over the screw followed by the eye connector coming from the voltmeter. Turn in the screw
and tighten completely.
4. Turn out the next bottom screw (b), slide a loc
k washer, followed by a washer over the screw. Then slide the first eye connector
coming from the mains input also over the screw followed by the eye connector coming from the voltmeter. Turn in the screw
and tighten completely.
5. Turn out the first top screw (c), slide a lock washer, followed by a washer over the screw. Then slide the eye connector coming
from the mains filter over the screw. Turn in the screw and tighten completely.
6. Turn out the first top screw (d), slide a lock washer, followed by a washer over the screw. Then slide the eye connector coming
from the mains filter over the screw. Turn in the screw and tighten completely.
7. Continue with "Closing the power input compartment ", page 296.
R59770072 FLM SERIES 19/03/2007
295

 Loading...


