28. Start pulse generator
28.3 Installation of the start pulse generator
Necessary tools
• 10 mm nut driver.
•3mmAllenkey.
• 6 x 120 mm flat screw driver.
How to install the start pulse generator?
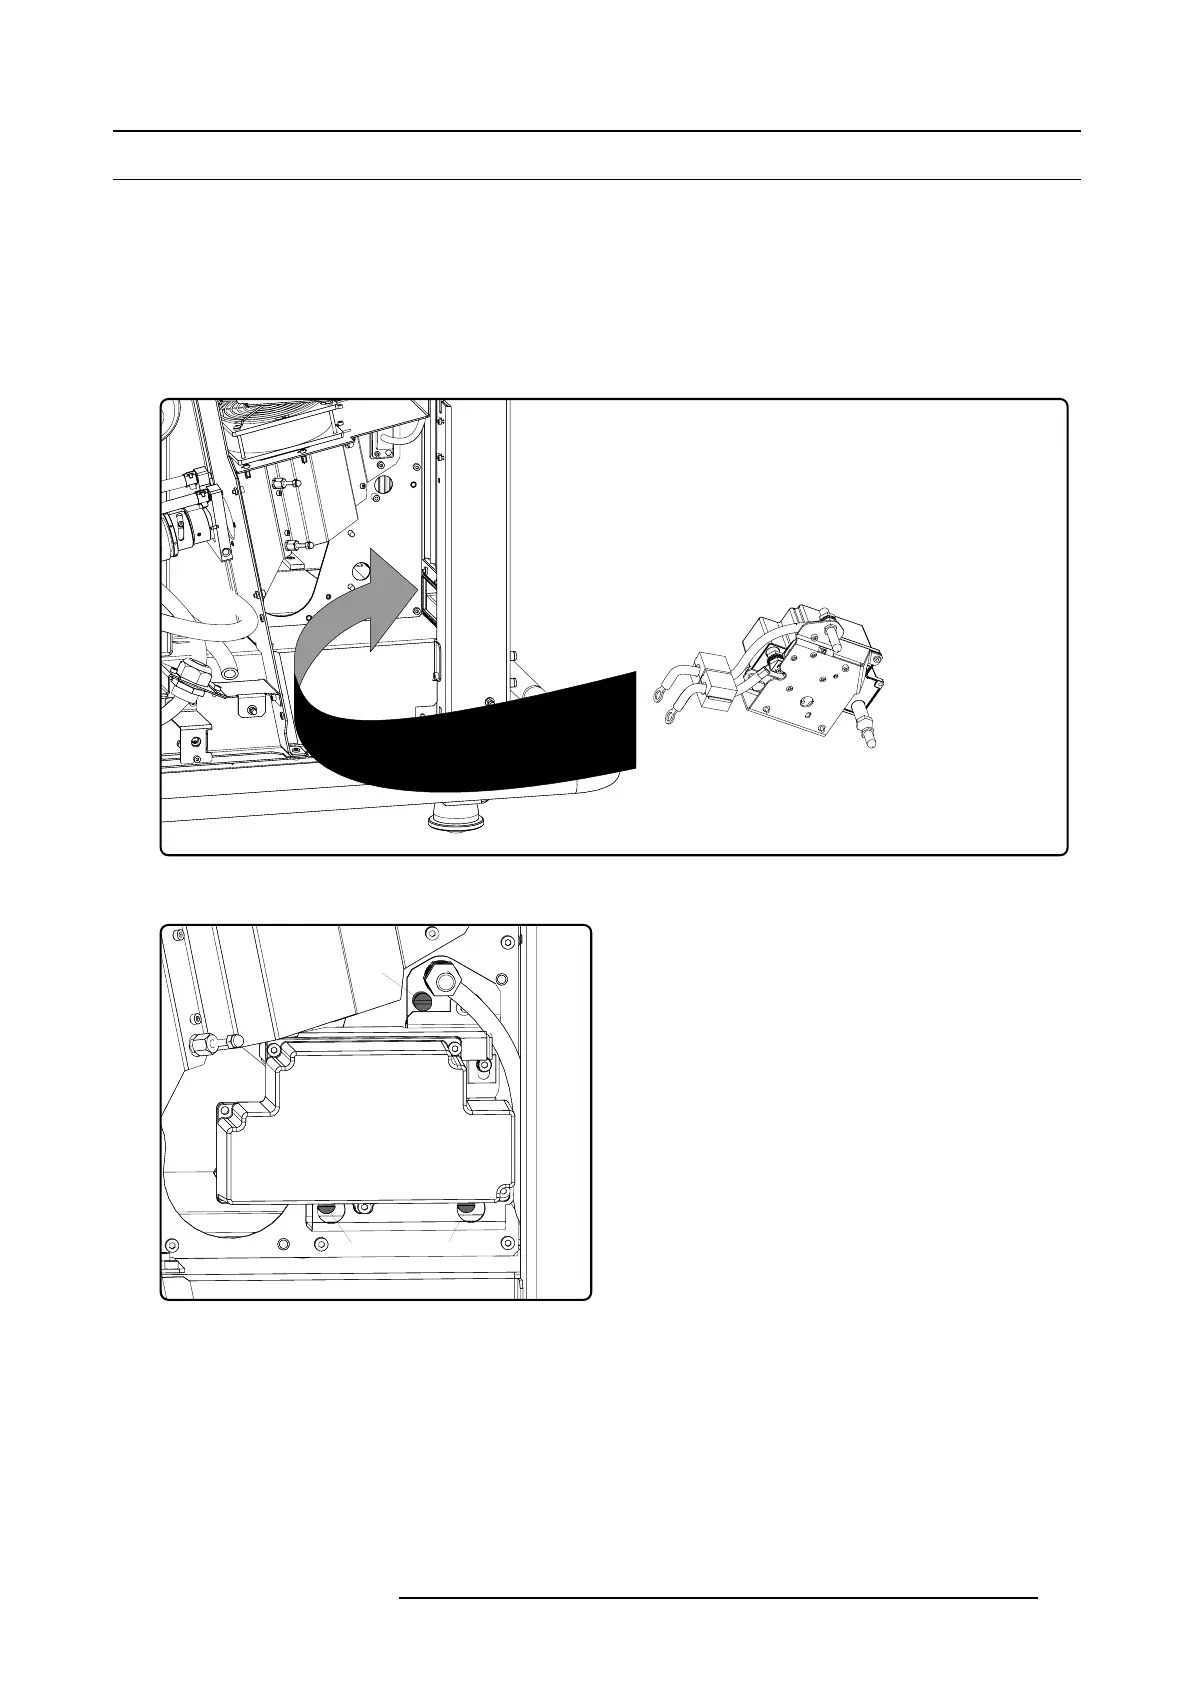
1. Place the start pulse generator into its position inside the projector.
Caution: Gently guide the thick wires through the frame opening. Make sure that the lamp house is removed from the projector.
Image 28-6
2. Fasten the 3 captive screws (S) of the start pulse generator as illustrated, using a flat screw driver.
SS
S
Image 28-7
3. Install the cover of the start pu
lse generator as illustrated. The cover has to be fasten with 5 hexagon socket head cap screws.
Use for that a 3 mm Allen key.
R59770072 FLM SERIES 19/03/2007
309

 Loading...