11. Integration rod
11.2 Removal of the integration rod assembly
To remove the integration rod assembly from the light pipe the light processor unit has to be removed from
the projector first.
CAUTION: All servicing to the light processor unit has to be done in a dust free area. Use compressed air to
blow away all dust on the outside of the light processor unit before entering the unit into the dust free area.
Necessary tools
• Compressed air.
•2mmAllenkey.
•2,5mmAllenkey.
How to remove the integration rod from the light pipe ?
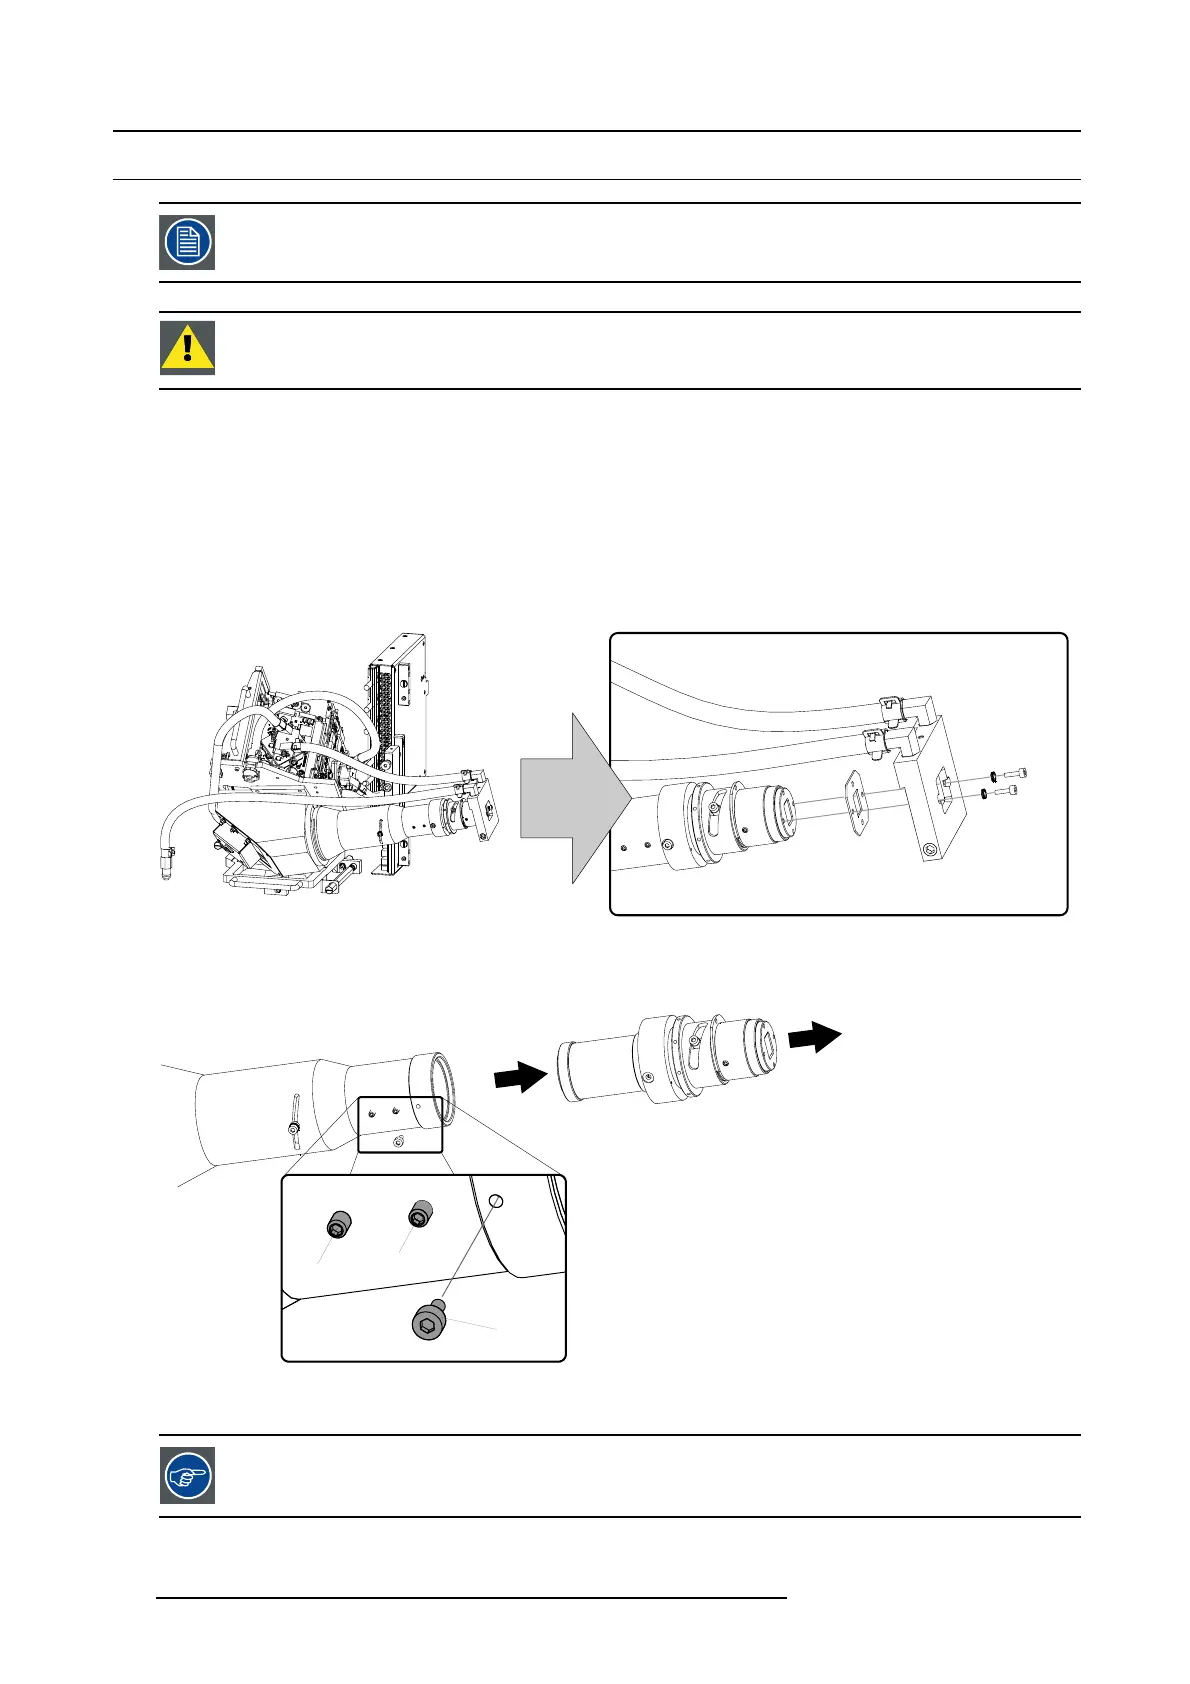
1. Remove the cooling block at the light pipe entrance by releasing the two socket head screws as illustrated. Use a
2,5 mm Allen
key.
Note: Note that the screws, which fasten the cooling block, also fasten the mask between the cooling block and integration rod.
Image 11-5
2. Release the two set screws (A) as illustrated. Use a 2 mm Allen key. It’s not necessary to remove the set screws.
3. Remove the socket head screw (B) as illustrated. Use a 2,5 mm Allen key.
A
A
B
Image 11-6
4. Pull the integration rod assembly out of the light pipe.
Do not keep the light pipe entrance open (no integration rod installed) for a long period. This to prevent dust
intrusion.
112 R59770072 FLM SERIES 19/03/2007
 Loading...


