27. Lamp power supply
27.3 Installing the LPS module
WARNING: This procedure may only be performed by qualified technical service personnel.
Necessary tools
• 6 x 120 mm flat screwdriver.
• 10 mm nut driver.
How to install the LPS module?
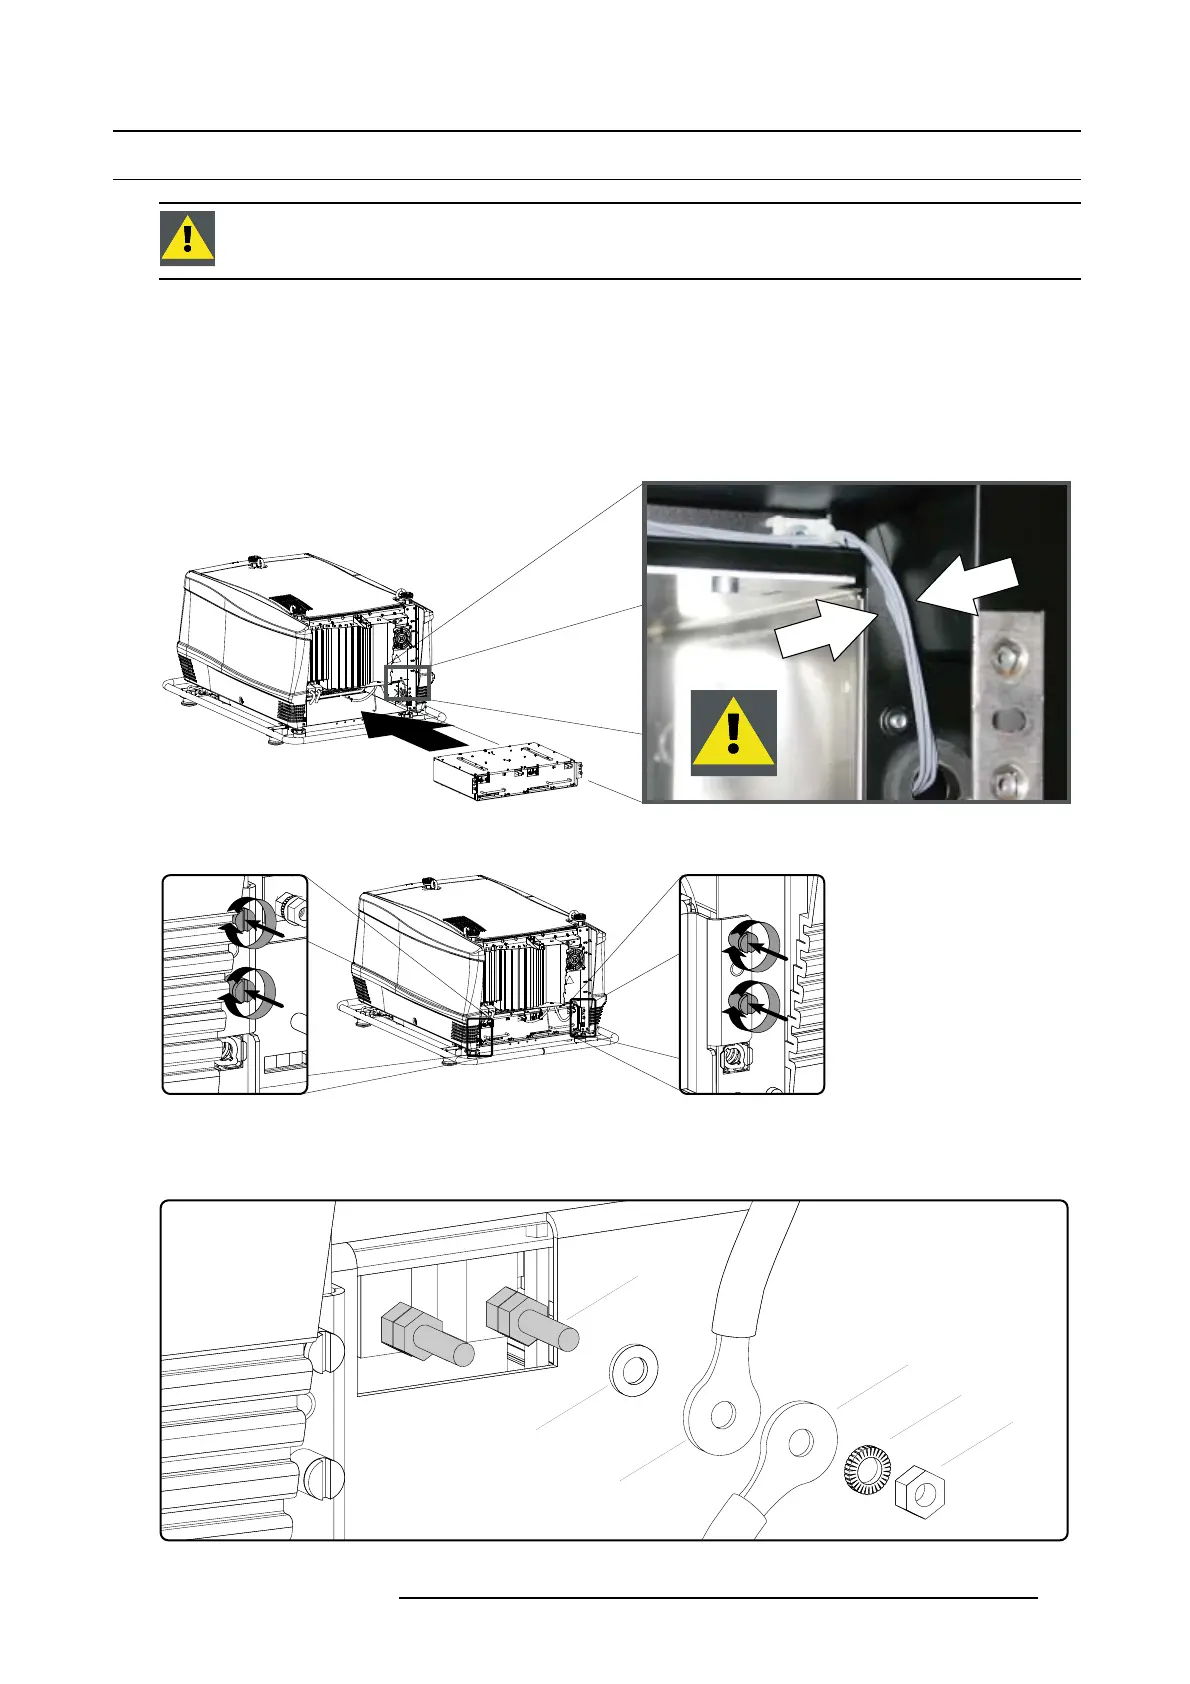
1. Slide the LPS module into its compartment as illustrated.
Caution: Do not damage the grey wire unit in the upper right corner of the LPS compartment while sliding in the LPS.
Image 27-8
2. Fasten the four captive screws of the LPS module.
Image 27-9
3. Connect the power cables coming from the SPG m
odule with the “LAMP OUT” sockets of the LPS module as illustrated.
Warning: Make sure to place the washers and cable eyes in correct order upon the pin as illustrated. Always use a plain
washer between the output pin and the cable eyes.
E2
L
N
P
W
E1
Image 27-10
R59770072 FLM SERIES 19/03/2007 303
 Loading...