EasyManuals Logo

Barco FLM series User Manual

Barco FLM series
331 pages
To Next Page IconTo Next Page
To Previous Page IconTo Previous Page
Page #232 background imageLoading...
Page #232 background image
23. Keypad board replacement
23.2 Mounting the new keypad unit
Necessary tools
Nut driver 5.5 mm
•Allenkey3mm
TorX screwdriver Tx10
How to mount
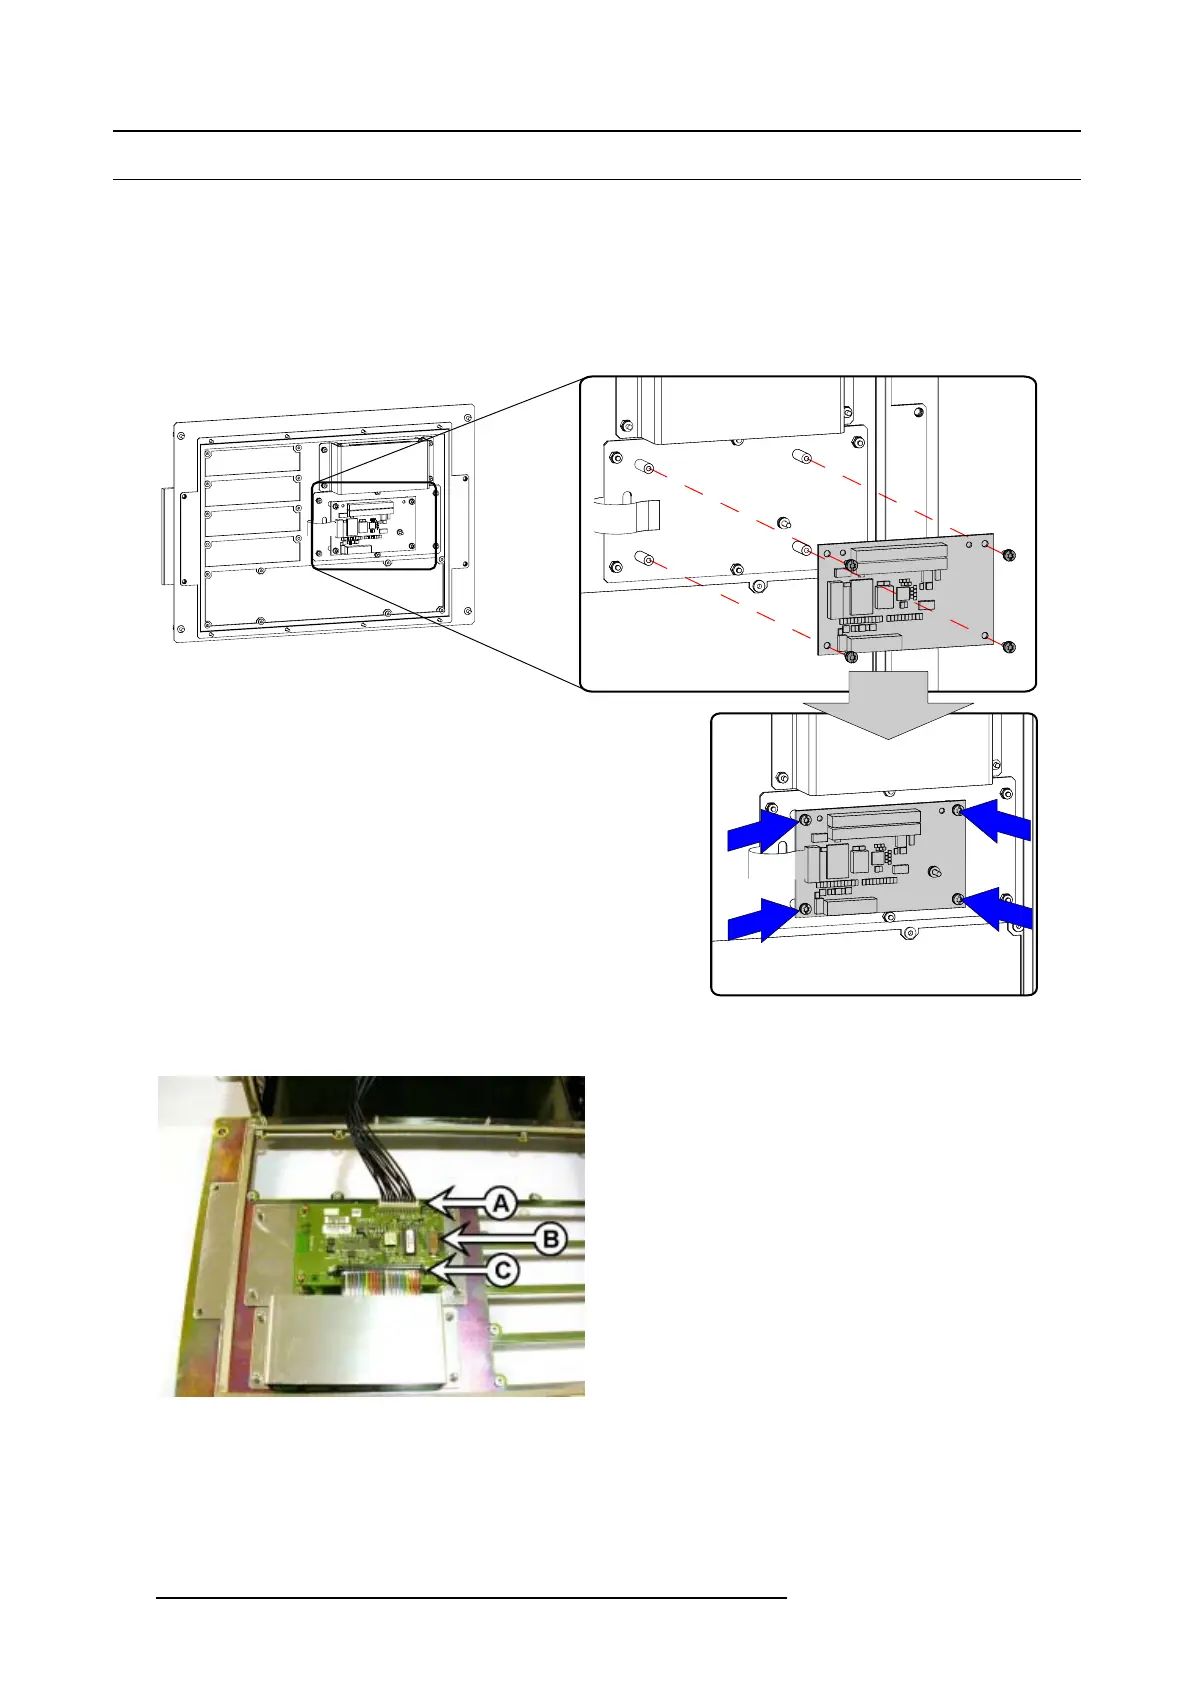
1. Place the new unit on the fixation studs and turn in the 4 screws.
Image 23-5
Mount keypad board
2. Reestablish the connections coming from the LCD panel (C), keypad (B) and PMP (A).
Image 23-6
3. Place the housing back and secure with the 8 nuts.
230
R59770072 FLM SERIES 19/03/2007

Table of Contents

Other manuals for Barco FLM series

Questions and Answers:

Question and Answer IconNeed help?

Do you have a question about the Barco FLM series and is the answer not in the manual?

Barco FLM series Specifications

General IconGeneral
BrandBarco
ModelFLM series
CategoryProjector
LanguageEnglish

Related product manuals