14. Lens holder
14.3 Adjusting the lens holder
What has to be done ?
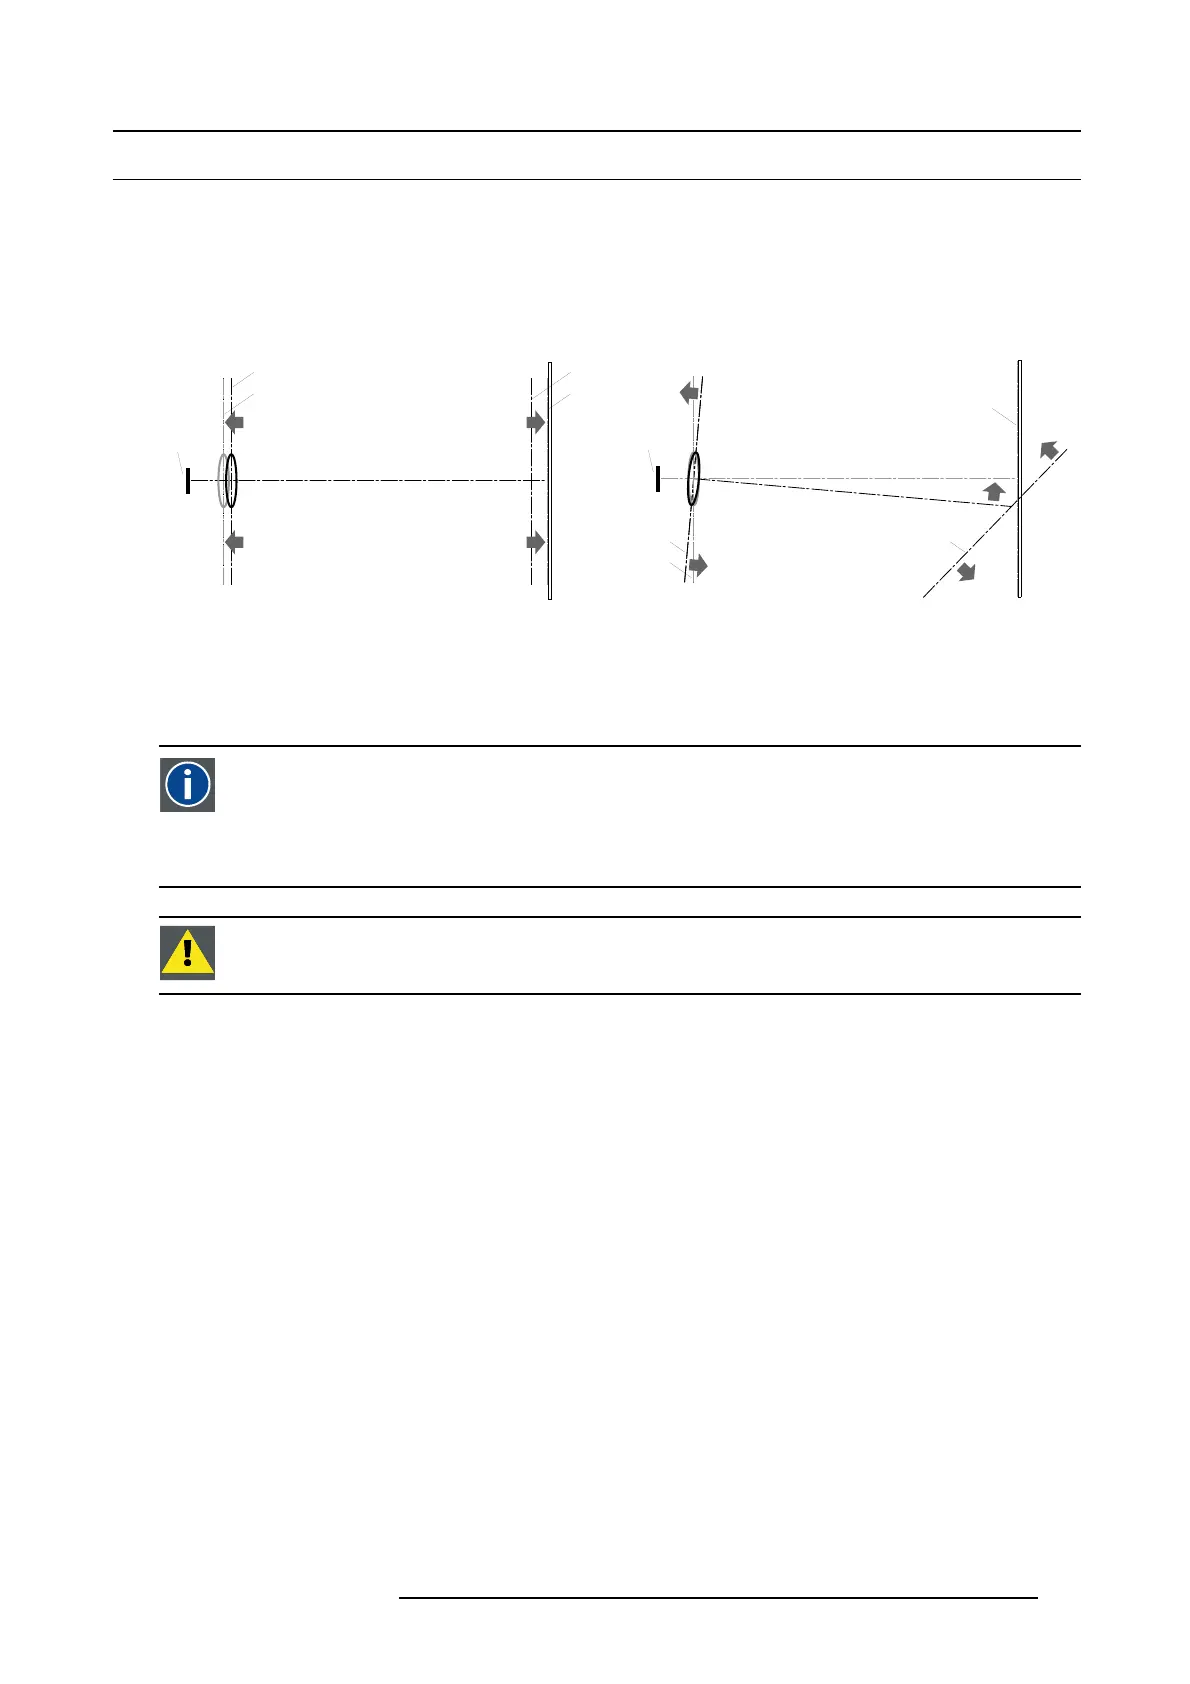
The lens holder has to be adjusted so that the “sharp focus plane” of the projected image falls together with the plane of the screen
(Fp1→Fp2). This is achieved by changing the distance between the DMD plane and the lens plane (Lp1→Lp2). The closer the lens
plane comes to the DMD plane the further the sharp focus plane will be. It can happen that you won’t be able to get a complete
focused image on the screen due to a tilt (or swing) of the lens plane with respect to the DMD plane. This is also know as Sheimpflug’s
law. To solve this the lens plane must be placed parallel with the DMD plane. This can be achieved by turning the lens holder to
remove the tilt (or swing) between lens plane and DMD plane (Lp3→Lp4).
SCREEN
DMD
Lp1
Lp2
Fp1
Fp2
SCREEN
DMD
Lp3
Lp4
Fp3
Fp4
(Scheimpflug)
Image 14-11
The lens holder has three adjustment mechanisms. The first mechanis
m allows to shift the lens back and forward, the second
mechanism allows to tilt the lens and the third mechanism allows to swing the lens. Note that all three adjustment mechanisms
stand in relation with each other. So, a change to one of them will also effect the adjustment result of the two others. Therefore,
all three adjustment points have to be alternately and repeate
dly adjusted until the projected image is completely focused on the
screen.
Scheimpflug principle
The "plane of sharp focus" can be changed so that any plane can be brought into sharp focus. When the DMD plane
and lens plane are parallel, the plane of sharp focus will also be parallel to these two planes. If, however, the lens
plane is tilted with respect to the DMD plane, the plane
of sharp focus will also be tilted according to geometrical and
optical properties. The DMD plane, the principal lens plane and the sharp focus plane will intersect in a line below the
projector for downward lens tilt.
CAUTION: The following procedure may only be executed in a clean and dust free area. Never remove the
projector covers in an area which is subject to airborne contaminations such as that produced by smoke
machines or similar.
Necessary tools
• Projection screen.
• Stable projector table.
• Measuring tape.
• TLD HB zoom lens 1.6 - 2.0 : 1 (R9842060).
•3mmAllenkey.
• 5,5 mm nut driver or flat screw driver.
• White paper sheet.
How to set up the projector for lens holder adjustment ?
1. Place the projector in a table mount on-Axis configuration with a projector screen distance (PD) of 1,5 meter. See owners manual
of the projector for detailed installation procedures.
Tip: To place the lens holder in the On-Axis positio
n select: Alignment > Lens > Mid position.
R59770072 FLM SERIES 19/03/2007
135

 Loading...


