11. Integration rod
11.3 Installing a new integration rod assembly
Necessary tools
• Compressed air.
•2mmAllenkey.
•2,5mmAllenkey.
Necessary parts
Integration rod assembly.
How to install a new the integration rod assembly ?
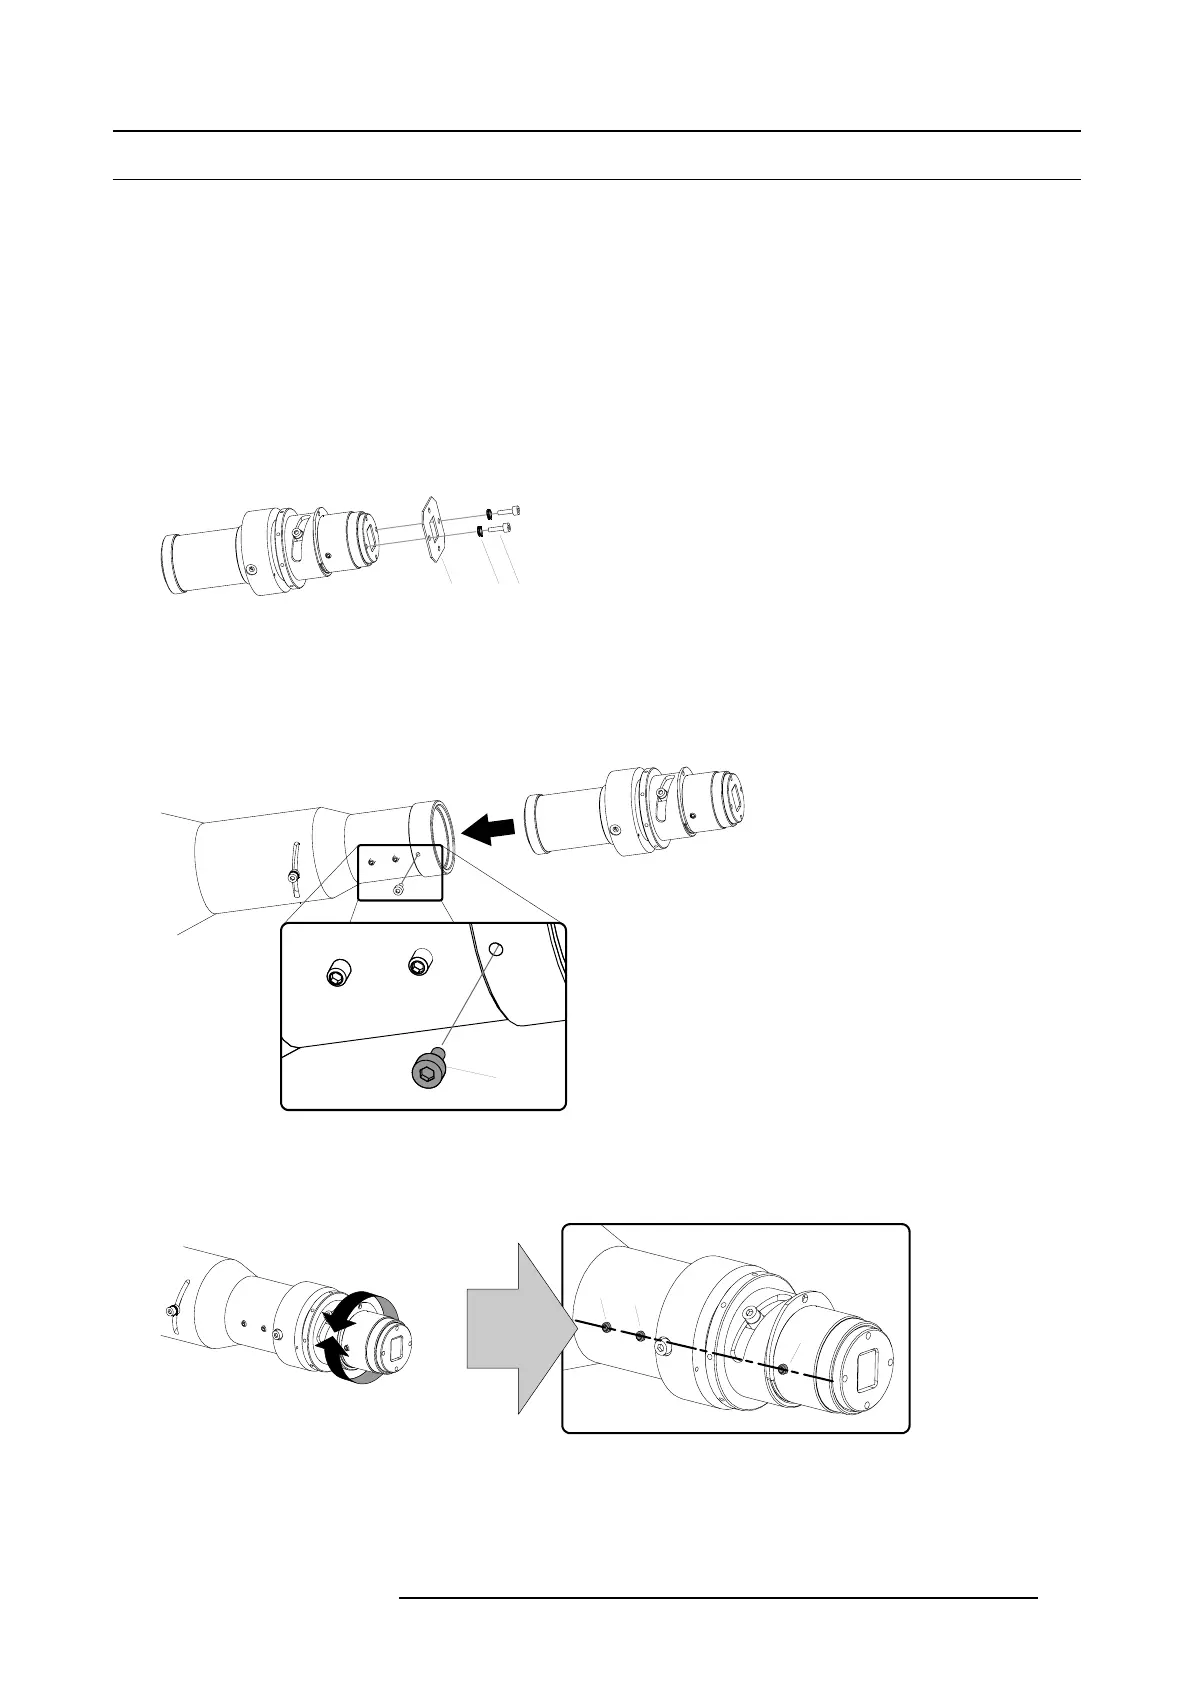
1. Removing the mask (M) from the integration rod by releasing the socket screws (S). Use a 2,5 mm Allen key.
Caution: Never touch the entrance or exit side of the integration rod assembly.
Note: The mask (M), the washers (W) and the socket screws (S) have to be reinstalled later in this procedure.
M W S
Image 11-7
2. Check if there are no dust particles present on the exit side of the integration rod assembly. If necessary remove the dust with
compressed air.
Note: The exit side of the rod is much more critical than the entrance side of the rod.
3. Check if the inner side of the light pipe entrance is dust free. If necessary remove the dust wi
th compressed air.
4. Gently slide the integration rod into the light pipe as illustrated.
B
Image 11-8
5. Secure the integration rod with a hexagon socket head screw (B). Use a 2,5 mm Allen key.
6. Rotate the integration rod until the set screws (A) of the light pipe are aligned with the set screw (B) of the integration rod assembly
as illustrated.
B
A
A
Image 11-9
7. Fasten the set screws (A). Use a 2 mm Allen key.
R59770072 FLM SERIES 19/03/2007
113

 Loading...


