14. Lens holder
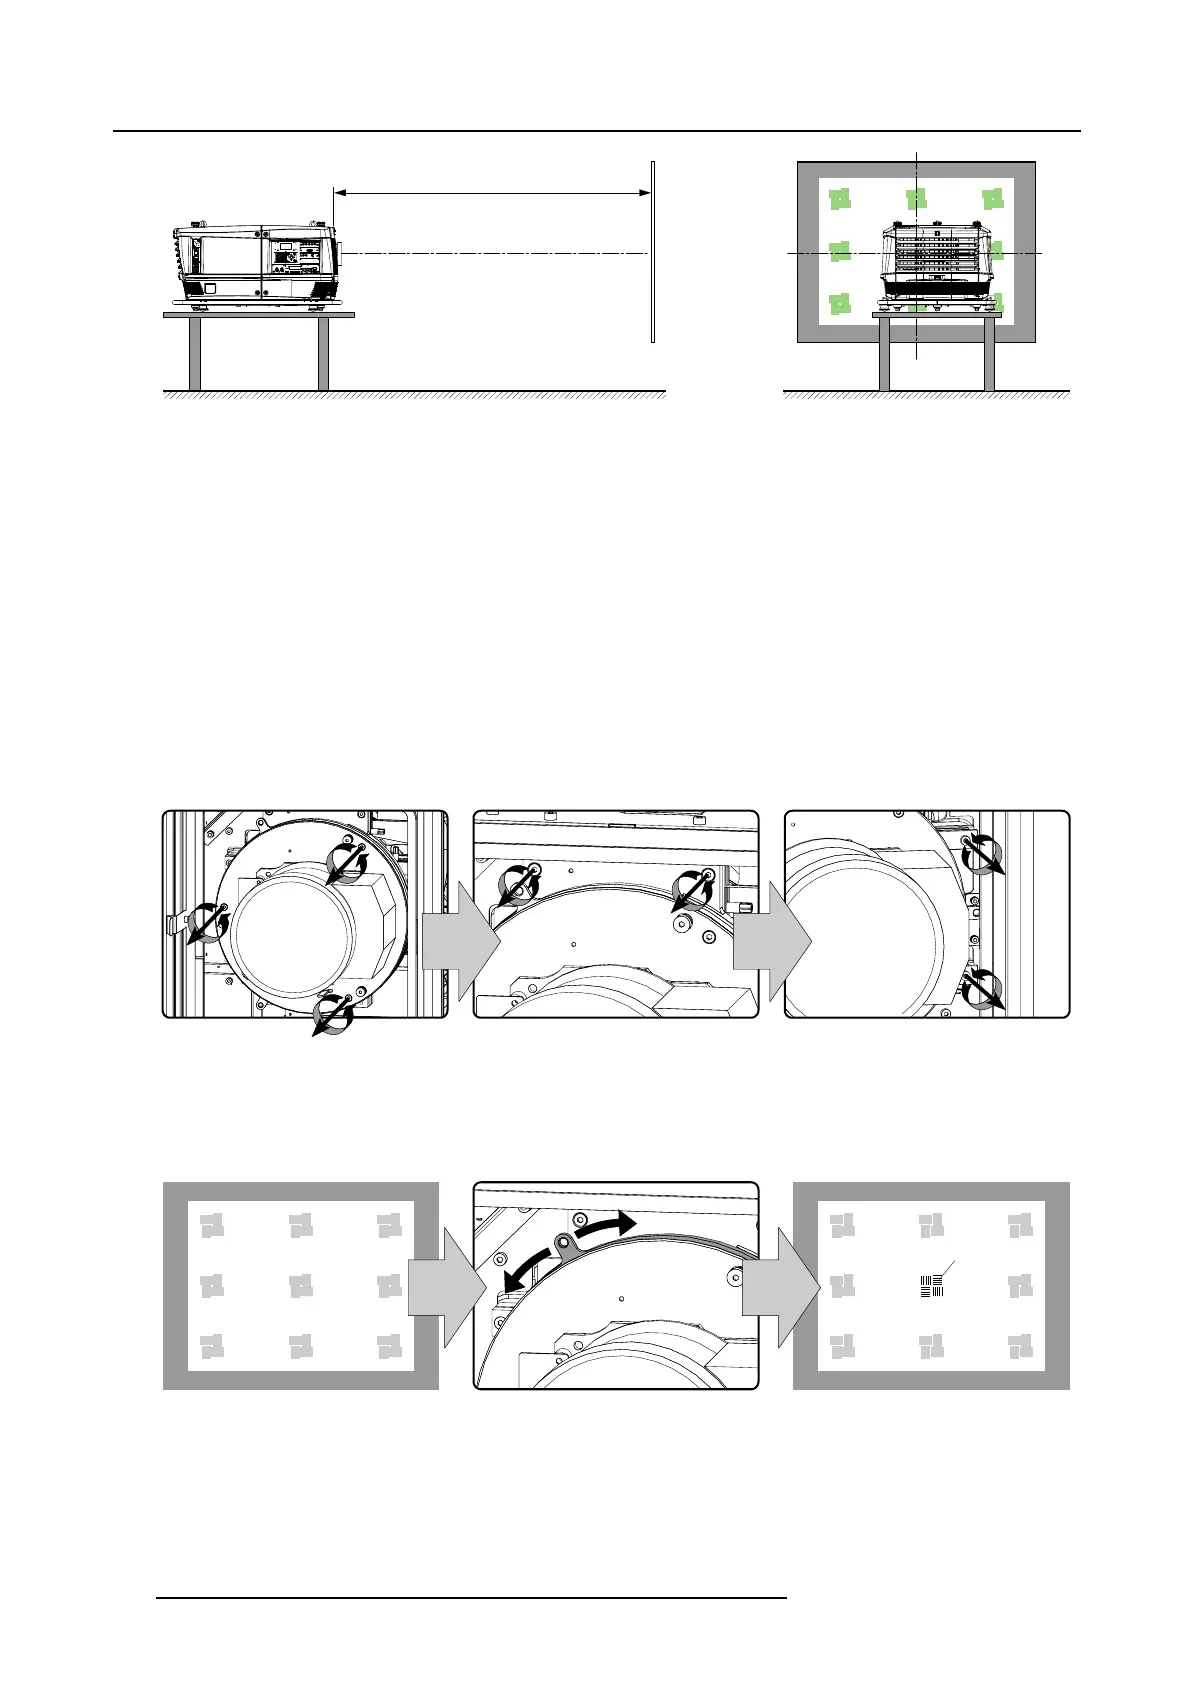
SCREEN
PD = 1,5 m
SCREEN
Image 14-12
2. Remove the front cover, side cover and top cover of the projector. See owners manual of the projector for detailed cover removal
procedures.
3. Install a TLD HB zoom lens 1.6 - 2.0 : 1. See owners manual for detailed lens installation instructions.
Note: The TLD HB zoom lens 1.6 - 2.0 : 1 is the most suitable lens (in a rental environment) for adjusting the lens holder of the
projector because of its lightweight. The three retaining springs of the lens holder plate ar
e not strong enough to keep
the TLD fixed focal lenses into position while adjusting the lens holder and a long throw lens makes it more difficult to
see the effect of the adjustments.
4. Switch on the projector and project the internal green focus pattern.
5. Set up the lens for minimum zoom (largest projected image) and minimum focus (f
ocus plane as close as possible to the projec-
tor). Keep pressing the focus minus key until the message “focus end of range” appears on the LCD panel.
How to adjust the lens holder
1. Loosen (not remove) the following lock screws of the lens holder adjustment mechanism usinga3mmAllenkey:
a) The three screws of the lens holder front plate.
b) The two screws of the lens holder tilt mechanism.
c) The two screws of the lens holder swing mechanism.
Image 14-13
2. Rotate the focus shift plate of the lens holder until the centre (F) of the projected pattern is most sharp on the screen.
Tip: Use a white paper to search for the “sharp focus plane”. The sharp focus plane is located behind the screen in case you
can’t focus the projected pattern on the paper somewhere between the screen and the lens. Knowing that will help you
to determine in which direction you have to rotate the focus shift plate. Rotate the plate counterclockwise in case you
can’t find the sharp focus plane somewhere between screen and lens.
F
Image 14-14
3. Adjust the screw (bit by bit) of the lens holder swing mechanism until the mid left and mid right of the projected pattern is most
sharp on the screen. Use a 5,5 mm nut driver or a flat screw driver.
Tip: Use a white paper to search for th
e “sharp focus plane” at the left or right side of the projected pattern. Turn the adjustment
screw a bit and check if the sharp focus plane has come closer to the screen. If not, turn the adjustment screw in the
opposite direction and check again.
Note: A simultaneous readjustment of the focus shift plate will be necessary to get the mid left and mid right of the projected
pattern equally focused as the centre.
136
R59770072 FLM SERIES 19/03/2007

 Loading...


