3.9 Turning the Power On and Off
52
Power On
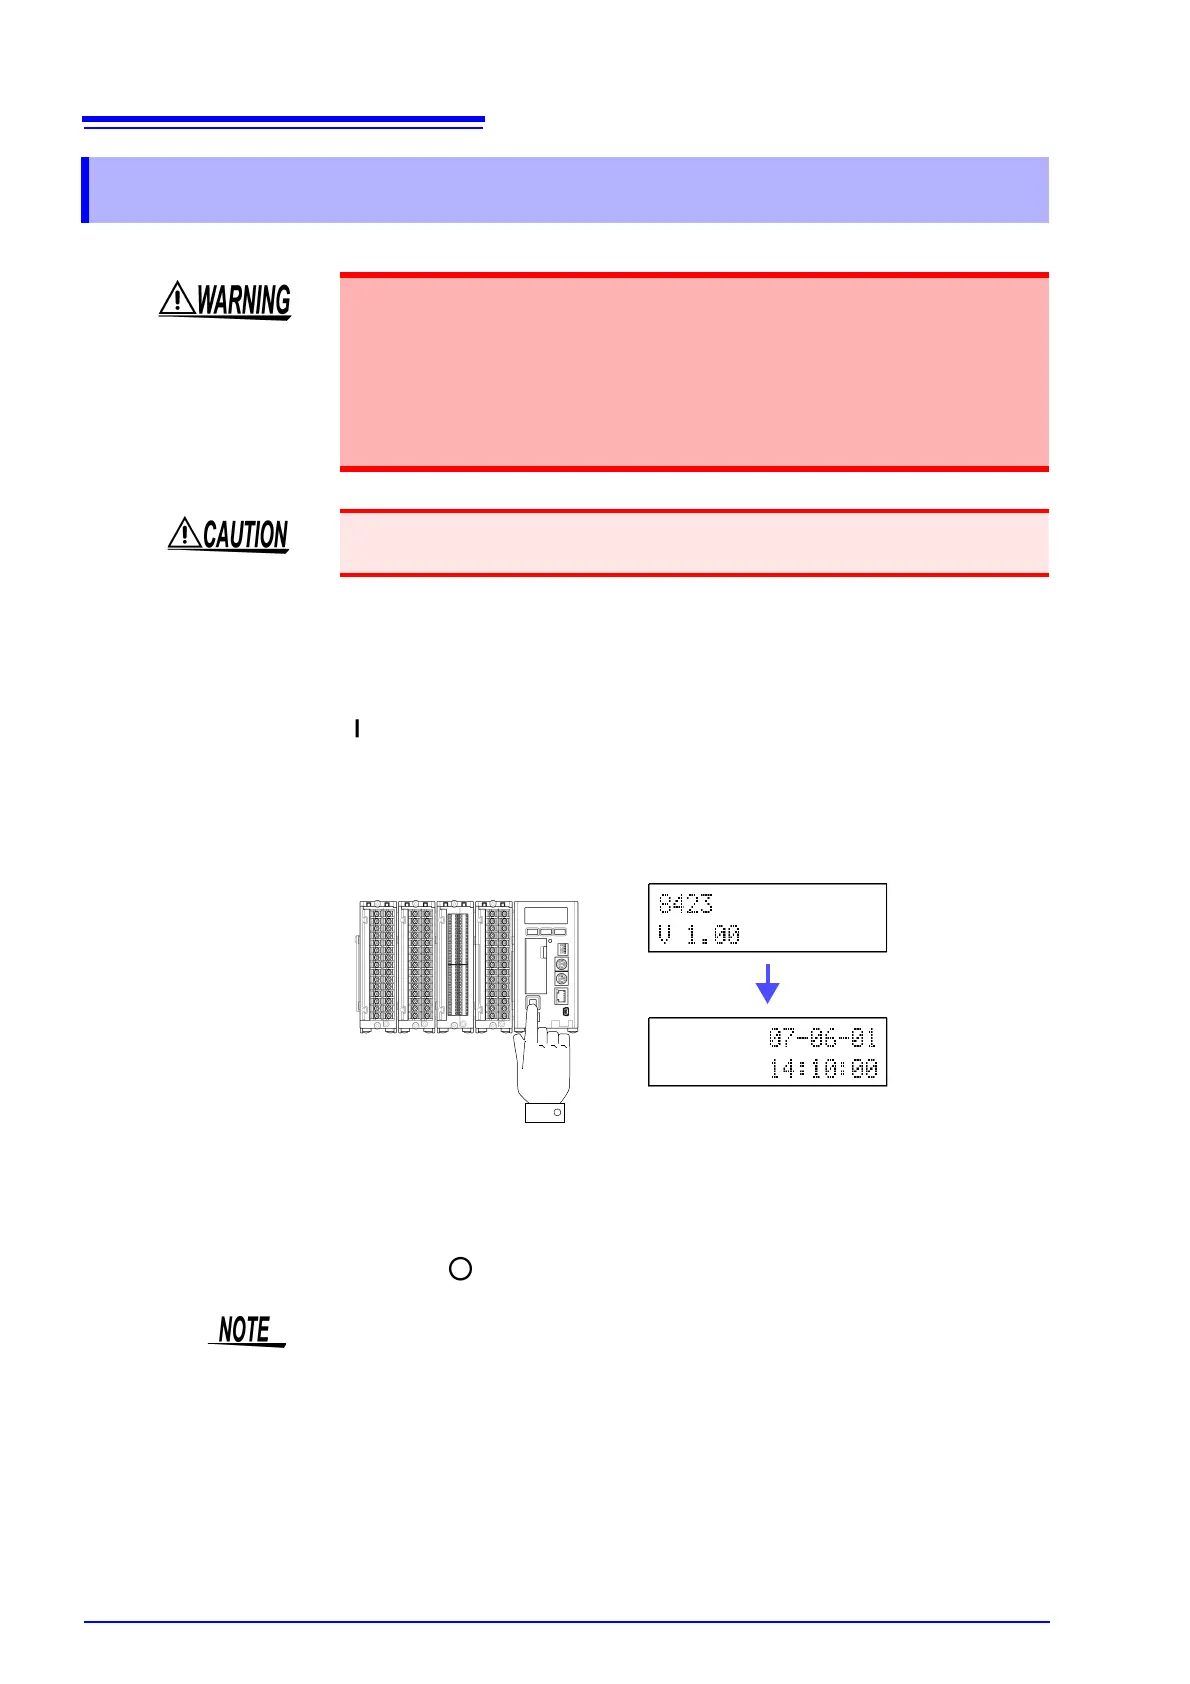
1. Press the power switch until you hear clicking sound to turn the power on
().
2. The instrument enters a startup state.
The model name and version appear on the screen, and then the instrument
enters the standby state (clock displayed).
Power Off
1. Fully press the power switch, and then remove your finger to turn the
power off ( ).
3.9 Turning the Power On and Off
To avoid an electric shock or short-circuit accident, confirm the following items
before turning on the power.
• When using the AC adapter, make sure the power supply is a rated supply
voltage (100 to 240 VAC) and rated supply frequency (50/60 Hz) of the instru-
ment. (Voltage fluctuations of ± 10% from the rated supply voltage are taken
into account.)
• Makes sure the instrument is installed properly. (p. 6)
To avoid damaging the instrument, make sure the input cables are connected
properly.
The settings are stored immediately after the power is turned off. The next time
you turn the power on, the settings will be in the same state as immediately
before the power was turned off. However, the measurement data will be
cleared.