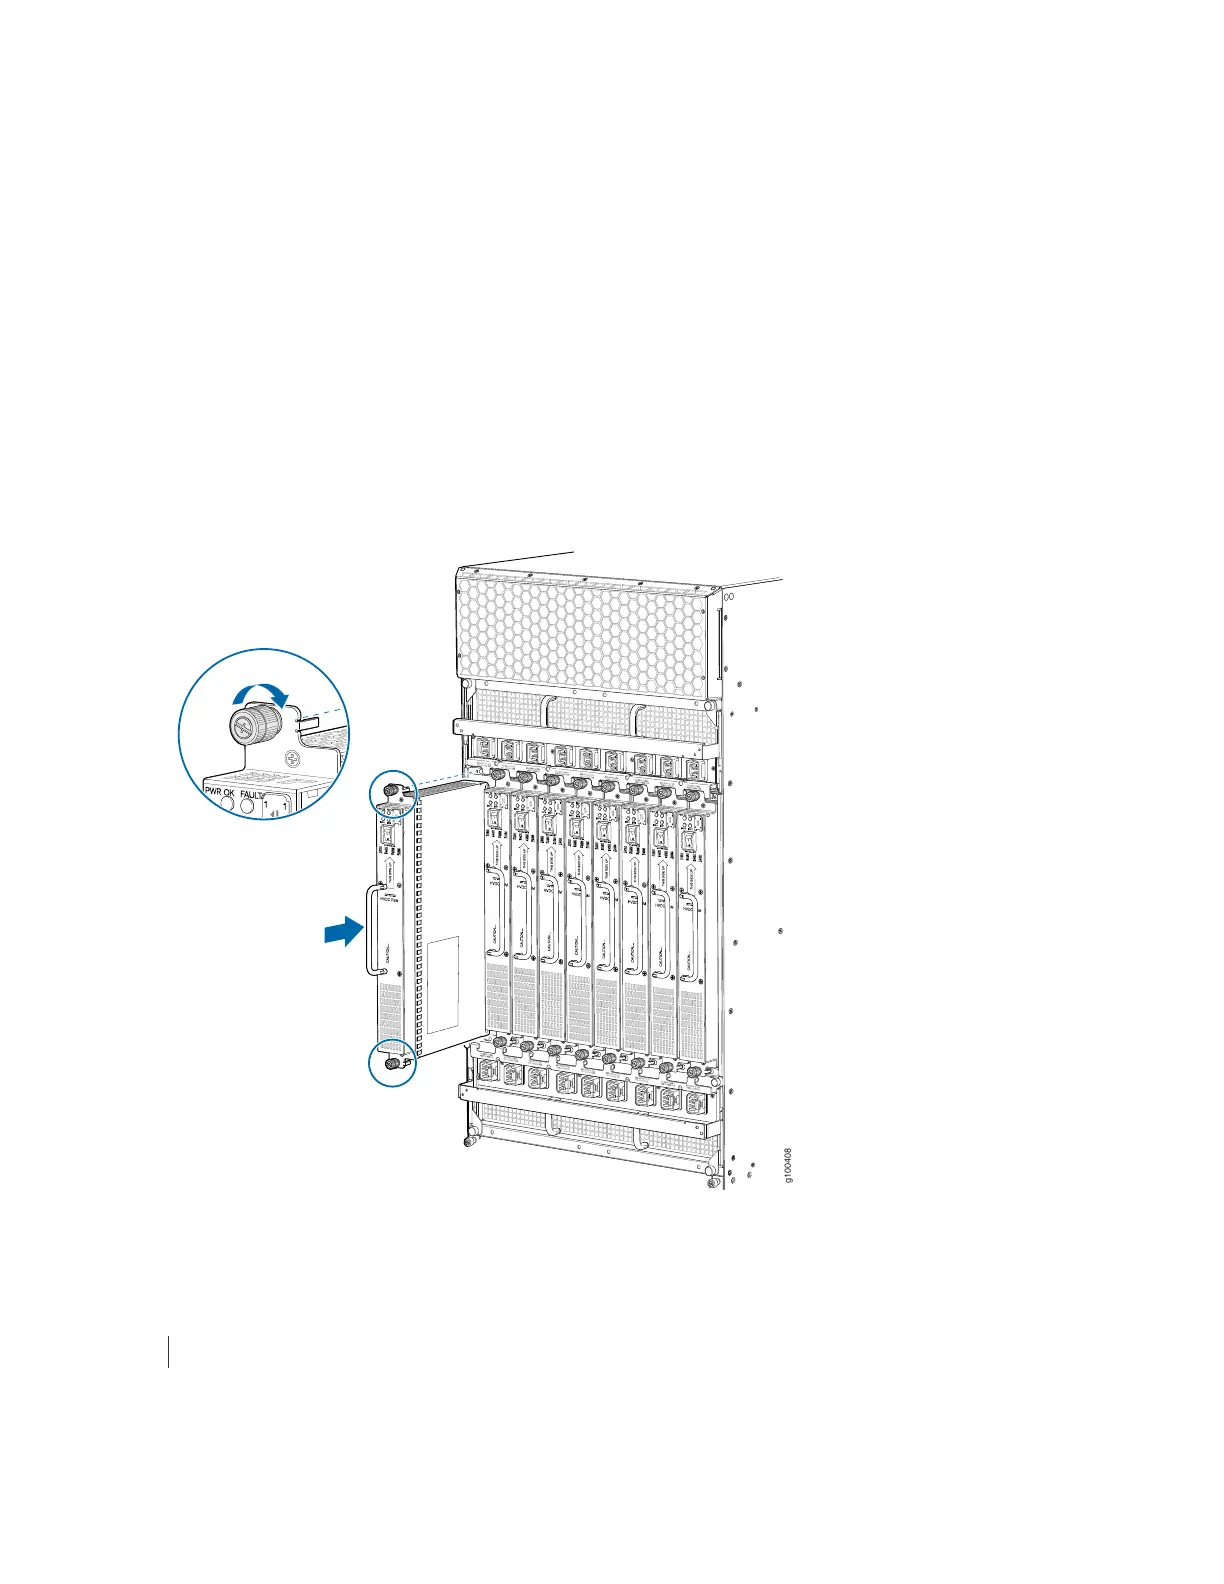
3. While grasping the handle on the PSM faceplate with one hand, use your other hand to guide the power
supply module into the chassis.
4. Tighten the captive screws on the PSM faceplate. Apply between 10 lb-in. (1.13 Nm) to 12 lb-in.
(1.35 Nm) of torque to each screw. Do not overtighten the screws.
5. Turn on the power switch to the on (|) position.
6. Verify that the PWR OK LED is lit steadily green.
Figure 201: Installing a DC Power Supply Module (240 V China)
SEE ALSO
MX2020DC Power Supply Module (-48 V) Description | 112
411