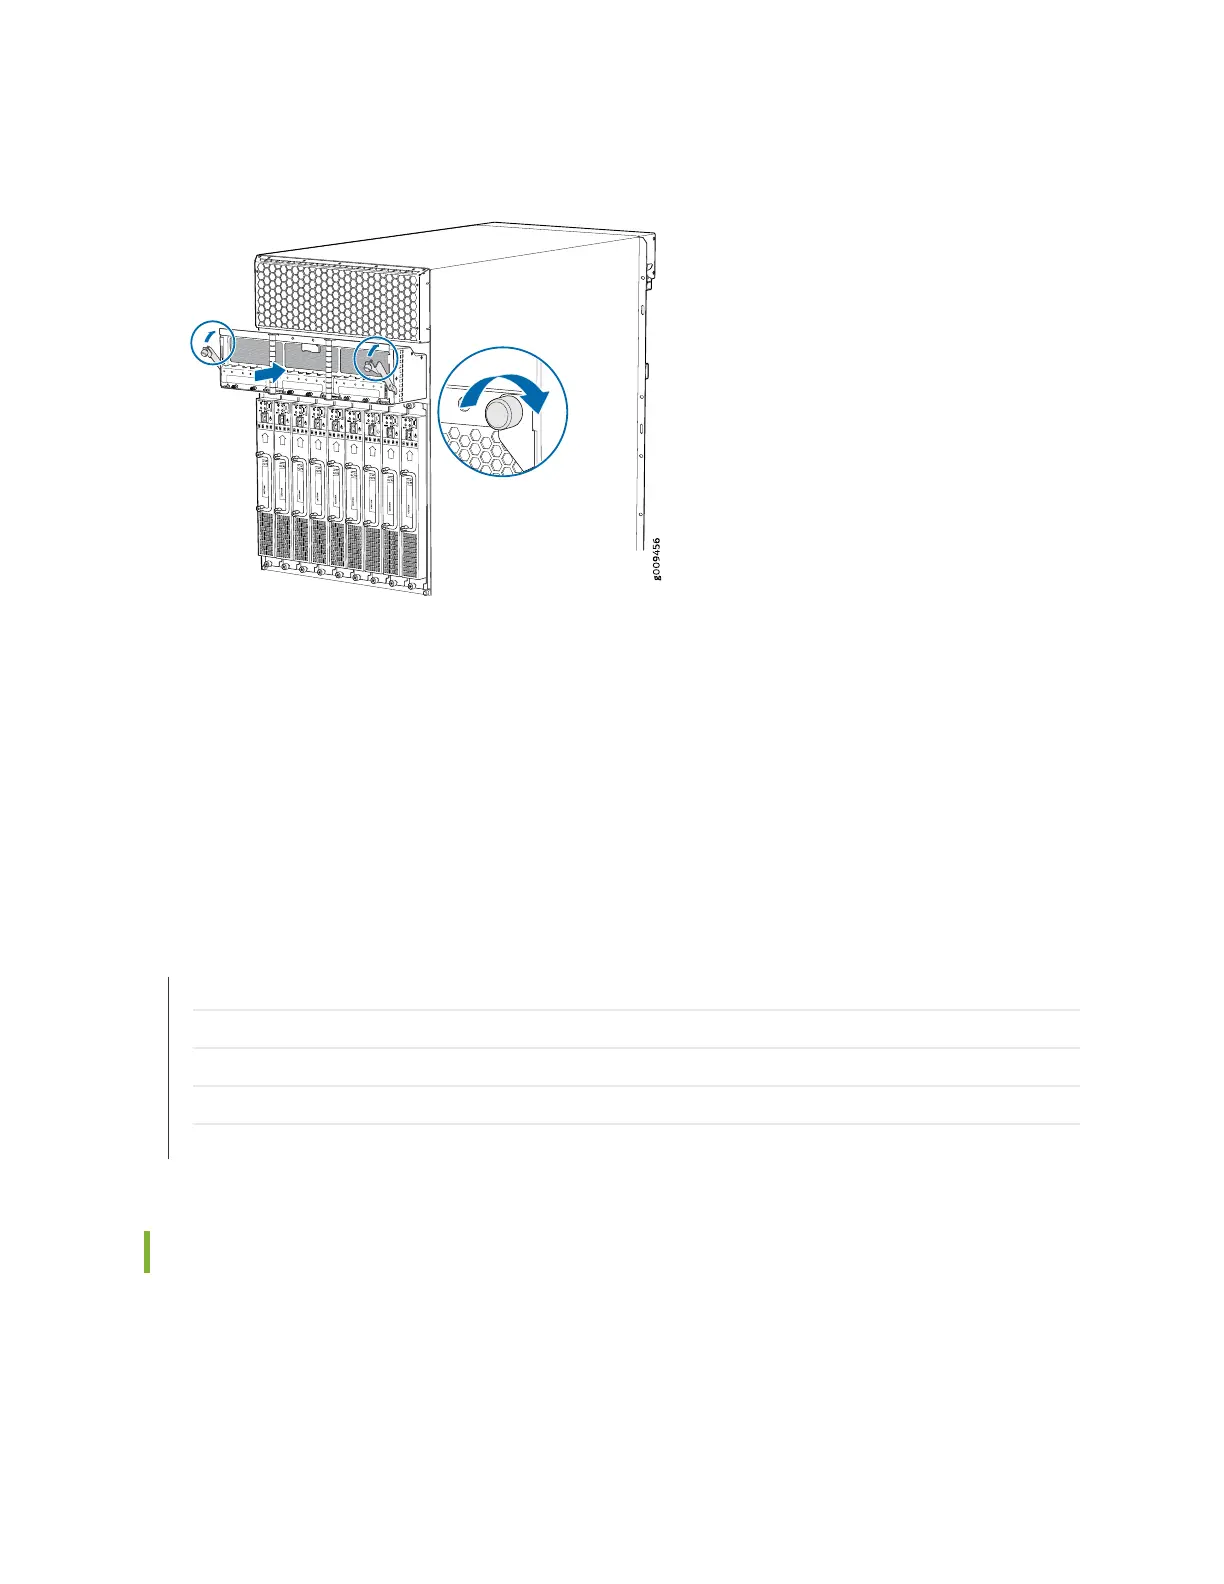
Figure 192: Installing an MX2008 Router Power Distribution Module
8. Tighten both captive screws on the PDM. Apply between 10 lb-in. (1.13 Nm) to 12 lb-in. (1.35 Nm) of
torque to each screw. Do not overtighten the screws.
9. Remove the clear plastic cover protecting the terminal studs on the PDM faceplate.
10. Remove the nut and washers from each of the terminal studs.
RELATED DOCUMENTATION
Powering Off the DC-Powered MX2000 Router | 660
MX2000 Router DC Power Subsystem Electrical Specifications | 205
Troubleshooting the MX2000 Router Power System | 686
Connecting an MX2000 DC Router Power Distribution Module (-48 V) Cable | 322
Preventing Electrostatic Discharge Damage to an MX Series Router
Replacing an MX2000 DC Power Distribution Module (240 V China)
1.
Removing an MX2000 Router DC Power Distribution Module (240 V China) | 397
2.
Installing an MX2000 Router DC Power Distribution Module (240 V China) | 400
396