4-10 Operation
4.6.5 Adjusting the Vacuum Control
The Vacuum Control (Figure 4-6) allows low viscosity fluids to be consistently dispensed without
dripping between cycles. The vacuum exerts a negative pressure (suckback) on the fluid, thereby
decreasing dripping.
To adjust the Vacuum Control:
1. Rotate the knob counterclockwise to increase vacuum pressure and decrease dripping.
2. Rotate the knob clockwise to decrease vacuum pressure.
4.6.6 Setting the Low Pressure Detection Threshold
This feature allows the user to set the air pressure level at which the software will issue an on-screen low
air pressure error message.
To set the low pressure threshold:
1. In the Fluidmove Main Window, select
Configuration > Setup Runtime Preferences >
Calibrate Low Air Pressure Detect
.
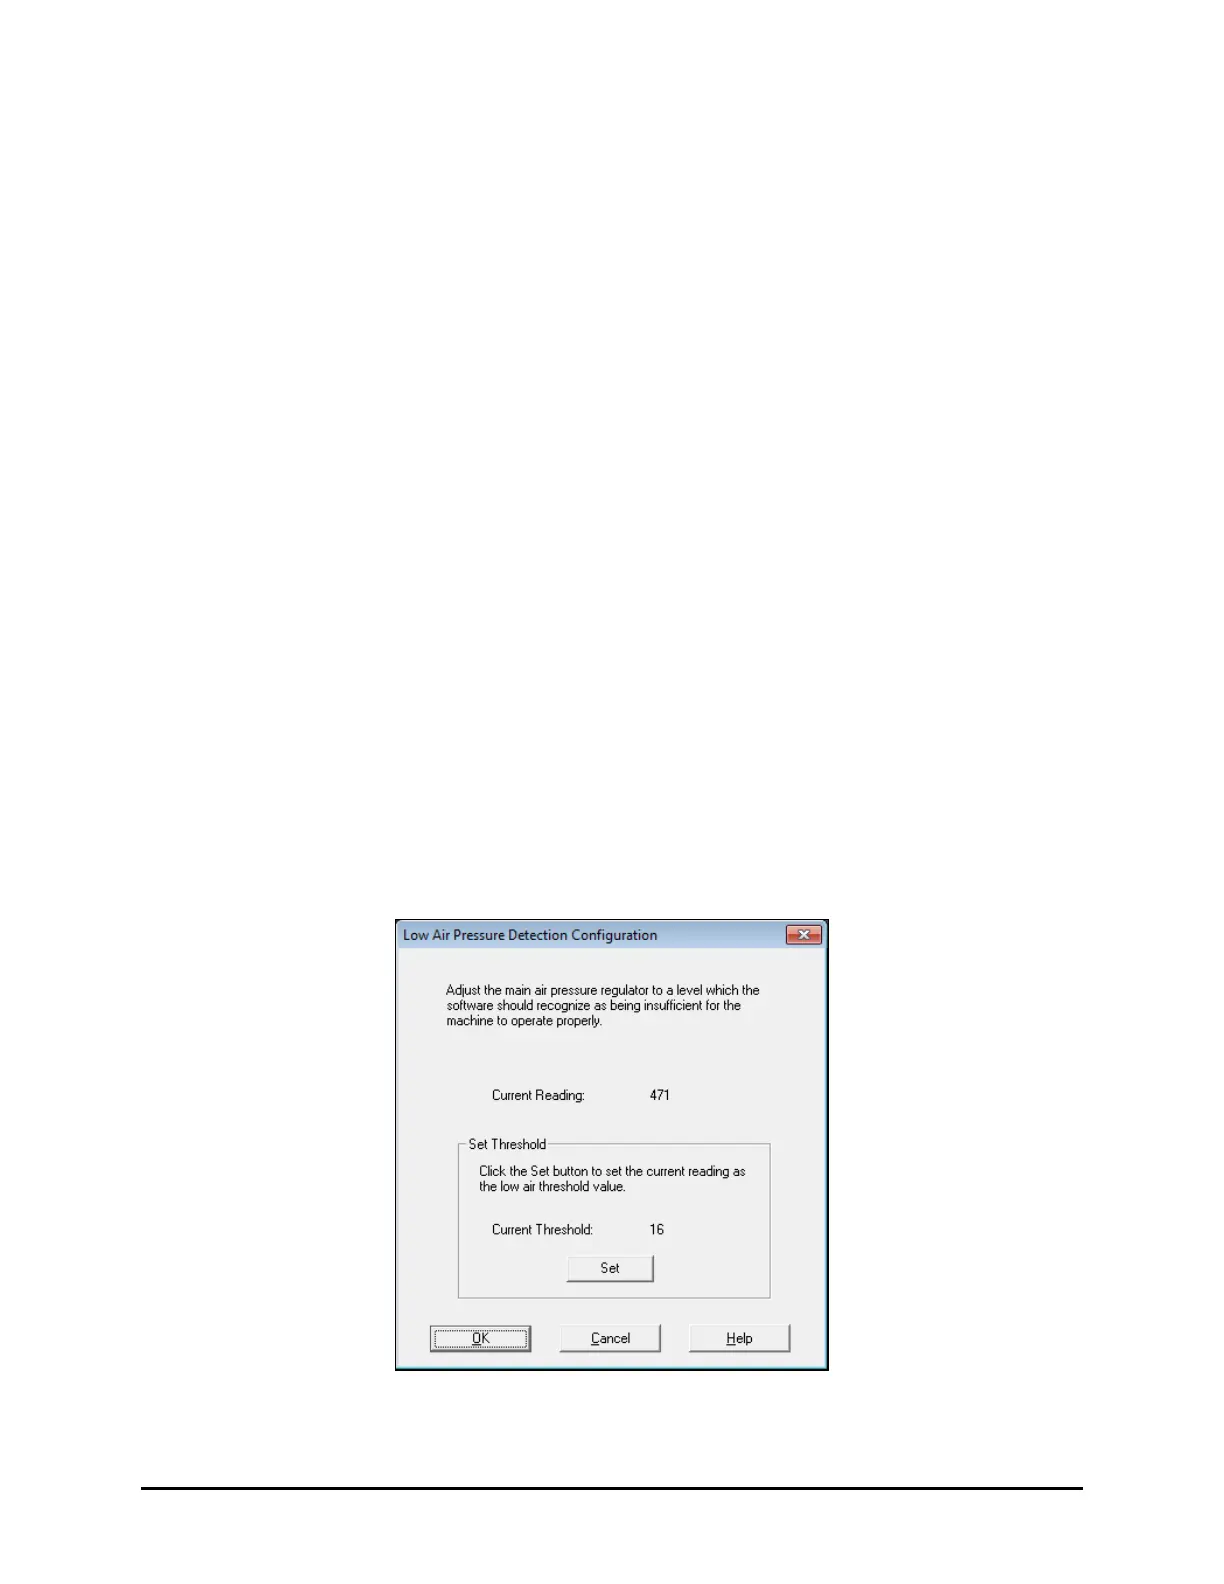
The Low Air Pressure Detection Configuration Window (Figure 4-10) opens.
2. Adjust the dispensing system’s Main Air Pressure Regulator to the pressure at which you
want the software to issue a low pressure error message.
This should be a value that would result in dispensing variations. The typical set value
is 65 psi, but this may vary depending upon the sensitivity of the application.
3. In the Low Air Pressure Detection Configuration window, click the
Set button to set the
current Main Air Pressure Regulator reading as the low air pressure threshold value.
4. Click on
OK.
5. Restore the air pressure to the normal setting.
Figure 4-10 Low Air Pressure Detection Window

 Loading...


