Installation 3-3
5. Remove the two 1/2-inch hex head screws clamping the four shipping brackets to the
levelers.
6. When the four shipping brackets have been removed, slide the forklift forks under the front
of the dispensing system between the levelers (feet). Use the forklift to gently lift the
dispensing system off of the crate.
You may use the shipping crate for future shipping purposes or dispose of according
to local regulations.
Save the shipping brackets. They can be used later for seismically securing the
dispensing system. See 3.11 Anchoring the Dispensing System.
CAUTION! Lift the dispensing system from the front only. Attempting to lift the dispensing
system from the back or sides may cause serious damage. Place forks between
the front feet, making sure that the blades reach from front to back.
WARNING! The dispensing system has a high center of gravity causing sensitivity to tipping.
Use extreme caution when lifting and moving the dispensing system.
7. Move the dispensing system over the location where it will be installed.
8.
Slowly lower the forklift until the dispensing system conveyor rail is at the approximate
height of the mating upstream and downstream equipment.
9.
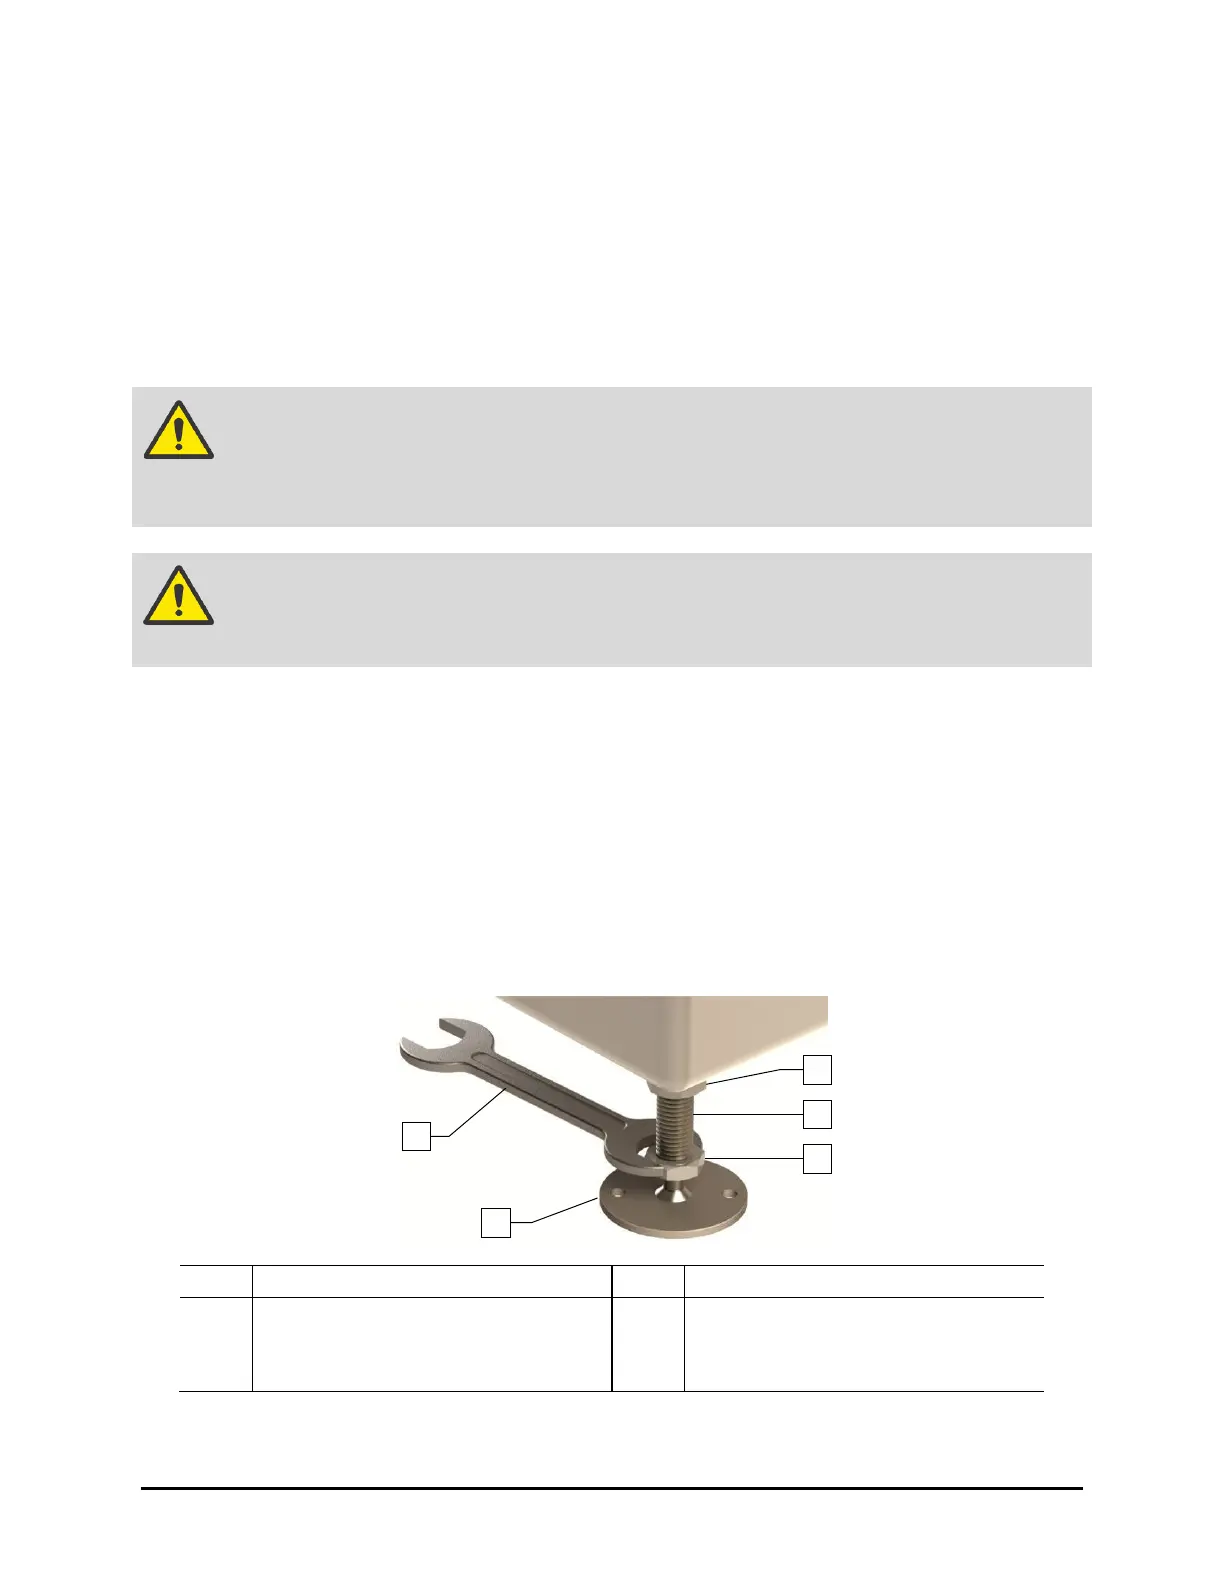
Raise or lower each leveler (foot) as follows until they all touch the floor:
a. Loosen the 1½-inch lock nut on the leveler (Figure 3-2).
b. Adjust the 1½-inch post nut to raise or lower each leveler as required.
Turning the post nut clockwise raises the leveler. Turning the post nut
counterclockwise lowers the leveler.
c. Tighten the lock nut finger tight.
1 Lock Nut 4 Leveler (foot)
2 Post 5 1 1/2-inch Wrench
3 Post Nut
Figure 3-2 Adjusting the Levelers

 Loading...


