4-16 Operation
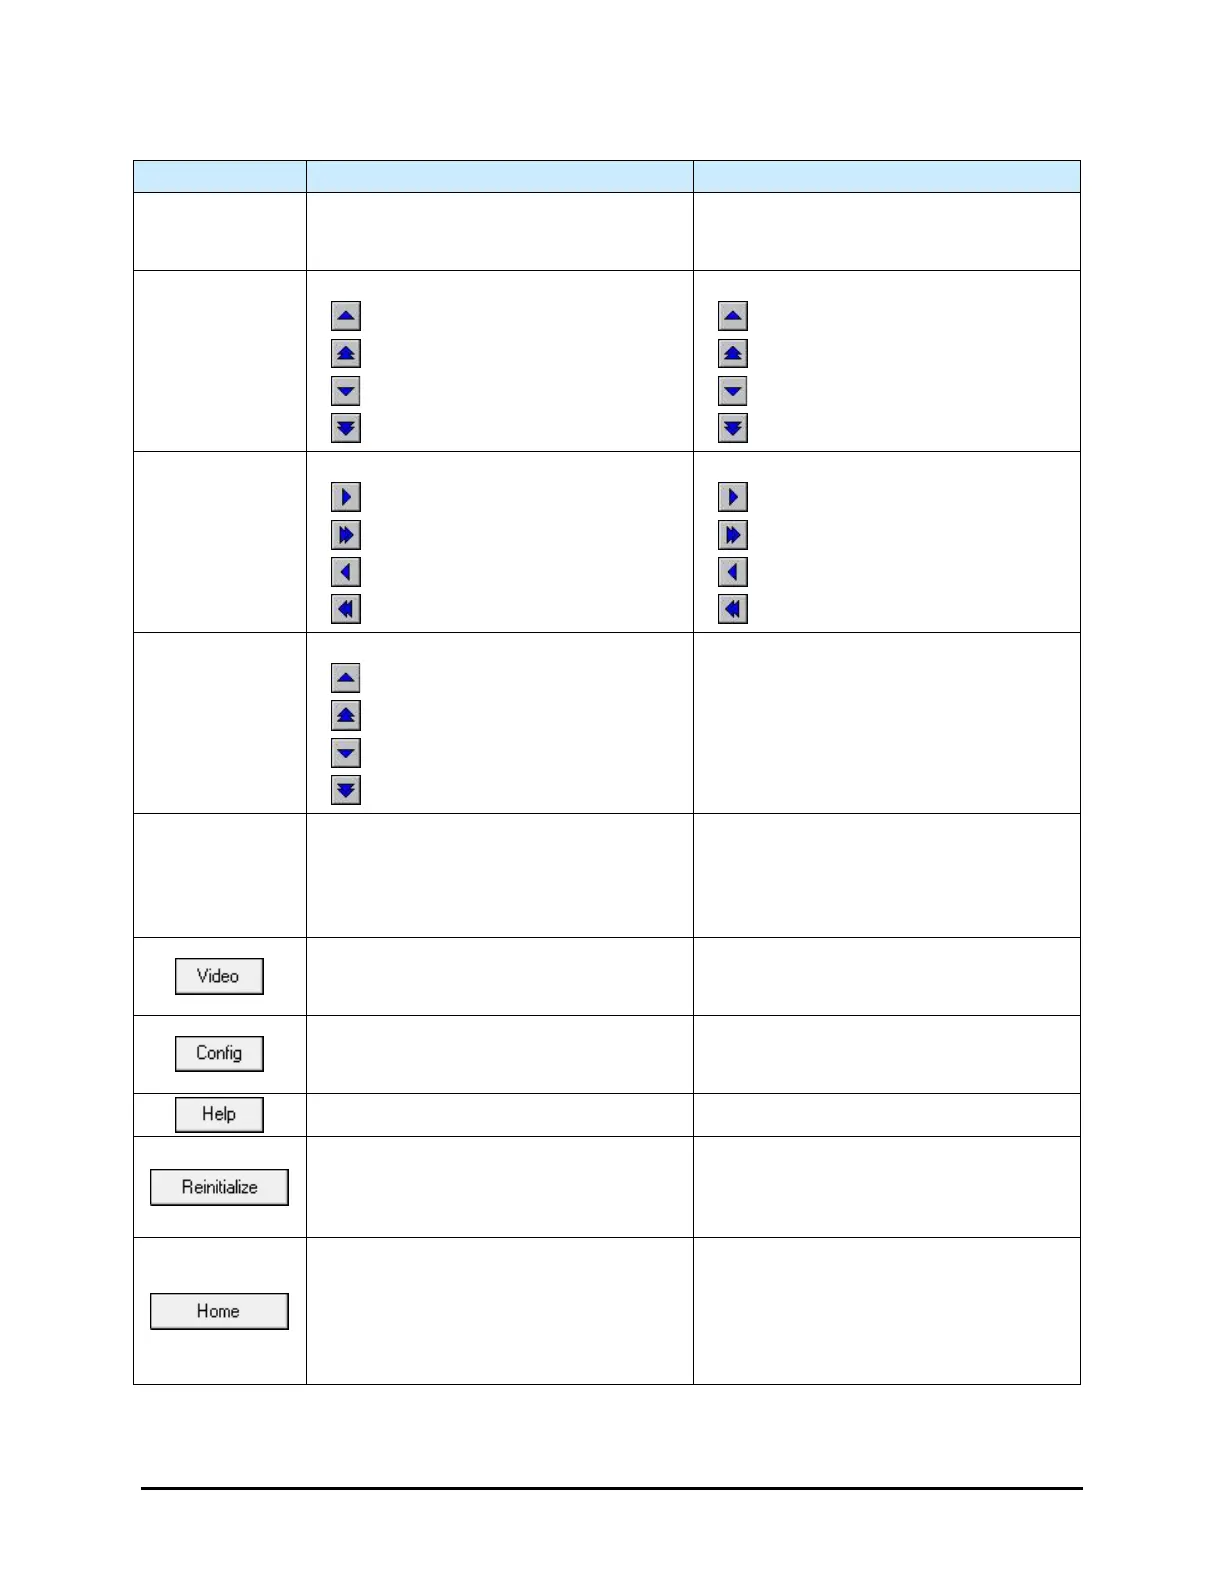
Table 4-3 Jog Control Commands
Target Box
Clicking in the Target Box moves the
dispensing head to the corresponding
position in the dispensing area.
N/A
Y-Axis Controls
(move front/back)
Moves the Dispensing Head as follows:
Slow Backward (small increments)
Fast Backward (large increments)
Slow Forward (small increments)
Fast Forward (large increments)
Moves the rear Conveyor Rail as follows:
Slow Backward (small increments)
Fast Backward (large increments)
Slow Forward (small increments)
Fast Forward (large increments)
X-Axis Controls
(move left/right)
Moves the Dispensing Head as follows:
Slow Right (small increments)
Fast Right (large increments)
Slow Left (small increments)
Fast Left (large increments)
Moves the Conveyor Belt as follows:
Slow Right (small increments)
Fast Right (large increments)
Slow Left (small increments)
Fast Left (large increments)
Z-Axis Controls
(move up/down)
Moves the Dispensing Head as follows:
Slow Upward (small increments)
Fast Upward (large increments)
Slow Downward (small increments)
Fast Downward (large increments)
N/A
Device
Radio Buttons
Click the Dispenser radio button to
activate jog controls for the Dispensing
Head.
Click the Conveyor 1 radio button to
activate jog controls for the conveyor. On
dual conveyor systems, click Conveyor 2
to activate the jog controls for the second
conveyor.
Click to open a Video Display where you
can see a close-up of the Dispensing
Area.
Click to Video open a Video Display in
which you can see a close-up of the
dispensing area.
Click to open a window where you can
configure Dispensing Head jog distance
and speed.
Click to open a window where you can
configure conveyor jog distance and
speed.
Click to access Fluidmove Online Help. Click to access Fluidmove Online Help.
Click to reinitialize the dispenser. Use
this button if you are experiencing
communication problems with the
Dispensing Head.
Click to reinitialize the conveyor. Use this
button if you are experiencing
communication problems with the
conveyor.
Clicking on Home sends the Dispensing
Head to its “Home” position. The home
position is the extreme left front corner of
the dispensing area, where the
Dispensing Head X, Y, Z-axes
coordinates are set to (0, 0, 0).
Clicking on Home sends the conveyor
rear rail to its “Home” position. The home
position is the extreme rear of the
dispensing area.

 Loading...


