Parts Replacement 8-7
8.11 Replacing the Camera Lens
WARNING! Except for lens replacement and lighting adjustments, all other configuration and
adjustments should only be performed by a trained service technician.
Tools and Materials Needed:
• 3 mm hex key
To remove and replace the camera lens:
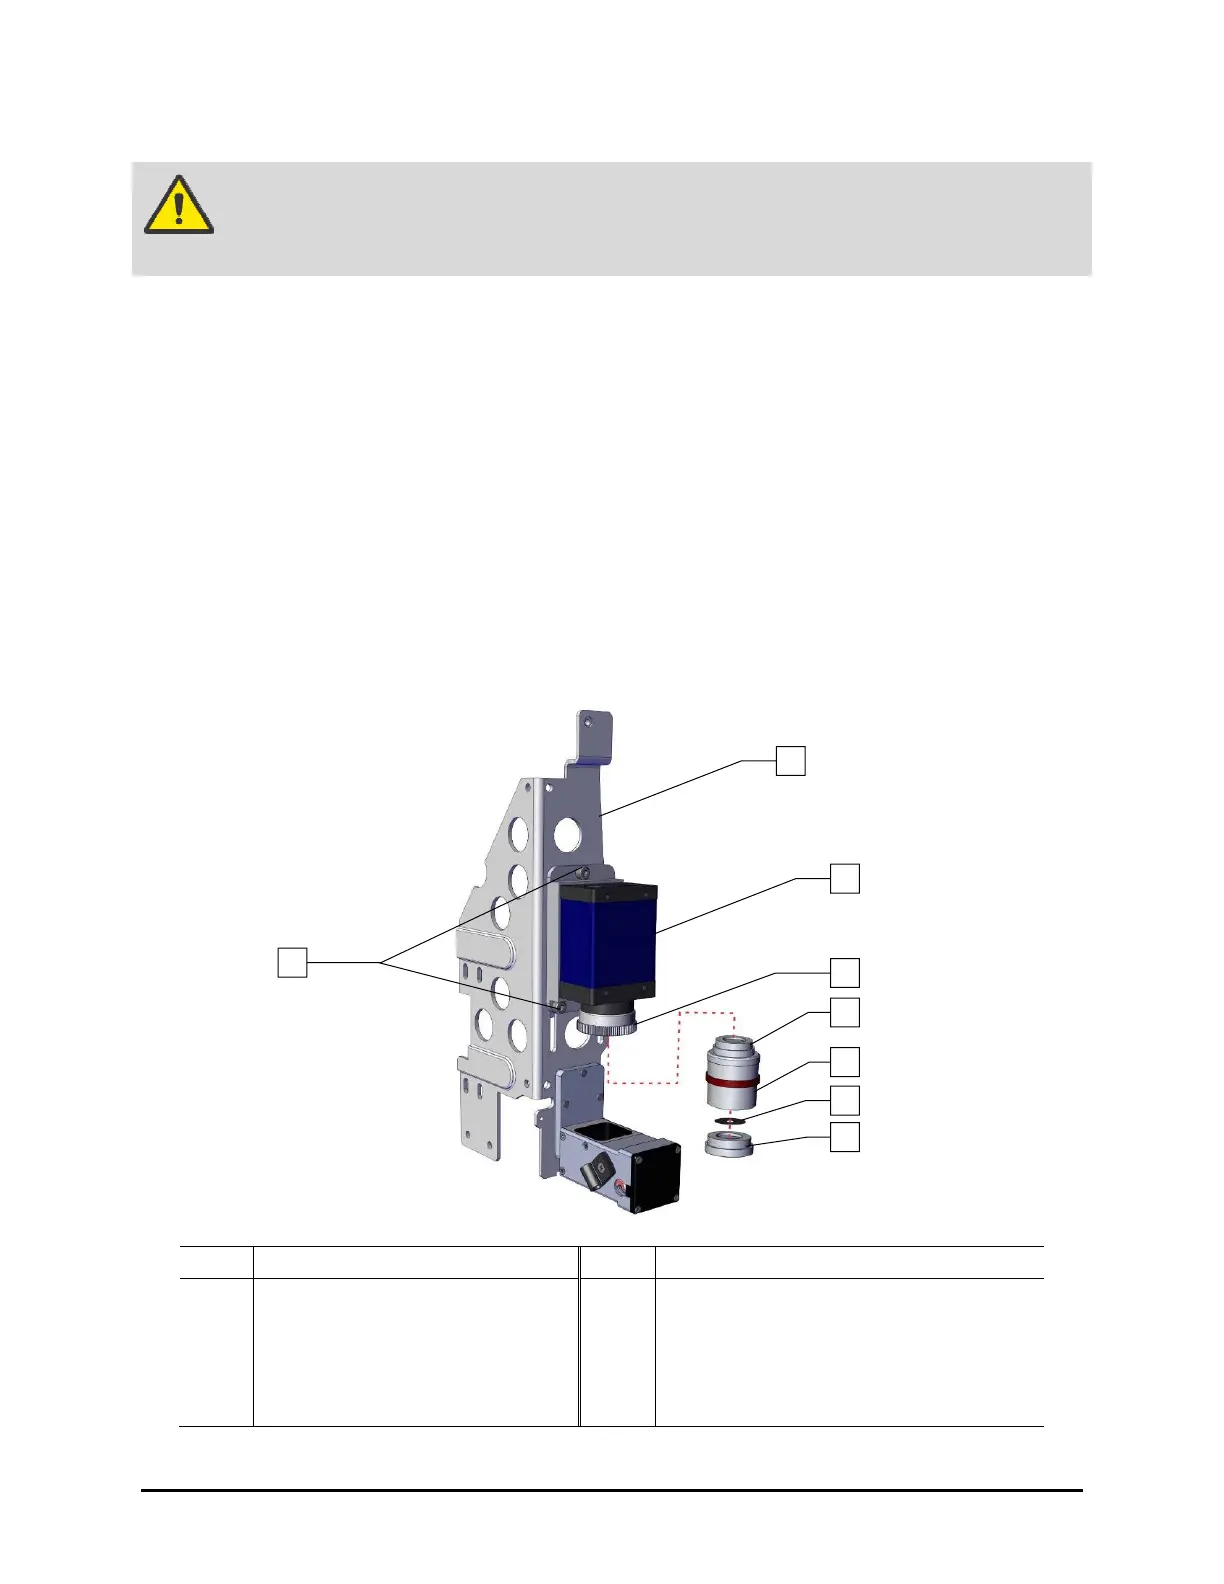
1. Loosen but do not remove the three (3) screws securing the camera to the bracket
(Figure 8-3).
2. Slide the camera assembly to the top of the bracket (Figure 8-3).
3. Secure the camera to the bracket by tightening three (3) screws.
4. Remove the lower, middle, and upper section as an assembly from the 2x optical lens by
turning counterclockwise (Figure 8-3).
NOTE Do not remove the 2x optical lens.
Item Description Item Description
1 Bracket 5 Upper Section
2
Screw (Third screw is located
opposite of lower left screw)
6 Middle Section
3 Camera 7 Aperture Disk
4 2x Optical Lens 8 Lower Section
Figure 8-3 Lens Assembly
ox
2
1
3
4
7
6
5
8

 Loading...


