Section 26: XLII SLIDE-OUT
PA1553
29
Top panel
Bottom panel
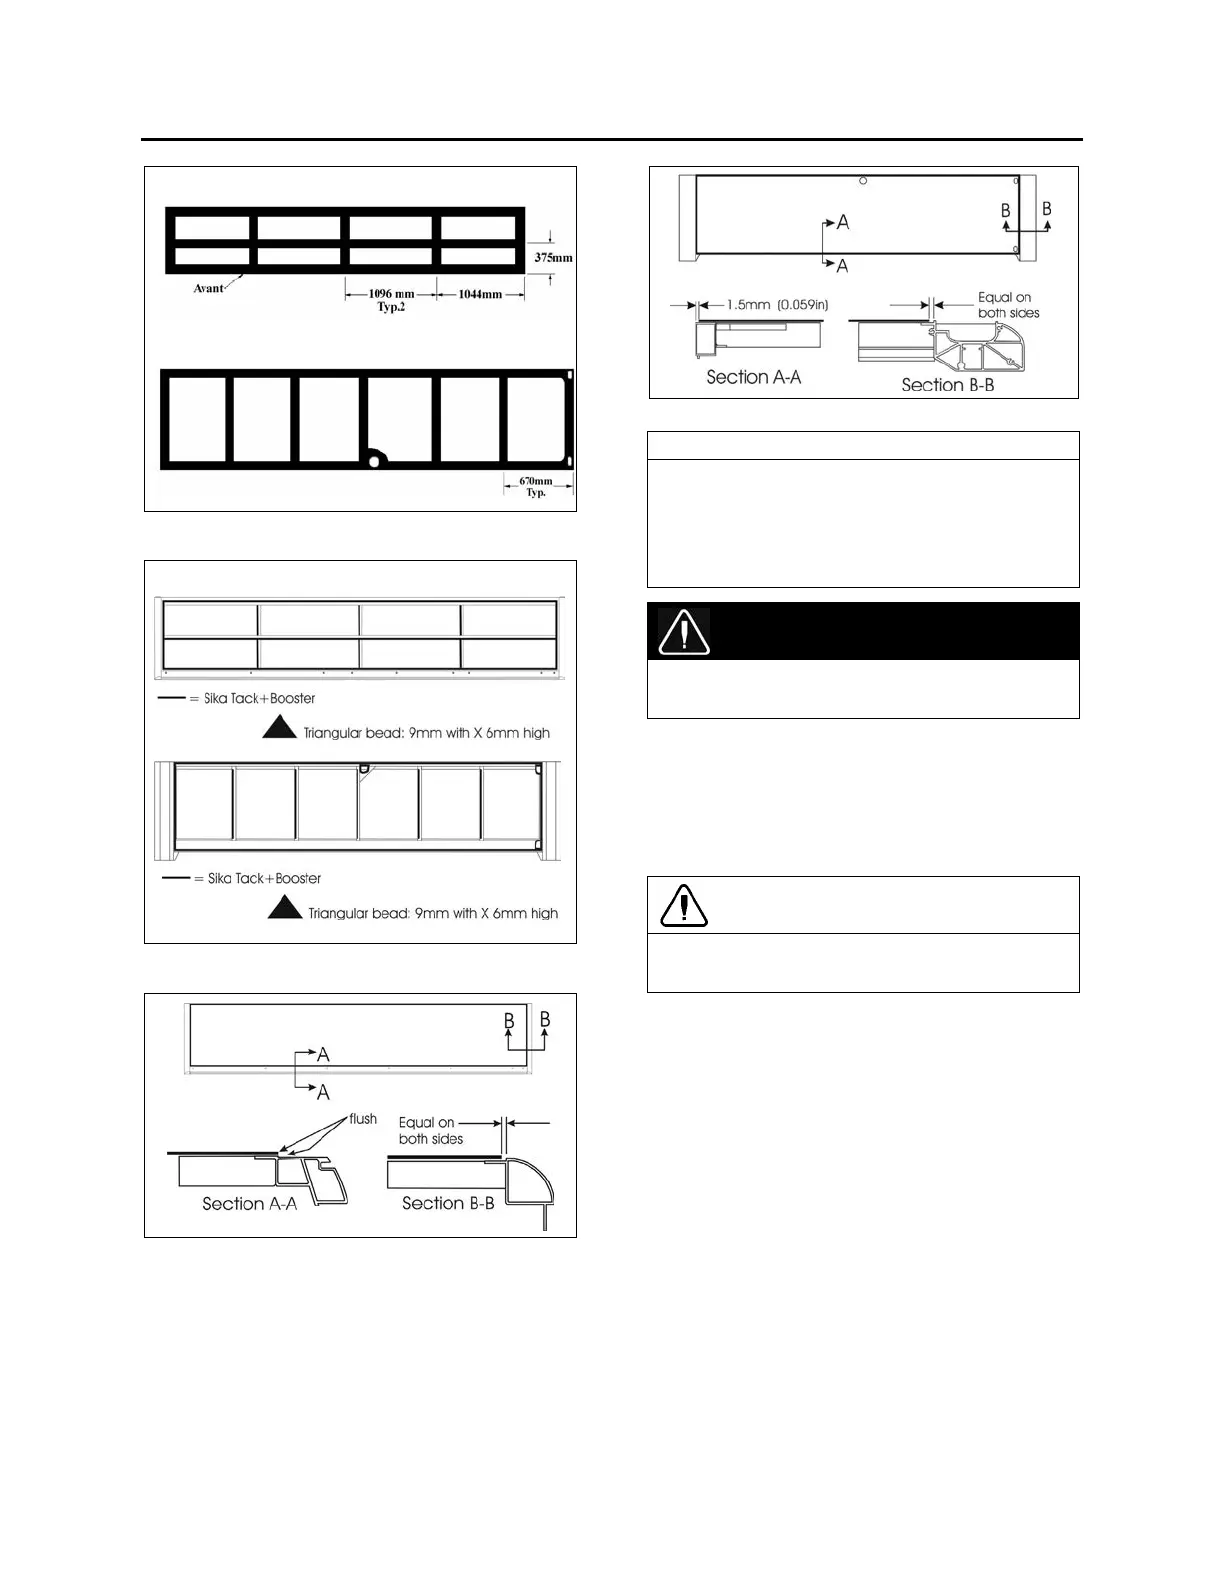
FIGURE 46 TOP AND BOTTOM PANEL INSTALLATION -
SIKA 206 G+P APPLICATION
Top structure
Bottom structure
FIGURE 47 : TOP AND BOTTOM PANEL INSTALLATION -
SIKA TACK+BOOSTER APPLICATION
FIGURE 48 : TOP PANEL INSTALLATION
FIGURE 49 : BOTTOM PANEL INSTALLATION
NOTE
The removal and installation procedures are
based on standard service methods described
in section 18: BODY. Refer to these
procedures for tools and adhesives
specifications.
DANGER
Always wear safety equipment when working
with glass and chemical adhesives.
16.7 WINDOWS REMOVAL
1. Remove the slide-out.
2. If needed, remove the exterior extrusion as
described in section 1.3.
CAUTION
Be careful not to damage the adjacent
surfaces.
3. With a knife or a wire, cut the sealant and
the adhesive between the windows and the
structure. Make sure not to damage the
rubber seal between the windows.
4. With a helper, remove the window from the
slide-out.
16.8 FIXED WINDOWS
INSTALLATION
Refer to procedures described in section 18:
BODY of the maintenance manual for details.
1. Clean and prepare the windows and the
slide-out structure surfaces with appropriate
cleaner, abrasives and primers.
2. If necessary, install the rubber seals as per
FIGURE 50 & FIGURE 51 . Press the seal
against the structure with a roller.

 Loading...