Section 18: BODY
PA1553
24
o When filler insertion is almost complete,
cut filler leaving ¼” of excess length to
thwart filler contraction over time then
insert filler into groove.
FIGURE 16: APPLICATION 0F SIKA 221 BLACK
o Reinstall center post and interior finishing
panels.
o Clean windshield surface of butyl residue.
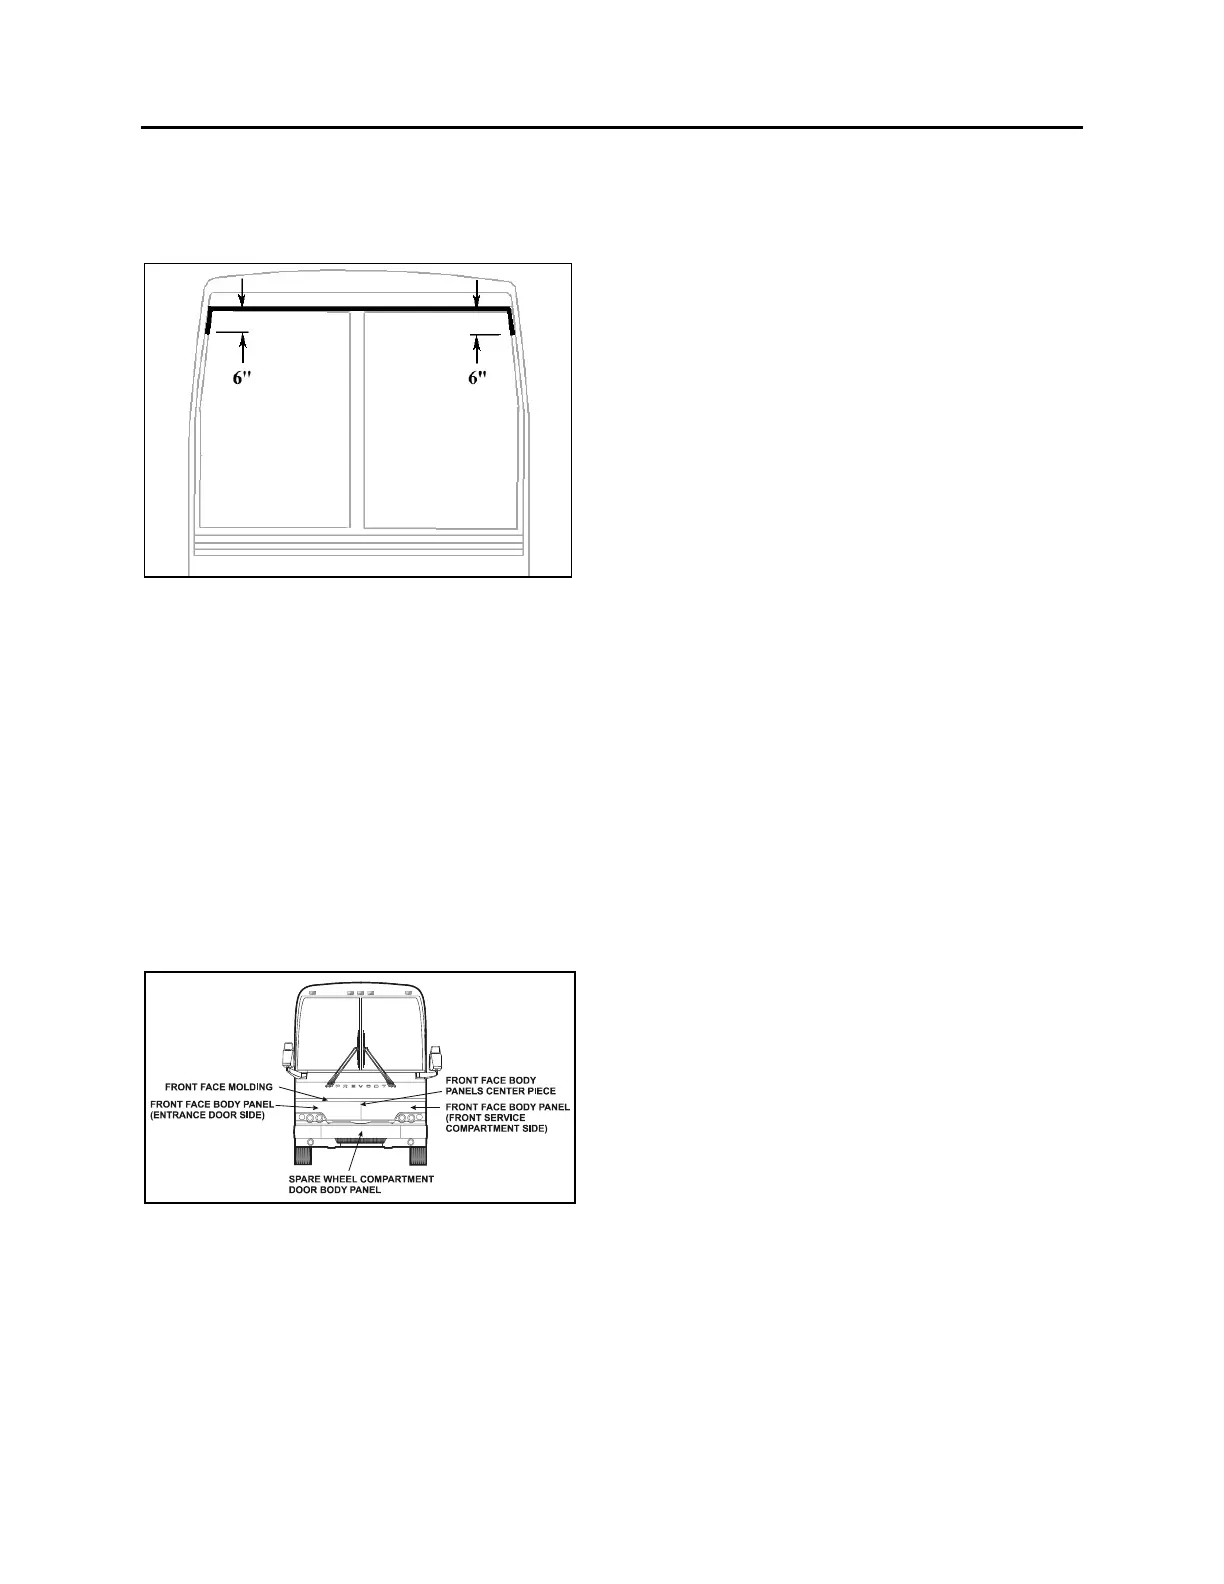
6.1.7 Front face Body Panel
For removal of front face body panel and
molding, you will need:
Drill with drill bits,
Lever or similar tool,
Olfa knife,
“C”-clamp,
Razor sharp window scraper.
Front Face Molding Removal
FIGURE 17: VIEW OF FRONT FACE
o First of all, pry loose the front face molding
using the lever. Save molding if only the
body panel needs to be changed.
o Using the Olfa knife, cut the Sika bead
and the double-face self adhesive tape.
Remove the Sika bead and self adhesive
tape residue with the scraper.
Front Face Body Panel Removal
o Using a drill and a 1/8” drill bit remove the
rivets fixing the vertical molding. The
stainless steel molding is located on the
entrance door or service door frame side
depending on body panel to be removed.
o Using the Olfa knife, cut the Sika bead
and the double-face self adhesive tape.
Remove the Sika bead and self adhesive
tape residue with the scraper.
o Pry loose the front face body panel using
the lever.
o While somebody cuts the Sika bead and
double-face self adhesive tape, another
person pulls the body panel using the “C”-
clamp to exert tension.
o Using the window scraper, remove any
Sika bead or self adhesive tape residue
left on fiber glass surface.
Front Face Molding Installation
For gluing of front face molding, refer to
procedure PR00212 included at the end of this
section.
Front face Body Panel Installation
For gluing of front face body panels, refer to
procedure PR470047 included at the end of this
section.
6.1.8 Entrance Door
For the removal of entrance door body panel,
you will need:
Pneumatic “Zip gun” type tool;
Razor sharp window scraper;
o Before removing body panel, you can to
ease repair uninstall entrance door from
vehicle. If applicable, remove reflector,
keyless system keyboard and cornering
light.
o You must also remove horizontal finishing
molding located underneath the window.
This molding is glued and will have to be
replaced because it will be damaged at
removal.
o Remove interior finishing panel to access
rub rail fixing bolts, then remove rub rail.
o Using the “Zip Gun”, cut Sika bead
located ¼ inch (7-8 mm) from each body
panel edge and around cornering light.
 Loading...


