Section 12: BRAKE AND AIR SYSTEM
PA1553
14
since all pads are the same. Once removed,
worn pads should be replaced in their original
position.
FIGURE 21: BRAKE PAD CHECK 12117
25.1.2 Caliper Maintenance
Use the following procedure for brake calipers
servicing. The procedure must be followed in
proper sequence to ensure that only needed
repairs or replacements are performed on
calipers. Problems such as hot brakes or
cracked rotors may be effects of sticking
calipers, too-small clearance between rotor and
pad or possible trapped air pressure in the brake
chamber. If any of these symptoms occur,
perform this procedure before replacing the rotor
to ensure the cause of the problem is properly
solved.
1. Check for presence of residual pressure:
To check if there is any residual air pressure in
the brake chamber, make four or five brake
applications, then try to turn the wheel manually,
if the wheel does not turn, use a wrench to crack
the air line and listen for trapped air in the brake
chamber then try to turn the wheel manually
again. If you find trapped air in the brake
booster, ensure that all pneumatic components
in the braking system are functioning properly.
NOTE
A residual pressure of 2-3 PSI in the system is
sufficient to prevent the brakes from releasing.
Also the stop light switch can operate with as
little as 1 PSI, therefore an illuminated brake
light does not mean brakes are dragging.
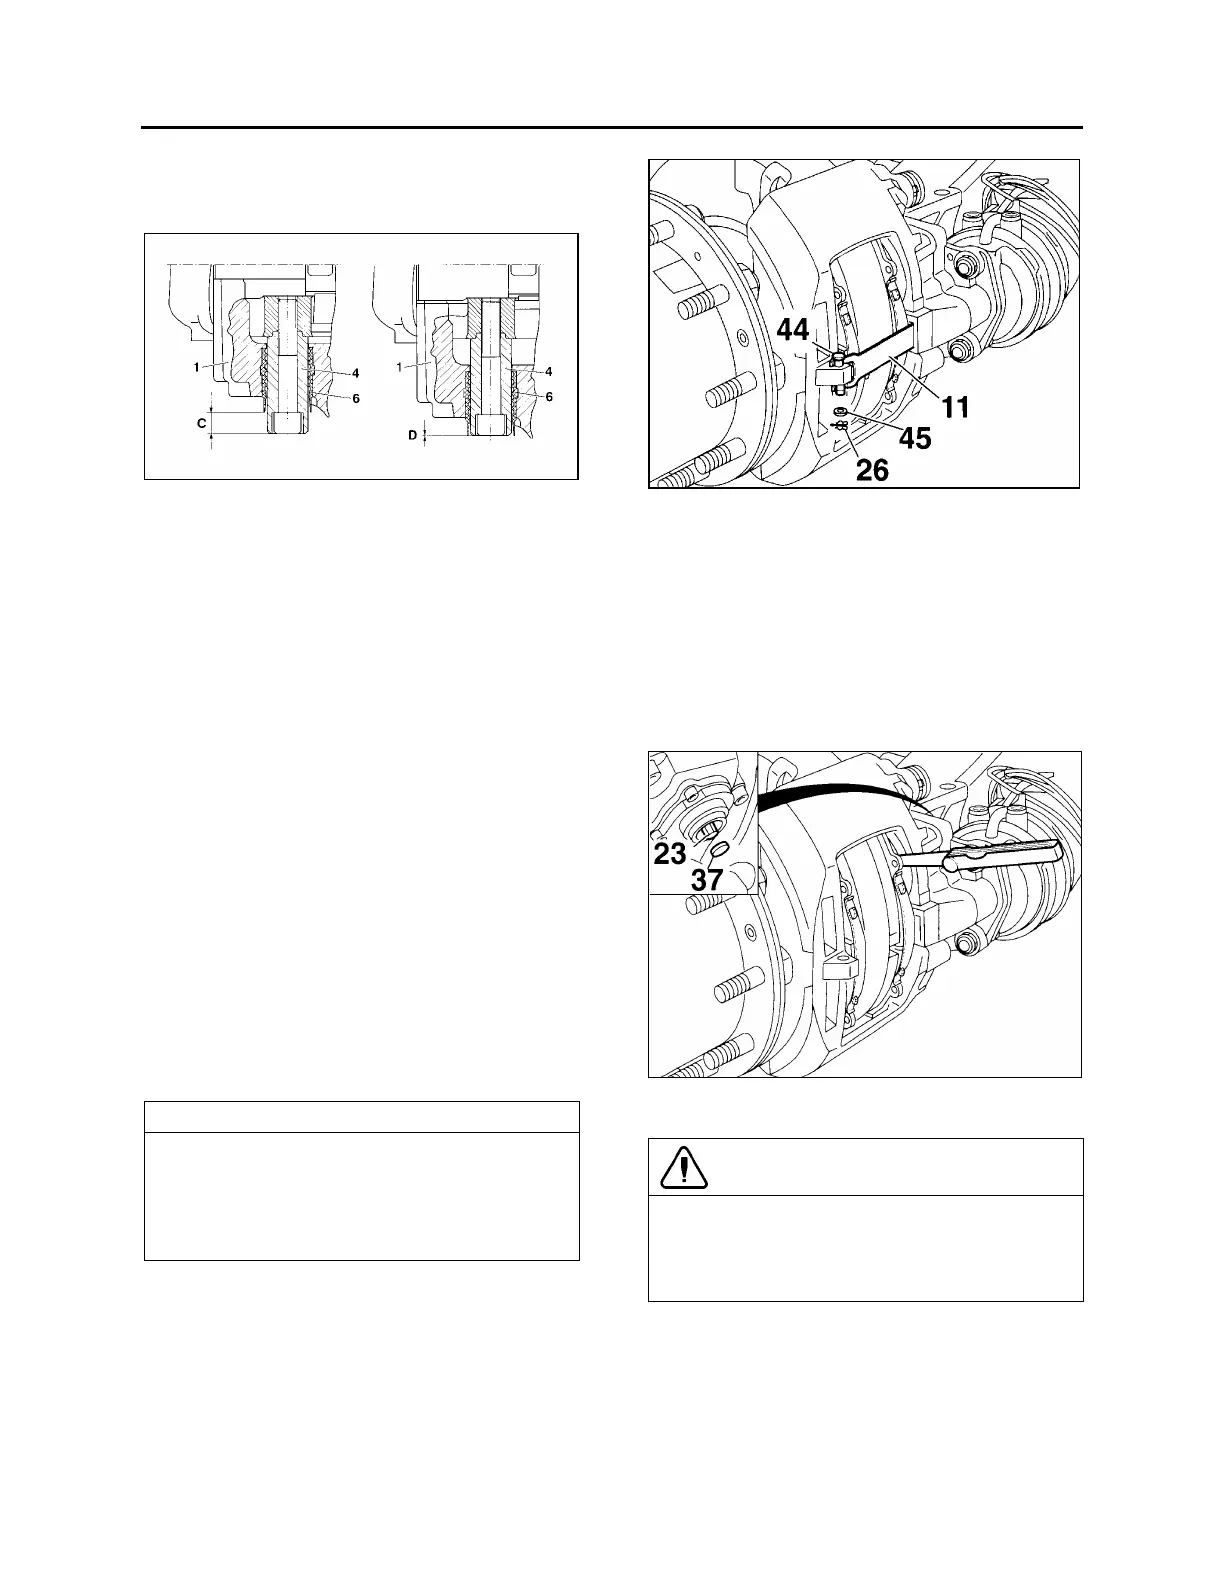
2. Pad to rotor clearance inspection:
Remove clip and washer (26 & 45, Fig. 22),
push down retainer bar (11), pull out pin (44)
and remove retainer bar. Push caliper toward
actuator (center of vehicle) for maximum
clearance.
FIGURE 22: CLEARANCE INSPECTION 12119
3. Measure pad to rotor clearance:
Place a long feeler gauge (long enough to
measure across entire tappet surface) between
the tappet and the backing plate of the pad,
measure clearance at both tappets. Clearance
should range between 0.020 and 0.035 inch (0.5
mm and 0.9 mm), with a maximum difference
between tappet measurements on same brake
of 0.008 inch (0.2 mm).
FIGURE 23: RUNNING CLEARANCE 12116
4. Checking the adjuster
CAUTION
Use only a standard box wrench on the
adjuster hexagonal pinion. Do not overtorque
the pinion as overtorquing will damage the
pinion.
a) Remove cap (37, Fig. 23).
b) Using a box wrench (8 mm), turn the
adjuster pinion (23, Fig. 23) counterclock-
wise about 2 - 3 clicks to increase running
clearance. By operating the braking system
 Loading...


