Section 18: BODY
PA1553
34
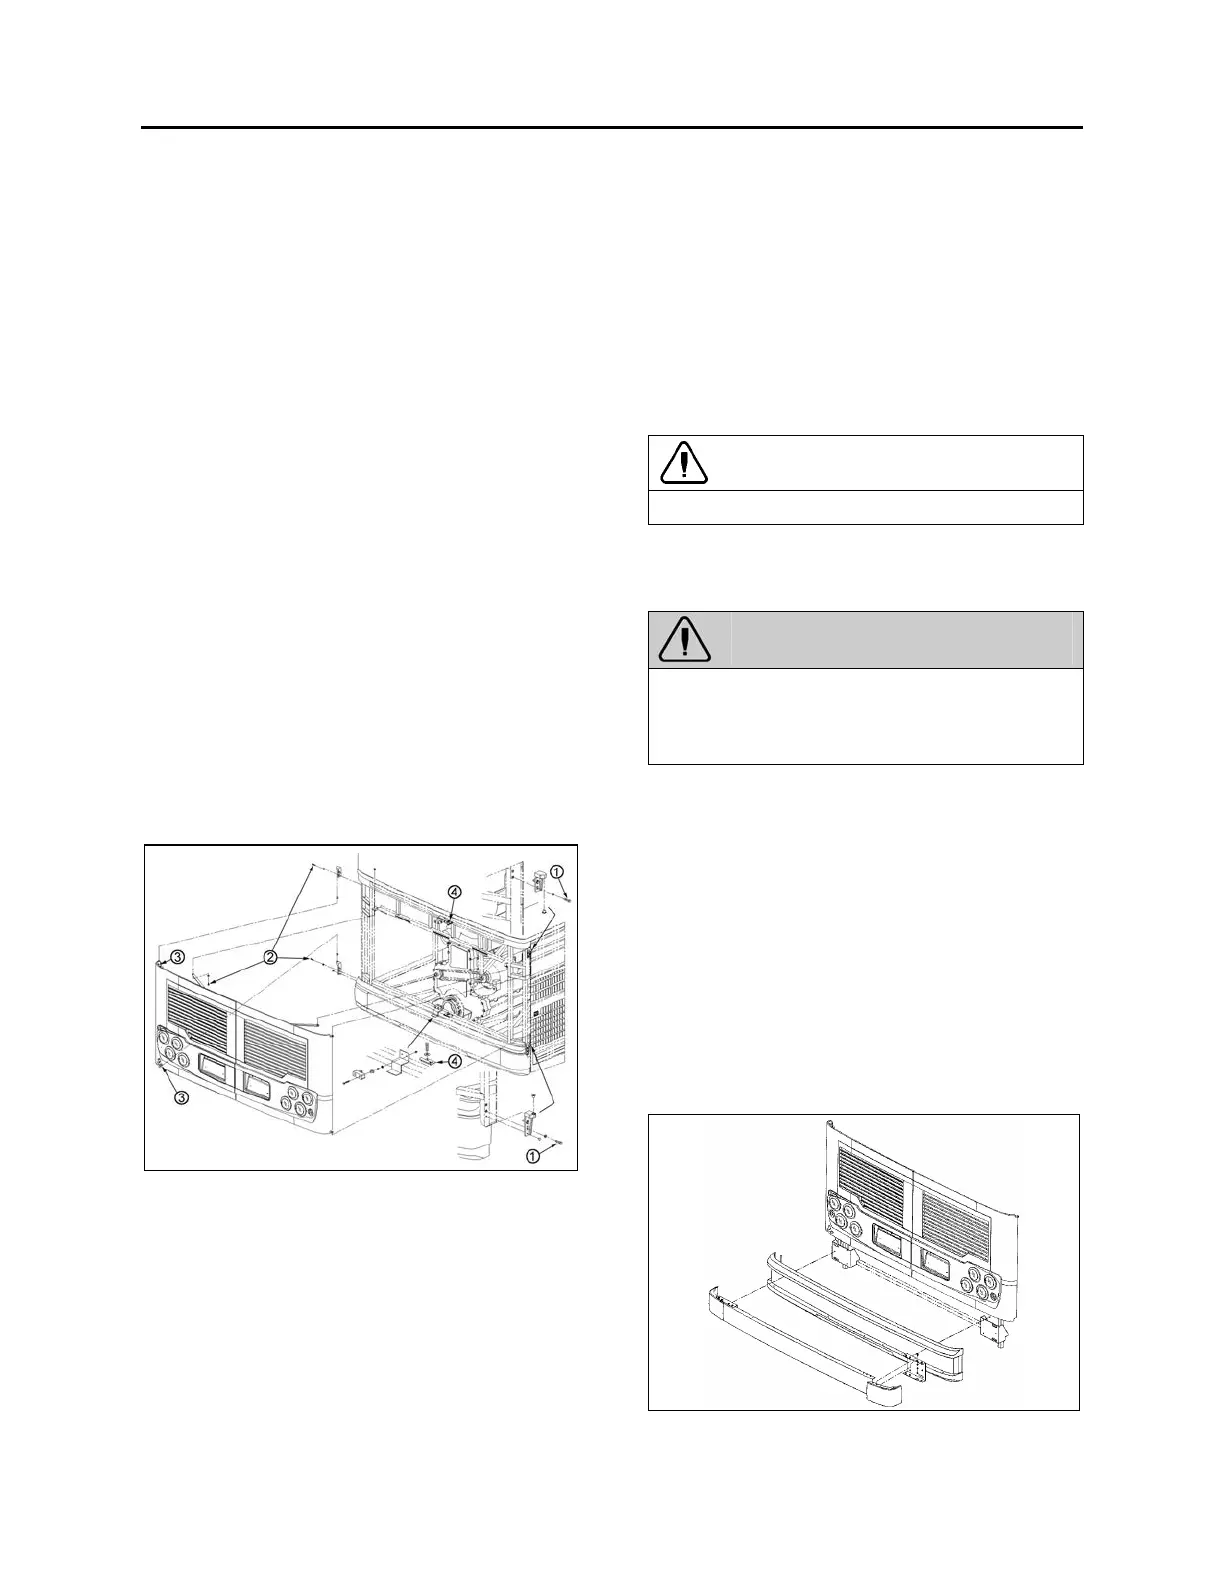
Engine compartment doors may be adjusted for
proper fit by untightening hinge bolts:
1. Loosen the bolts, (1, 2 Fig. 28) holding the
hinge to the vehicle structure to shift the
door "UP or DOWN".
2. Loosening the bolts (3, Fig. 28) allows the
door to be shifted "LEFT or RIGHT" and "IN
or OUT".
3. Adjust the doors position depending on the
gap needed between exterior finishing
panels.
4. Tighten the bolts.
5. Check that the doors swing freely and close
properly. It may be necessary to adjust the
door latch to get proper fit and operation.
To adjust the latch mechanism (4, Fig. 28) and
the striker pin:
1. Open the doors to access the striker pin.
2. Slightly loosen the striker pin.
3. Using a hammer, adjust the striker pin to
center it in the door latch mechanism.
4. Tighten the striker pin.
5. Check doors fit and operation.
FIGURE 28: ENGINE COMPARTMENT DOORS 18633
Engine Compartment Door Body Panel
Removal
For the removal of engine compartment door
body panel, you will need:
Pneumatic “Zip gun” type tool;
Razor sharp window scraper;
A pair of locking pliers;
Isopropyl alcohol.
o Remove damaged engine compartment
door from vehicle.
o Install the damaged door onto an
appropriate support.
o Wearing gloves, goggles and ear plugs,
pry loose body panel using a “Zip gun” or
lever starting from the edge opposite the
curved side.
o Use the “Zip gun” to detach completely the
stainless steel body panel from door
frame.
CAUTION
Do not damage painted surface.
o Use a second person equipped with a pair
of locking pliers to pull the body panel as
you cut the Sika bead.
WARNING
Be very careful when pulling the body panel,
somebody could get hurt if the body panel
suddenly detach from the door surface without
notice.
o Using the window scraper, remove any
Sika bead or self adhesive tape residue
left on the fiber glass surface.
For gluing of engine compartment doors
molding, refer to procedure PR00211 included
at the end of this section.
For engine compartment door body panel
installation, refer to procedure PR280032
included at the end of this section.
6.3.3 Rear Bumper
Remove three bolts on each side holding
bumper to vehicle and remove bumper.
To install bumper, reverse the procedure.
FIGURE 29: REAR BUMPER
 Loading...


