Section 18: BODY
PA1553
36
To adjust the latch mechanism (3, Fig. 31) and
the striker pin:
1. Open the door to access the striker pin.
2. Slightly loosen the striker pin.
3. Using a hammer, adjust the striker pin to
center it in the door latch mechanism.
4. Tighten the striker pin.
5. Check door fit and operation.
For gluing of engine compartment R.H. side
door finishing molding, refer to procedure
PR00210 included at the end of this section.
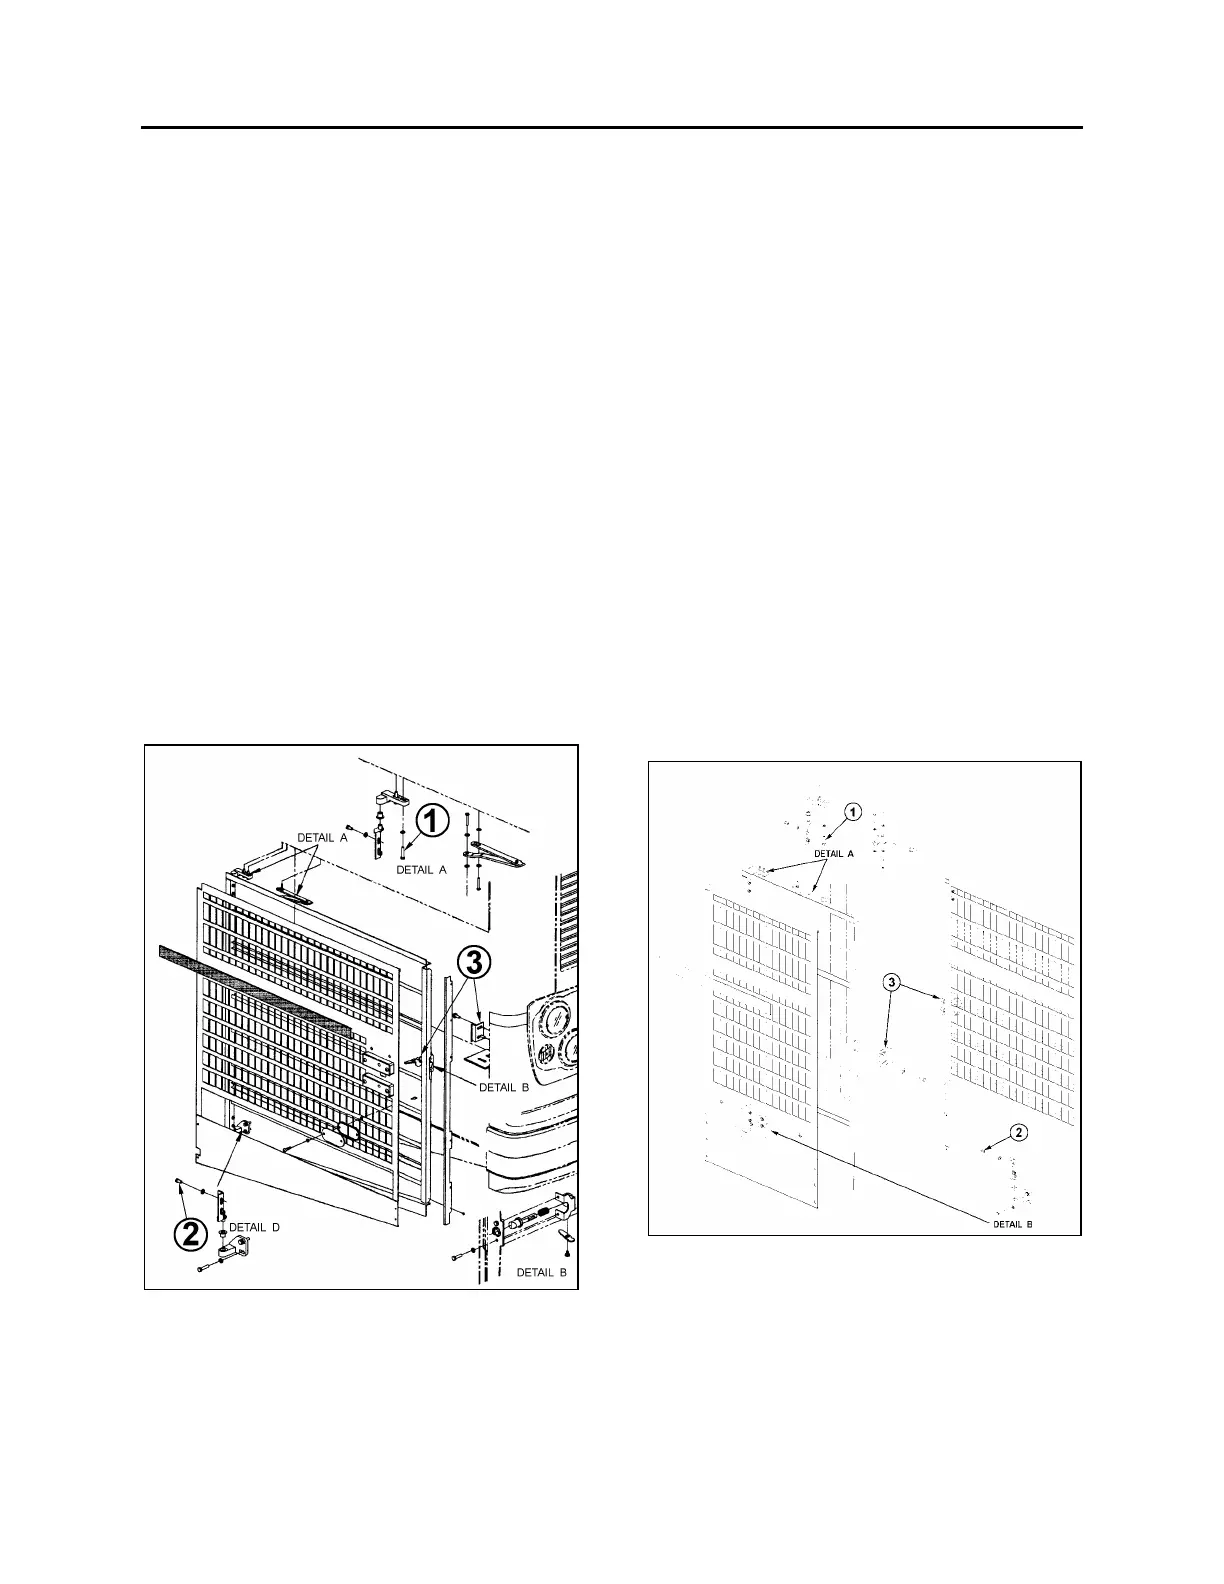
6.4.3 Engine Radiator Door
Radiator door may be adjusted for proper fit by
untightening hinge bolts:
1. Loosen the bolts, (1, Fig. 32) holding the
hinge to the vehicle structure to shift the
door "IN or OUT" and "UP or DOWN".
2. Loosening the bolts (2, Fig. 32) allows the
door to be shifted "LEFT or RIGHT" and "UP
or DOWN".
FIGURE 32: RADIATOR DOOR 18636
3. Adjust the door position depending on the
gap needed between exterior finishing
panels.
4. Tighten the bolts.
5. Check that the door swings freely and
closes properly. It may be necessary to
adjust the door latch to get proper fit and
operation.
To adjust the latch mechanism (3, Fig. 32) and
the striker pin:
1. Open the door to access the striker pin.
2. Slightly loosen the striker pin.
3. Using a hammer, adjust the striker pin to
center it in the door latch mechanism.
4. Tighten the striker pin.
5. Check door fit and operation.
Engine Small Radiator Door
Small radiator door may be adjusted for proper
fit by untightening hinge bolts:
1. Loosen the bolts, (1, Fig. 33) holding the
hinge to the vehicle structure to shift the
door "IN or OUT" and "UP or DOWN".
2. Loosening the bolts (2, Fig. 33) allows the
door to be shifted "LEFT or RIGHT" and "UP
or DOWN".
FIGURE 33: SMALL RADIATOR DOOR 18636
3. Adjust the door position depending on the
gap needed between exterior finishing
panels.
4. Tighten the bolts.
5. Check that the door swings freely and
closes properly. It may be necessary to
 Loading...


