INTRODUCTION
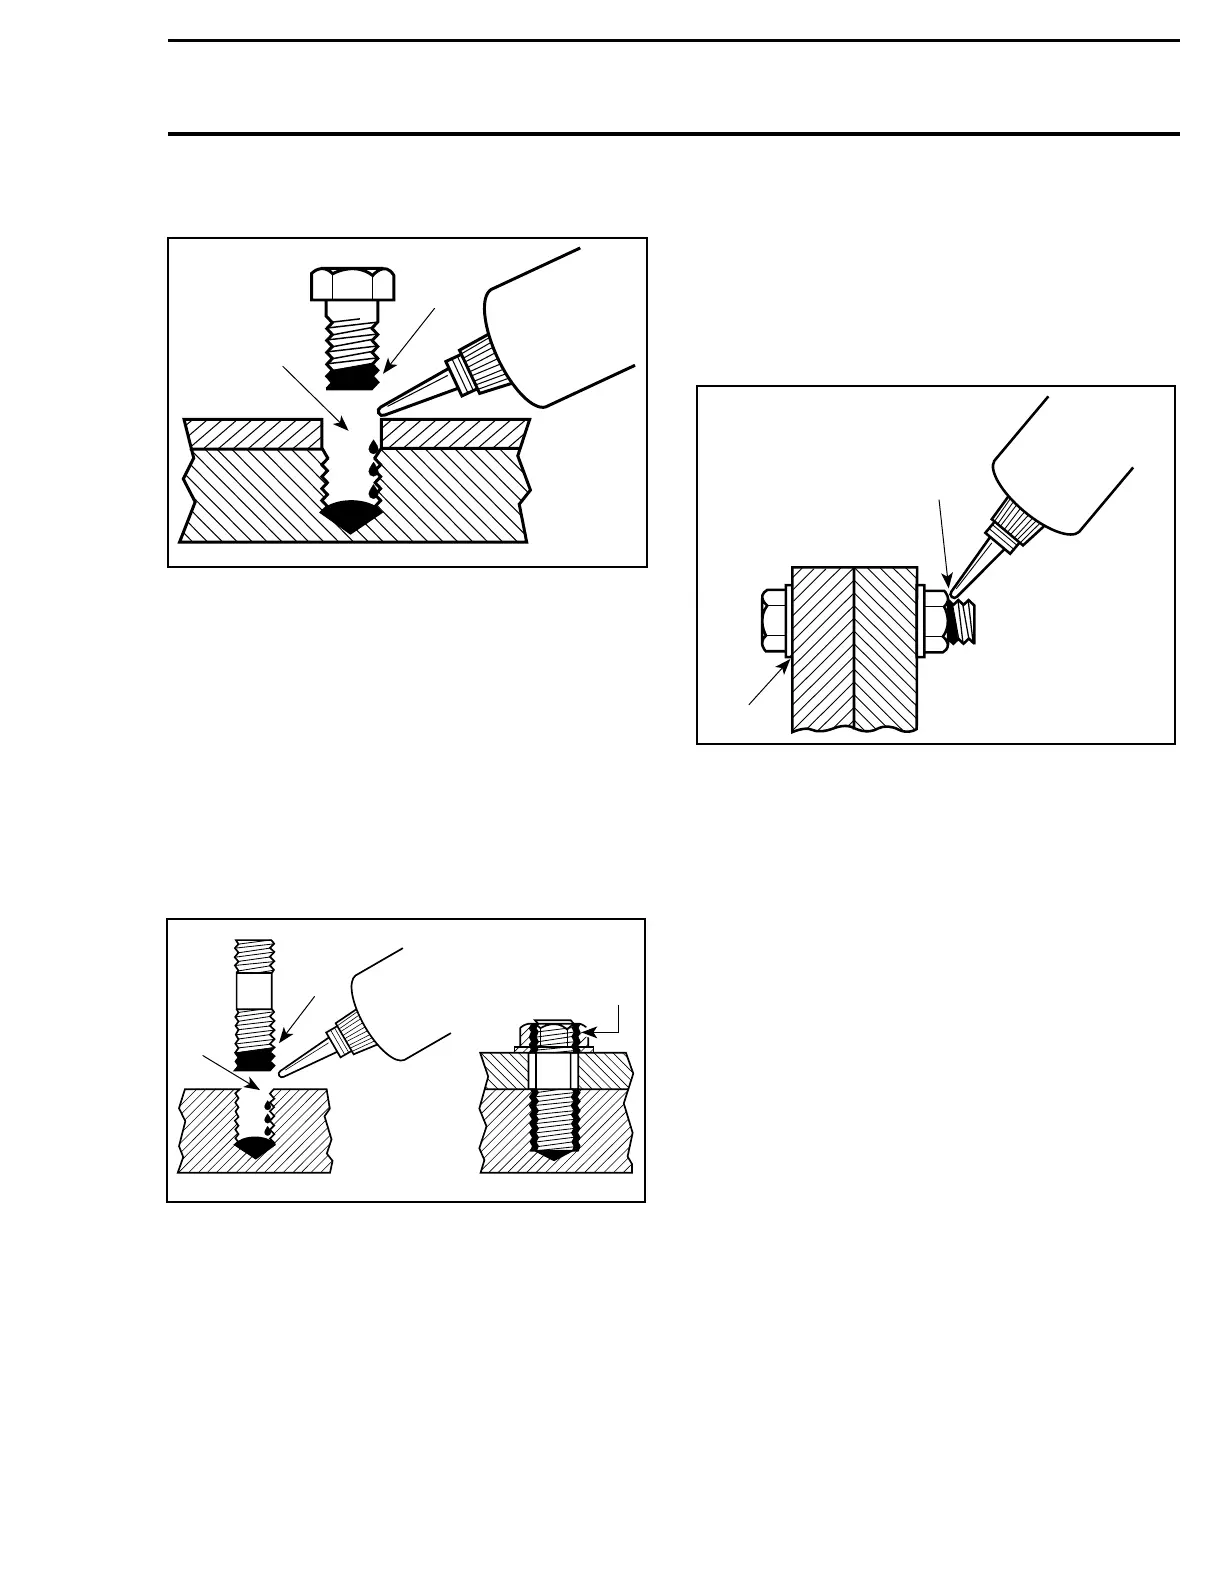
Blind Holes
A00A3MA
1
2
1. On threads
2. On threads and at the bottom of hole
– Clean threads (bolt and hole) with solvent.
– Apply Loctite Primer N (P/N 293 800 041) on
threads (bolt and nut) and allow to dry for 30
seconds.
– Choose proper strength Loctite threadlocker.
– Apply several drops along the threaded hole and
at the bottom of the hole.
– Apply several drops on bolt threads.
– Tighten as required.
Stud in Blind Holes
A00A5RA
2
1
3
1. On threads
2. On threads and in the hole
3. Onto nut threads
– Clean threads (stud and hole) with solvent.
– Apply Loctite Primer N (P/N 293 800 041) on
threads and allow to dry.
– Put several drops of proper strength Loctite
threadlocker on female threads and in hole.
– Apply several drops
of proper strength Loctite
on stud threads.
– Install stud.
– Install cover, etc.
– Apply drops of proper strength Loctite on un-
covered threads.
– Tighten nuts as required.
Pre-assembled Parts
A00A3OA
1
2
1. Apply here
2. Do not apply
1. Clean bolts and nuts with solvent.
2. Assemble components.
3. Tighten nuts.
4. Apply drops of proper strength Loctite on
bolt/nut contact surfaces.
5. Avoid touching metal with tip of flask.
NOTE: For preventive maintenance on exist-
ing equipment, retighten nuts and apply proper
strength Loctite on bolt/nut contact surfaces.
smr2005-041 XV