5-30 Rapidlab 1200 Operator’s Guide: Maintenance
02087462 Rev. V
Removing the Sensors
1. Select Status > Maintenance > Performing Sensor Maintenance.
2. To start the procedure, select
Continue.
3. Remove the sensor:
a. Lift the door to the Measurement module.
Refer to Preparing for Maintenance Procedures‚ page 5-1.
b. Push the spring-loaded latch to the right.
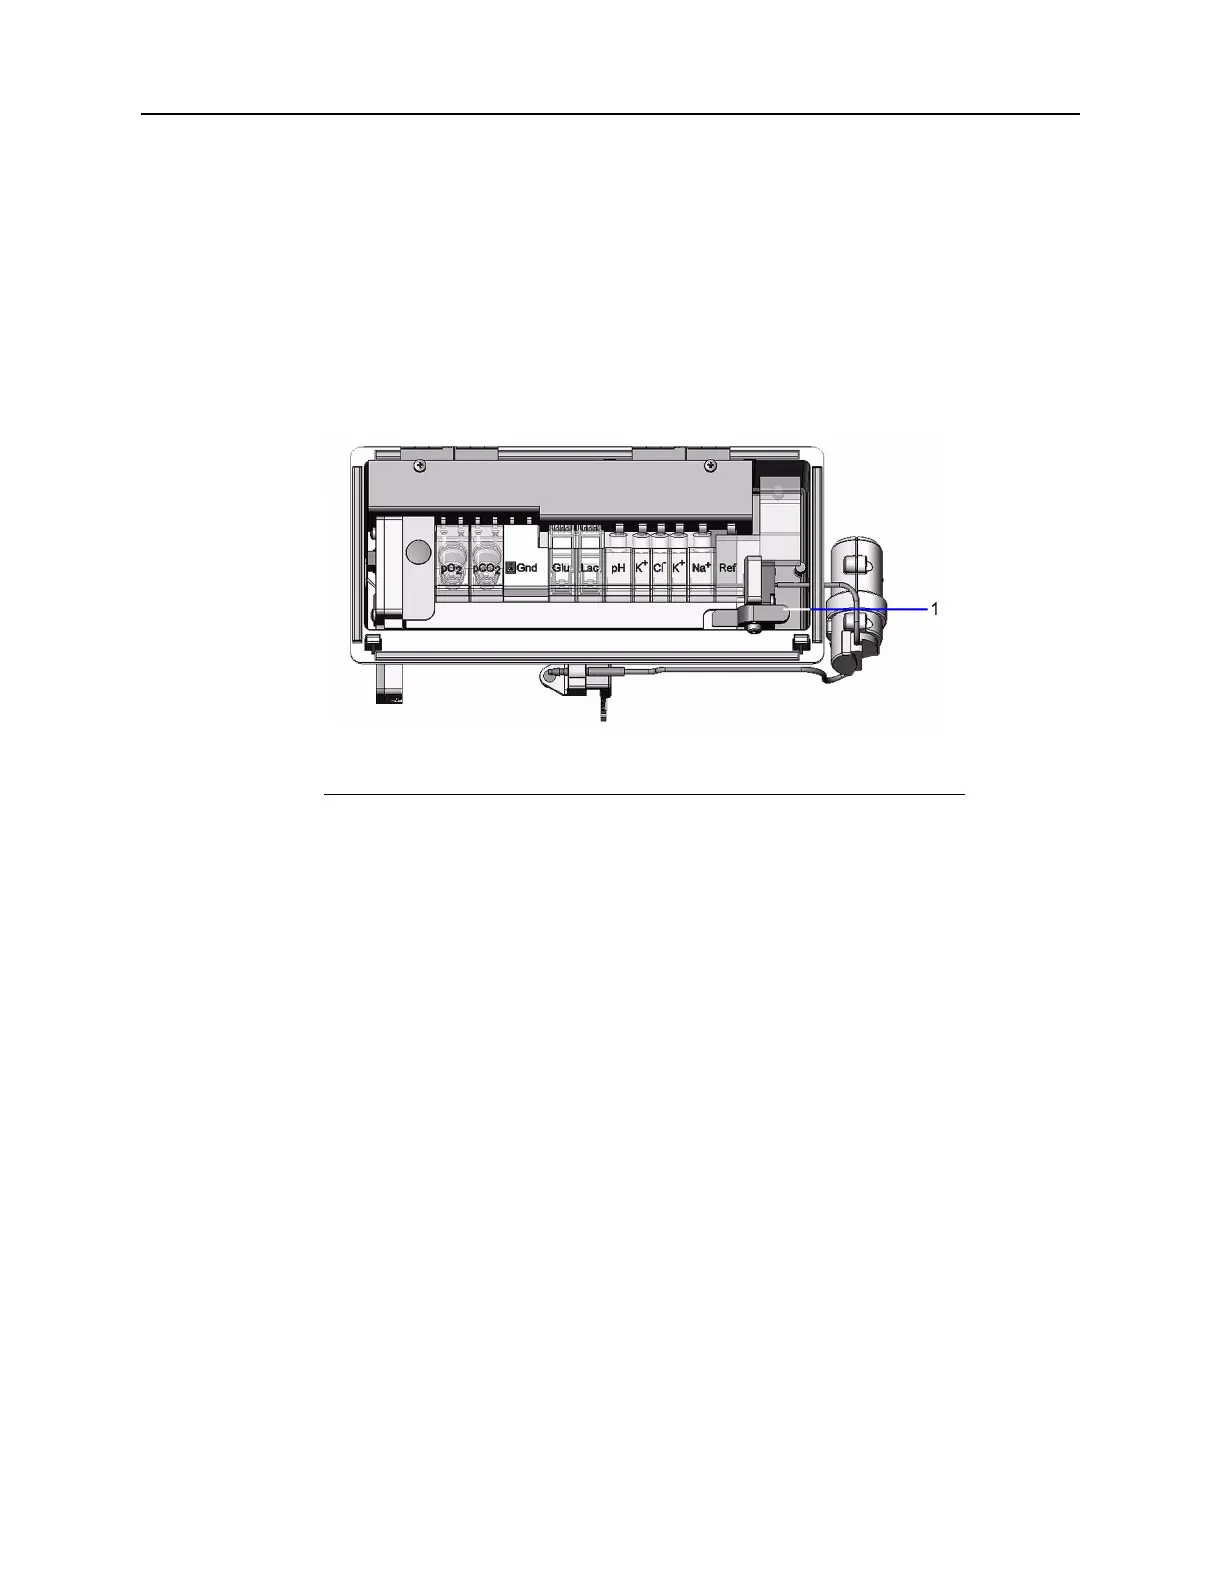
Figure 5-15 Rapidlab 1260 or 1265 Measurement Module
c. Grasp the tab on the sensor and pull the sensor up and out.
d. Discard the sensor according to your institution’s policy.
4. If you are replacing a measurement sensor, refer to Performing Measurement Sensor
Maintenance‚ page 5-40
5. If you are replacing the reference sensor, fill the internal electrode compartment.
Refer to Filling the Reference Sensor Cassette‚ page 5-36.
6. If you are replacing the reference sensor or measurement sensors, install the internal
electrode into the internal electrode compartment and screw the electrode into place.
7. Clean and inspect the sensor:
a. Tap the front face of the sensor with your knuckle to remove any bubbles.
b. Wipe any excess fill solution from the exterior of the sensor using a lint-free
tissue.
c. Ensure that the O-ring is in place:
• Reference sensor has an O-ring on both sides of the sensor.
• All other sensors have an O-ring on the left side of the sensor.
1 Spring-loaded latch
 Loading...