2-42
Chapter 2 Installing FACP Components
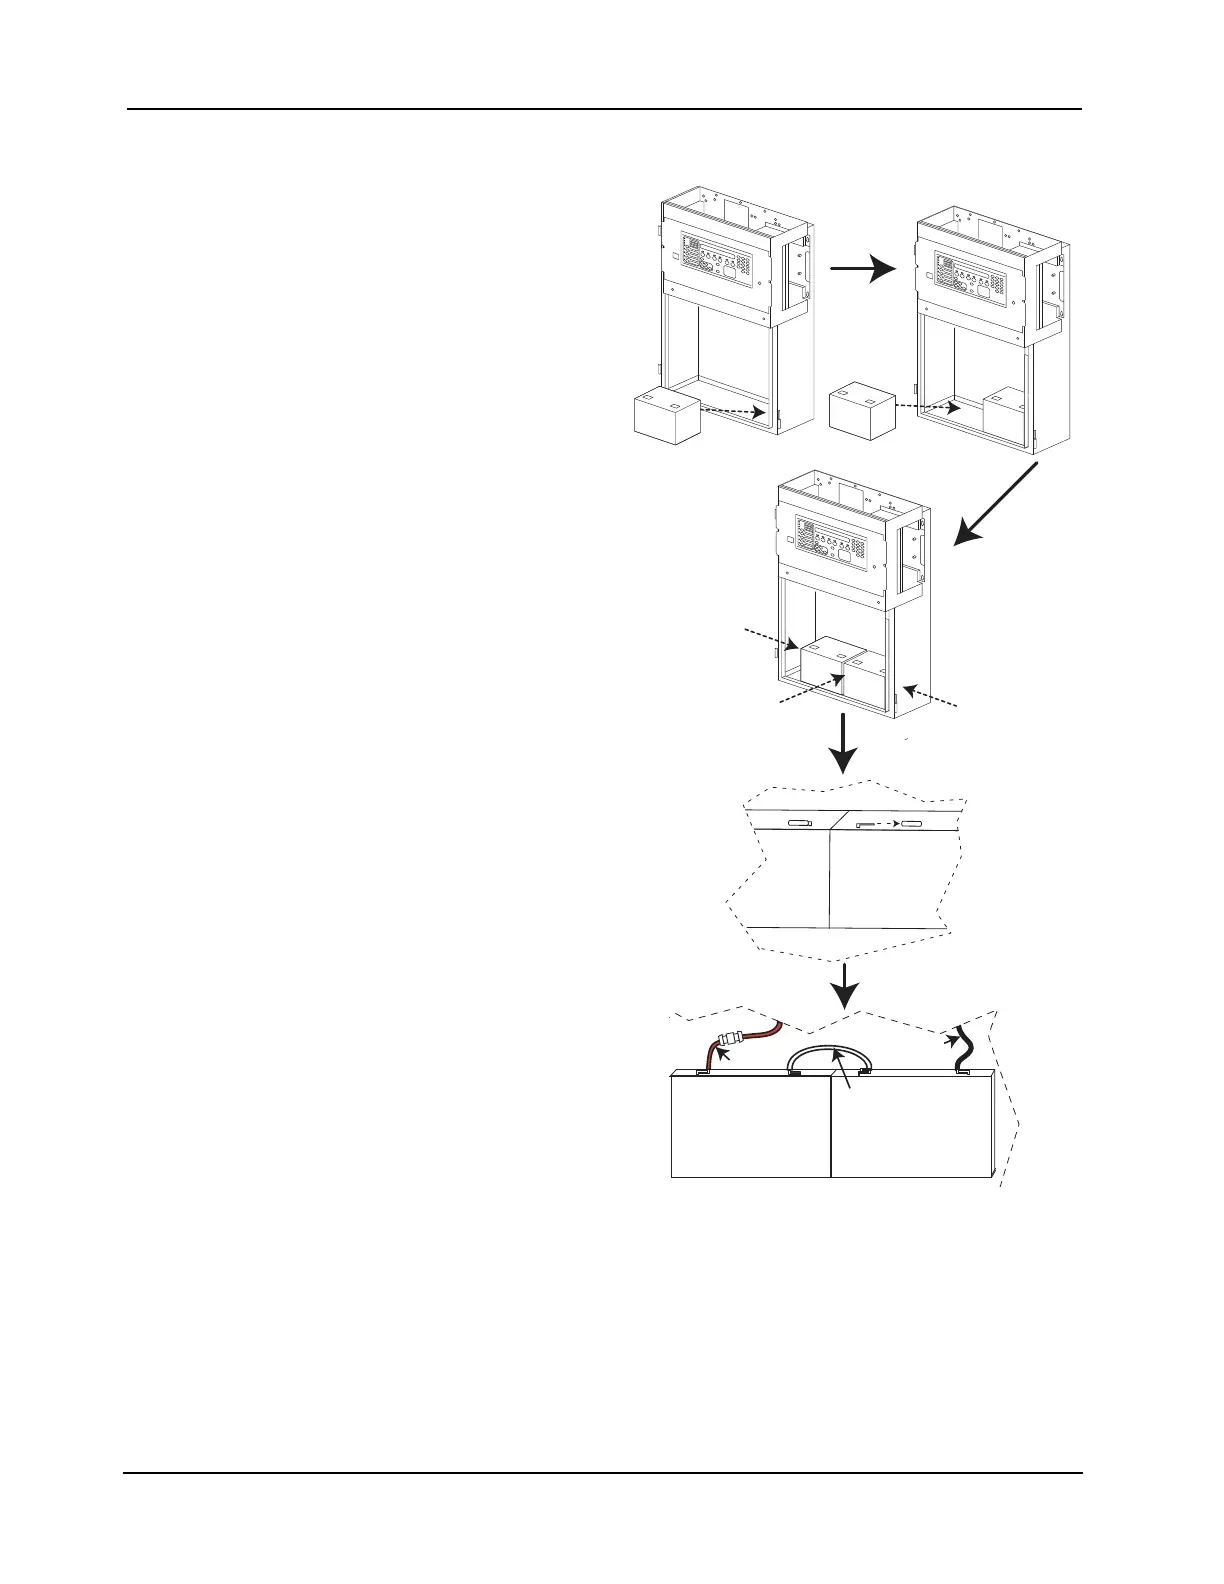
Step 9. Installing and Removing Batteries (continued)
Installing and
Removing
Batteries in a
Multi-Bay Cabinet
To install the batteries:
1. Remove the batteries from the
packaging and inspect them for
any damage.
2. Place the batteries at the bottom
of the cabinet, center them and
gently push them against the back
wall.
3. Once the batteries are in place
remove the terminal protectors
from the batteries.
4. Connect the batteries to the panel
using the battery harness:
• Connect the positive terminal
of the left battery to the
positive battery input on the
panel using the red cable.
• Connect the negative terminal
of the right battery to the
negative battery input on the
panel using the black cable.
• Use the white jumper cable to
connect the two remaining
battery terminals, joining the
two batteries.
5. Power up the panel following the
instructions in “Step 10. System
Power Up and Power Down
Procedures” on page 43.
To remove the batteries:
1. Power Down the Panel following
the instructions in “Step 10.
System Power Up and Power
Down Procedures” on page 43.
2. Remove the harness from the
batteries.
3. Fit the battery terminals with
terminal protectors.
4. Remove the batteries from the
cabinet.
Dispose of the old batteries properly.
Figure 2-40. Multi-Bay Battery Installation