2-21
Chapter 2 Installing FACP Components
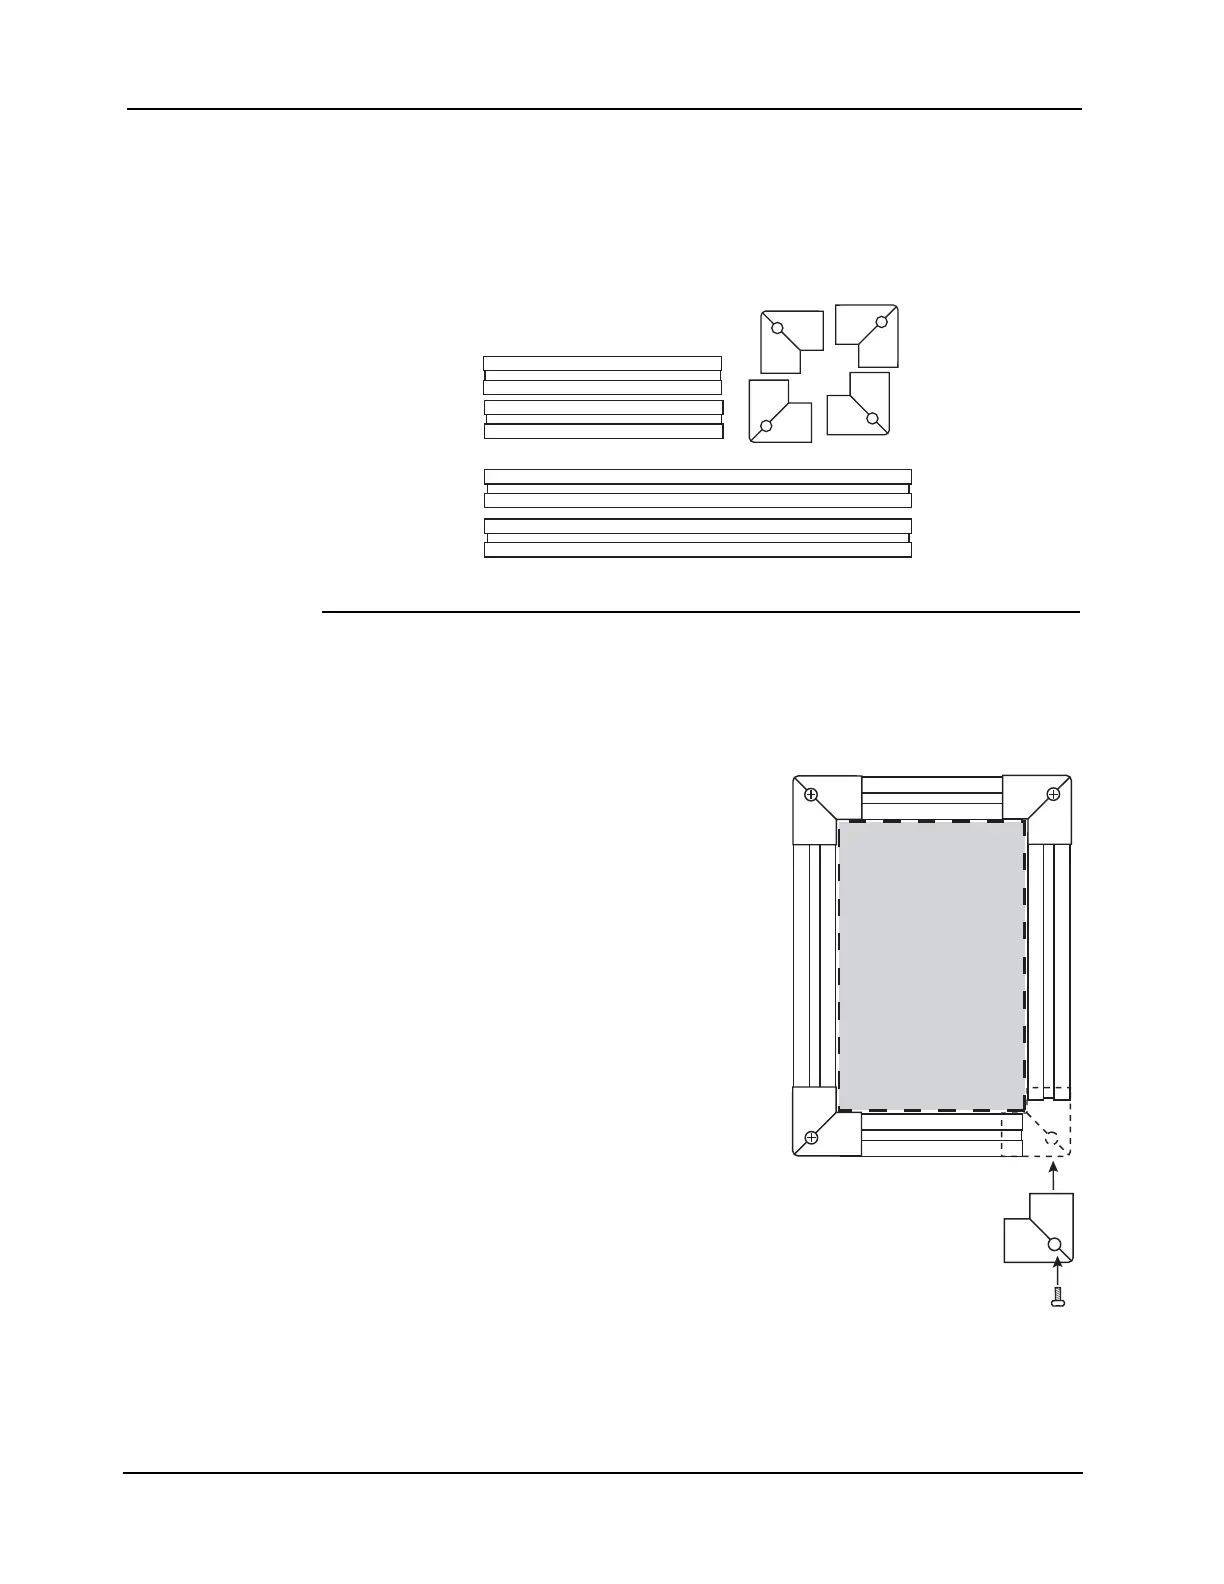
Step 3. Trim Kit Application (optional)
Trim Kit Content Trim Kits are used to cosmetically cover wall openings when boxes are mounted semi-flush
into the wall. The kit includes:
• Two top trim bands (shorter)
• Two side trim bands (longer)
• Four corner pieces.
Figure 2-19. Semi-Flush Trim Kit
Trim Application After the back box is mounted to the wall, attach the trim in accordance with the following
procedure:
1. Hold the top strip against the top of the back box.
2. Centered the strip on the box width, and mark the end
locations (the top bands are approximately
1" (25 mm) shorter than the box width). Peel off the
adhesive tape release, align it with the marks and
press down to assure adhesion.
3. Place the second top strip beneath the back box and
repeat step 2.
4. The side bands are sized for the 3-bay box, they must
be re-sized for use with 1 and 2 bay boxes.
• For use with a 3-bay box: align, mark, and attach
as was done for the top and bottom bands.
• For use with a 1-bay or 2-bay boxes, cut the bands
approximately 1" (25mm) shorter than the box
height (1-bay boxes are 22" (559 mm) high,
2-bay boxes are 40" (1016 mm) high). Carefully
cut them to length using a hacksaw or sharp
utility knife.
5. Attach the cut bands using the same procedure as the
top and bottom bands.
6. Each corner piece overlaps the trim strip slightly less
than 3/4" (19mm). Align the corner pieces tight to the
box corner and attach with a drywall or similar screw,
suitable for the wall material (screws are not
supplied).
Figure 2-20. Applying the Trim
Corner Pieces (x4)
Top Trim Bands (x2)
Side Trim Bands (x2)
Semi-Flush
Mounted
BACK BOX