3-9
Chapter 3 Installing 4100ES MINIPLEX Components
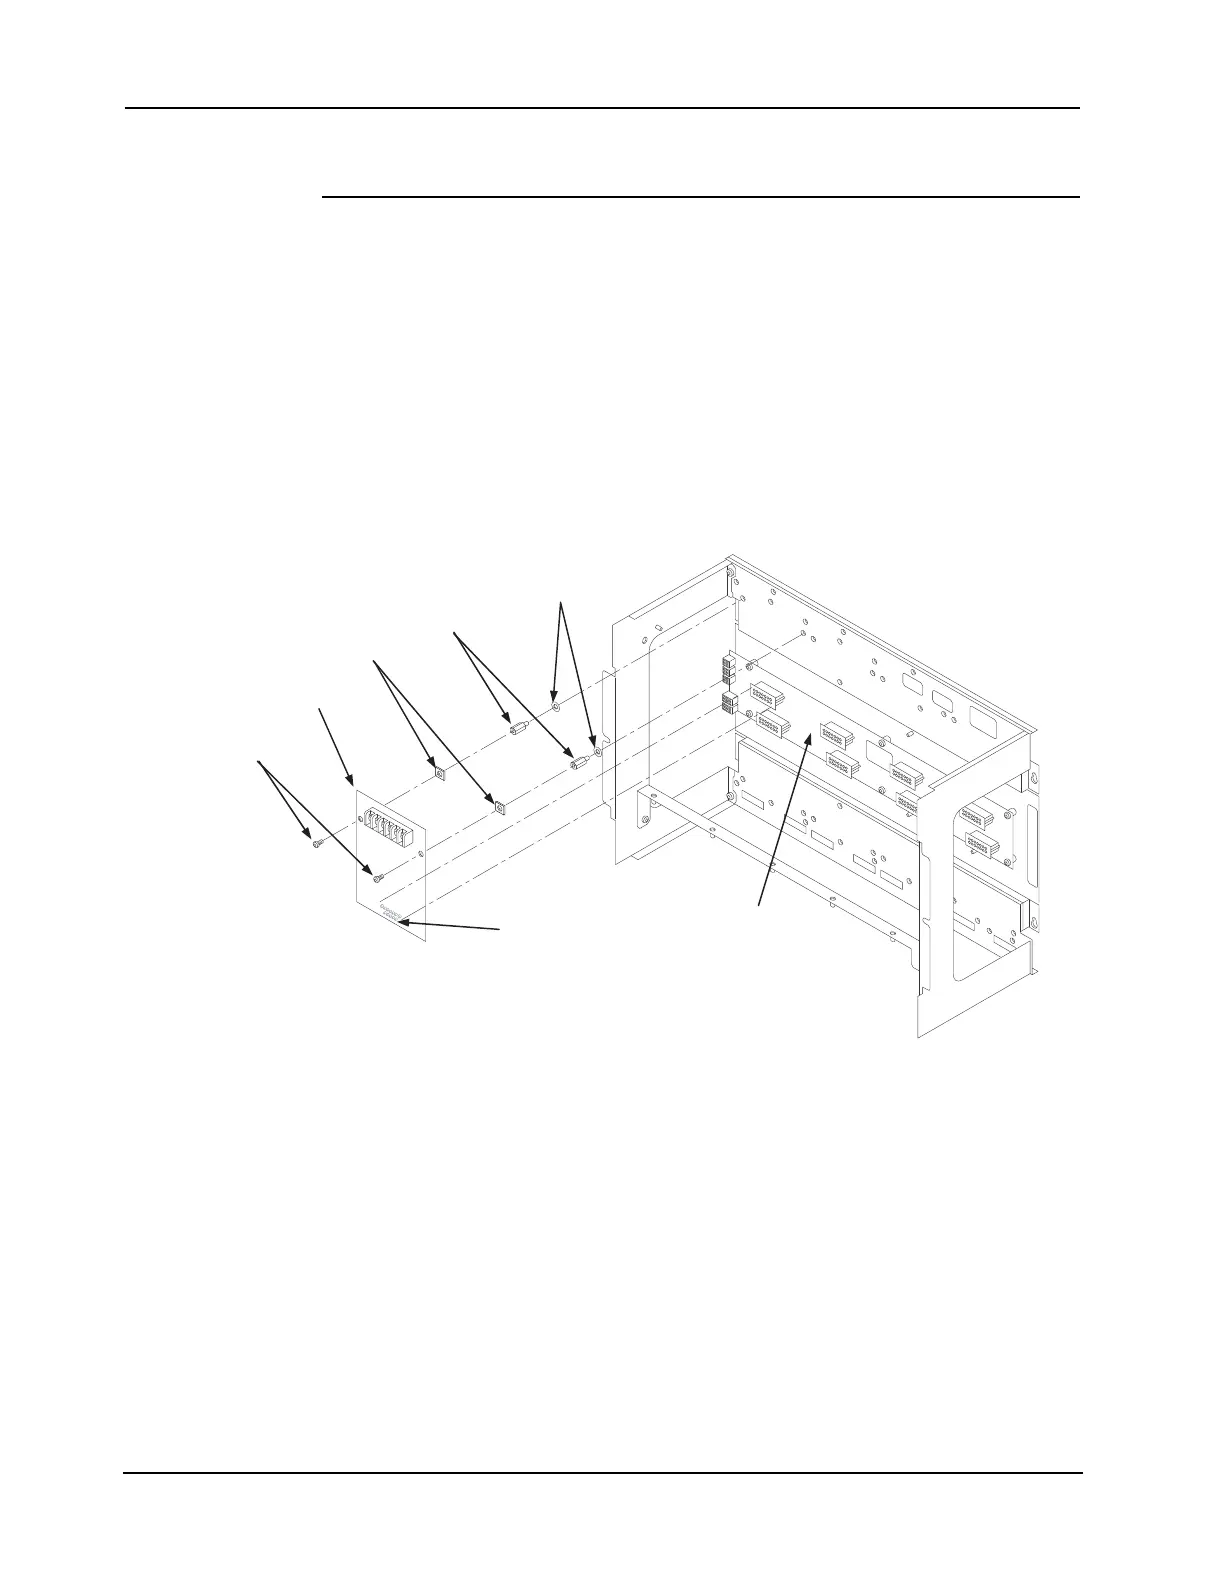
TIC/Riser Mounting
Overview All TICs and audio riser cards are mounted like any 4 x 5 card. This section describes the TIC/
audio riser card mounting procedure, which is identical to that of other 4 x 5 cards.
Mounting
Instructions
Use the following instructions and Figure 3-2 to mount 4 x 5 slave cards to an expansion
cabinet.
1. Screw two standoffs and washers to the appropriate holes in the back of the cabinet. These
holes must line up with the screw holes in the card. See Figure 3-2.
2. Plug the card into the top left PDI connector (P8).
3. Secure the top of the card to the standoffs with two #6 torx screws and washers.
Figure 3-2. TIC Mounting
IMPORTANT:
• The TIC must be mounted in the upper left position of the bay.
• The audio riser card must be mounted directly below the TIC.
TIC CARD
STANDOFFS
#6 SCREWS
WASHERS
PDI CONNECTOR
(reverse side)
PDI
SCREW
RETAINERS