2-24
Chapter 2 Installing FACP Components
Step 4. Mounting the Door (continued)
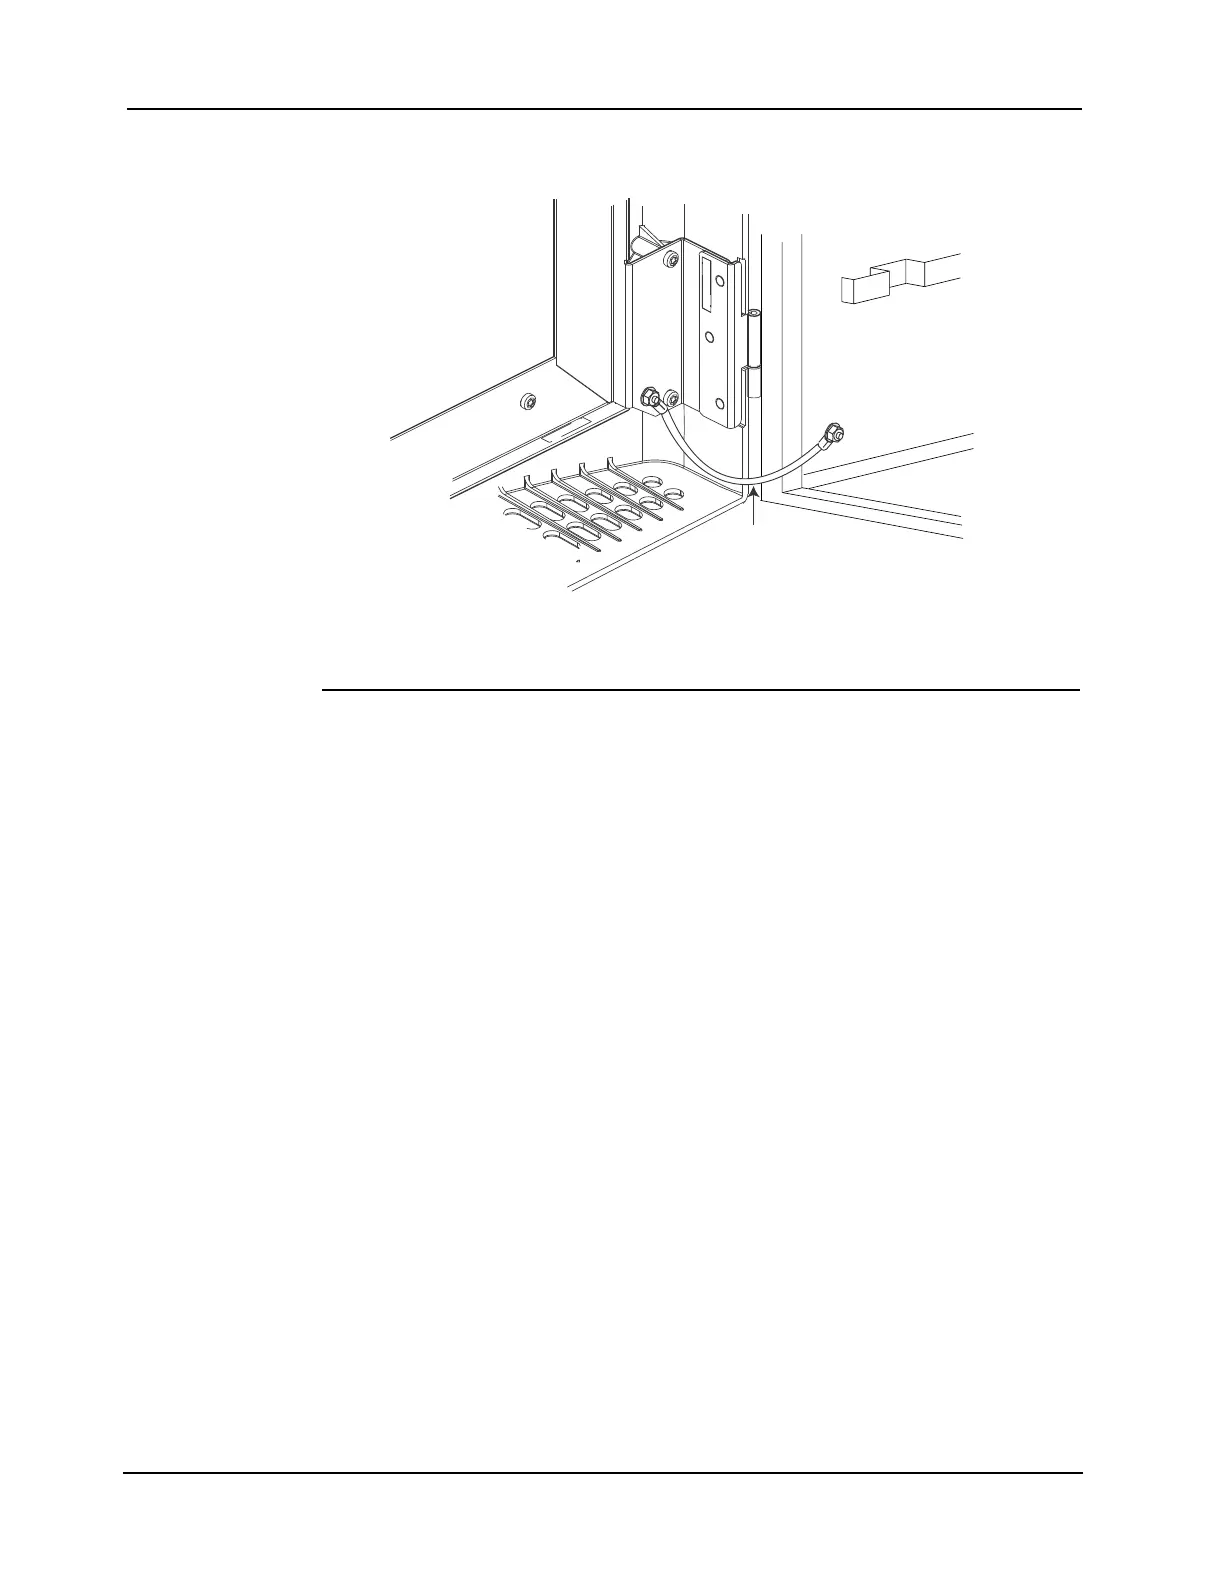
Attaching Doors 6. Attach the two ground wires to the back box with the # 6 hex flange nuts in the shipping
group (the grounding straps should already be attached to the door). See Figure 2-26.
Figure 2-26. The Ground Wire
7. Remove the B-key that is attached to the door and keep it in a safe place.
Reversing the
Door
Read the following instructions to reverse doors so that their hinges are on the right and locks
are on the left. Be sure to retain all hardware.
Note: A 5/16 hex nut driver is required to complete the following steps.
1. Disconnect the ground wires from the back box and set them aside.
2. Remove the door (if attached) by lifting it up off the back box’s hinge pins. Set the door
aside.
3. Remove the lock catch and its screws from the right side of the back box.
4. Attach the lock catch to the left side of the back box so that the slot protrudes through the
outside of the back box.
5. Use a 1/8 (3mm) punch and hammer to remove the hinge pins from the hinge leaves on the
back box.
6. Reinsert the hinge pins so that they face lengthwise toward the bottom of the back box.
7. Remove all hinge hardware from the left side of the back box.
8. Attach the hinge hardware to the right side of the back box, so that the hinge pins are facing
toward the top of the back box.
9. Turn the door upside down, align its hinges to the back box hinge pins, and then slide the
door down onto the hinge pins.
10. Re-attach the ground-wire and flange nut to the back box and door.
11. Remove the B-key that is attached to the door, and keep it in a safe place.