Charts ECDIS-E User Guide
4-50 65934012
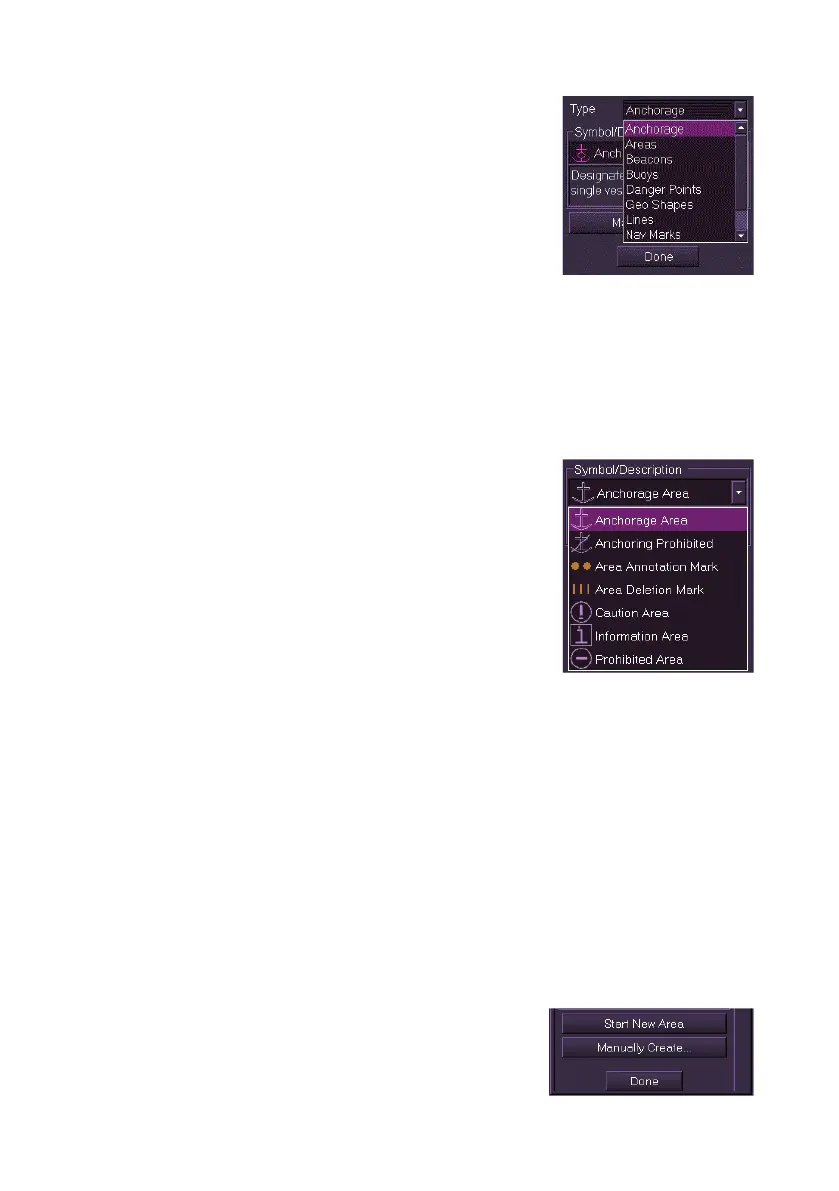
3. To select the object type click on the Type
drop down arrow and select from the list. The
following object types are assigned:
Anchorage
Areas
Beacons
Buoys
Danger Points
Geo Shapes
Lines
Nav Marks
Other Points
Soundings
4. With the object type selected click on the
Symbol/Description drop down list and
select the object symbol. The field directly
underneath the Symbol/Description drop
down list includes a brief description of the
selected symbol.
5. Move the cursor into the chart display, the
screen cursor displays MO EDIT.
6. Click in the area where you want the object
positioned. The object appears with a white highlighting. Objects
with point geometry are highlighted with a white box, line or area
objects are highlighted with small white circles at their individual
points. When the object is created, more editable fields will become
available in the window such as Position and Notes.
7. To change the object's parameters click in the respective fields.
8. To create the same object, or to add points to a line or area object,
move the cursor to another area of the screen and left click. Each
left click results in a new object of the selected type being created,
or points added to the line or area.
9. If the object type created was an area or a line the window includes
the option of starting a new area or line by clicking on the Start
New Area/Line button.
10. To create a new object with a manually
specified position, click on the Manually