01/02
4-91
8825/8830 Printer
REP 10.1
Repairs and Adjustments
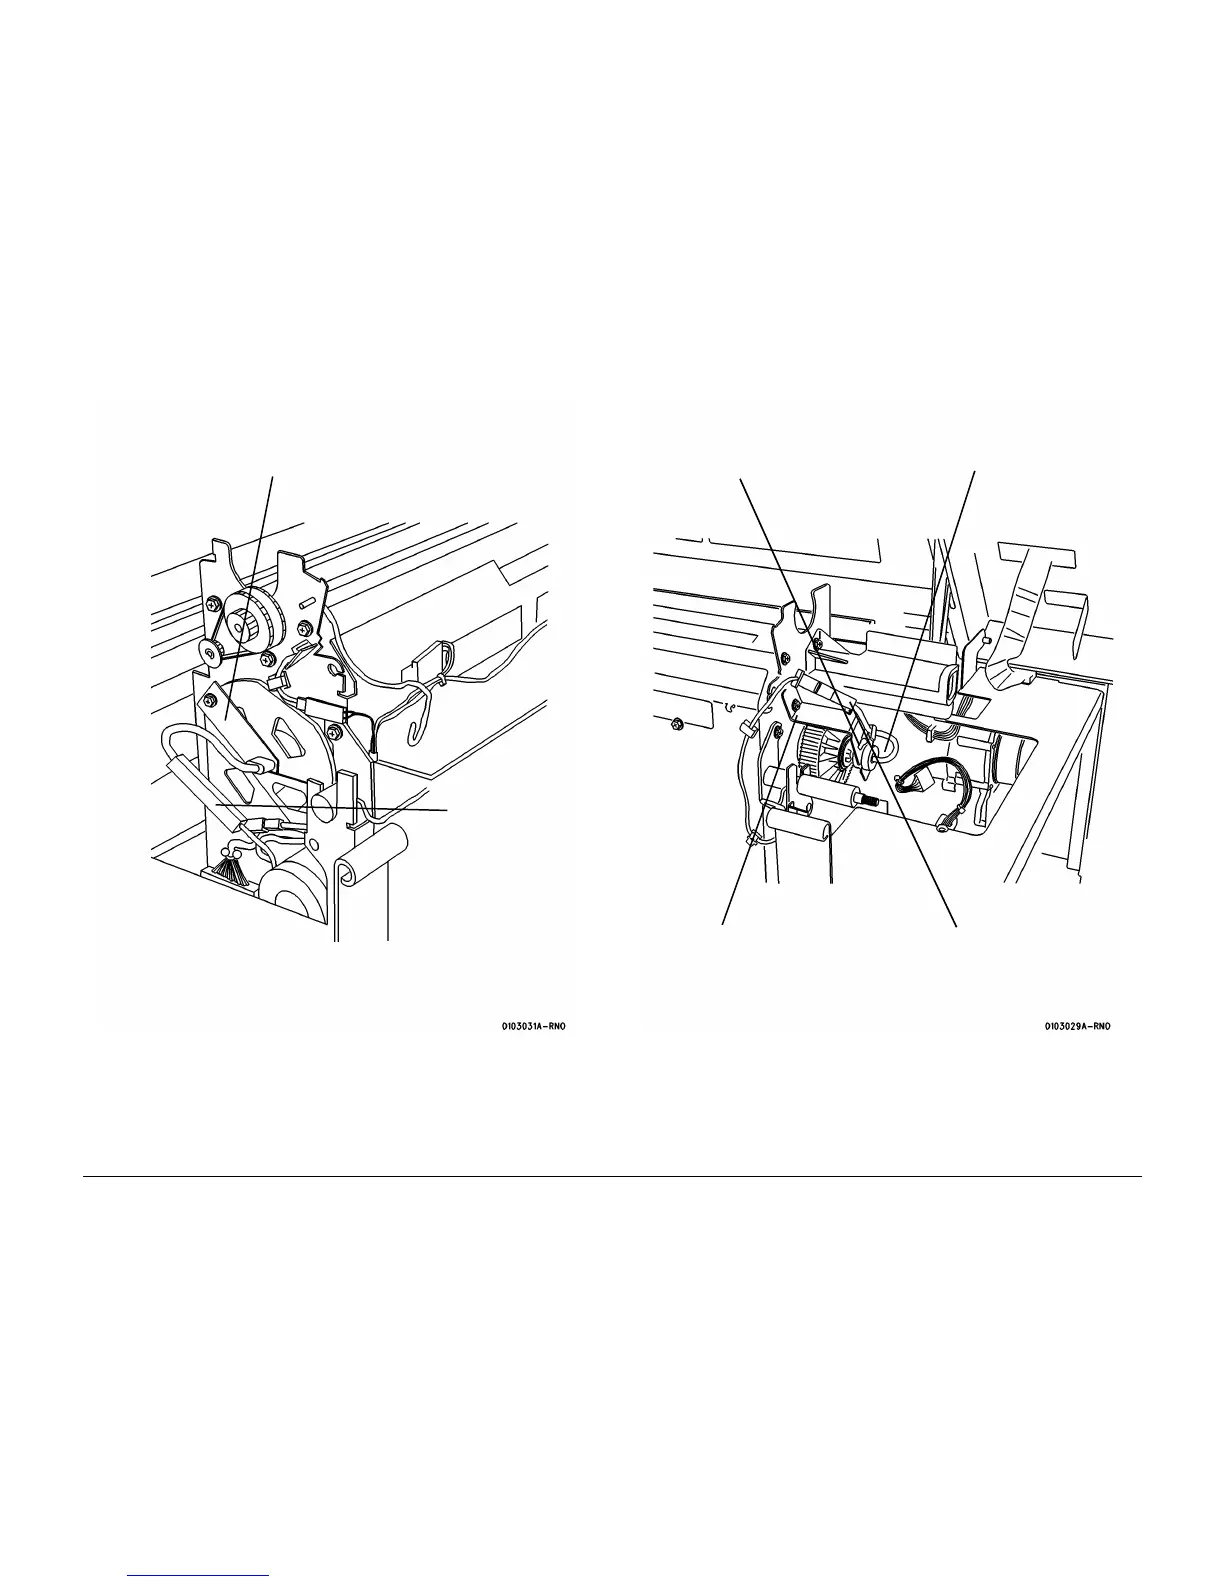
2. (Figure 5): Reinstall the bracket (Left side).
Figure 5 Reinstalling the Bracket (Left side)
3. (Figure 6): Reinstall the grommet and the bracket (Right side).
Figure 6 Reinstalling the Bracket (Right side)
4. Ensure that the Thermistor Pad is clean.
1
Connect the
connector
2
Reinstall the screws and
the bracket
2
Reinstall the bracket onto
the grommet
1
Reinstall the grommet
onto the Heat Rod wire
3
Reinstall the screw and
the bracket
4
Connect the connector
and put the wire into the
clamp

 Loading...


