Corrective Maintenance
Printhead Latch
194
14207L-001 A ZM400/ZM600 Maintenance Manual 8/9/07
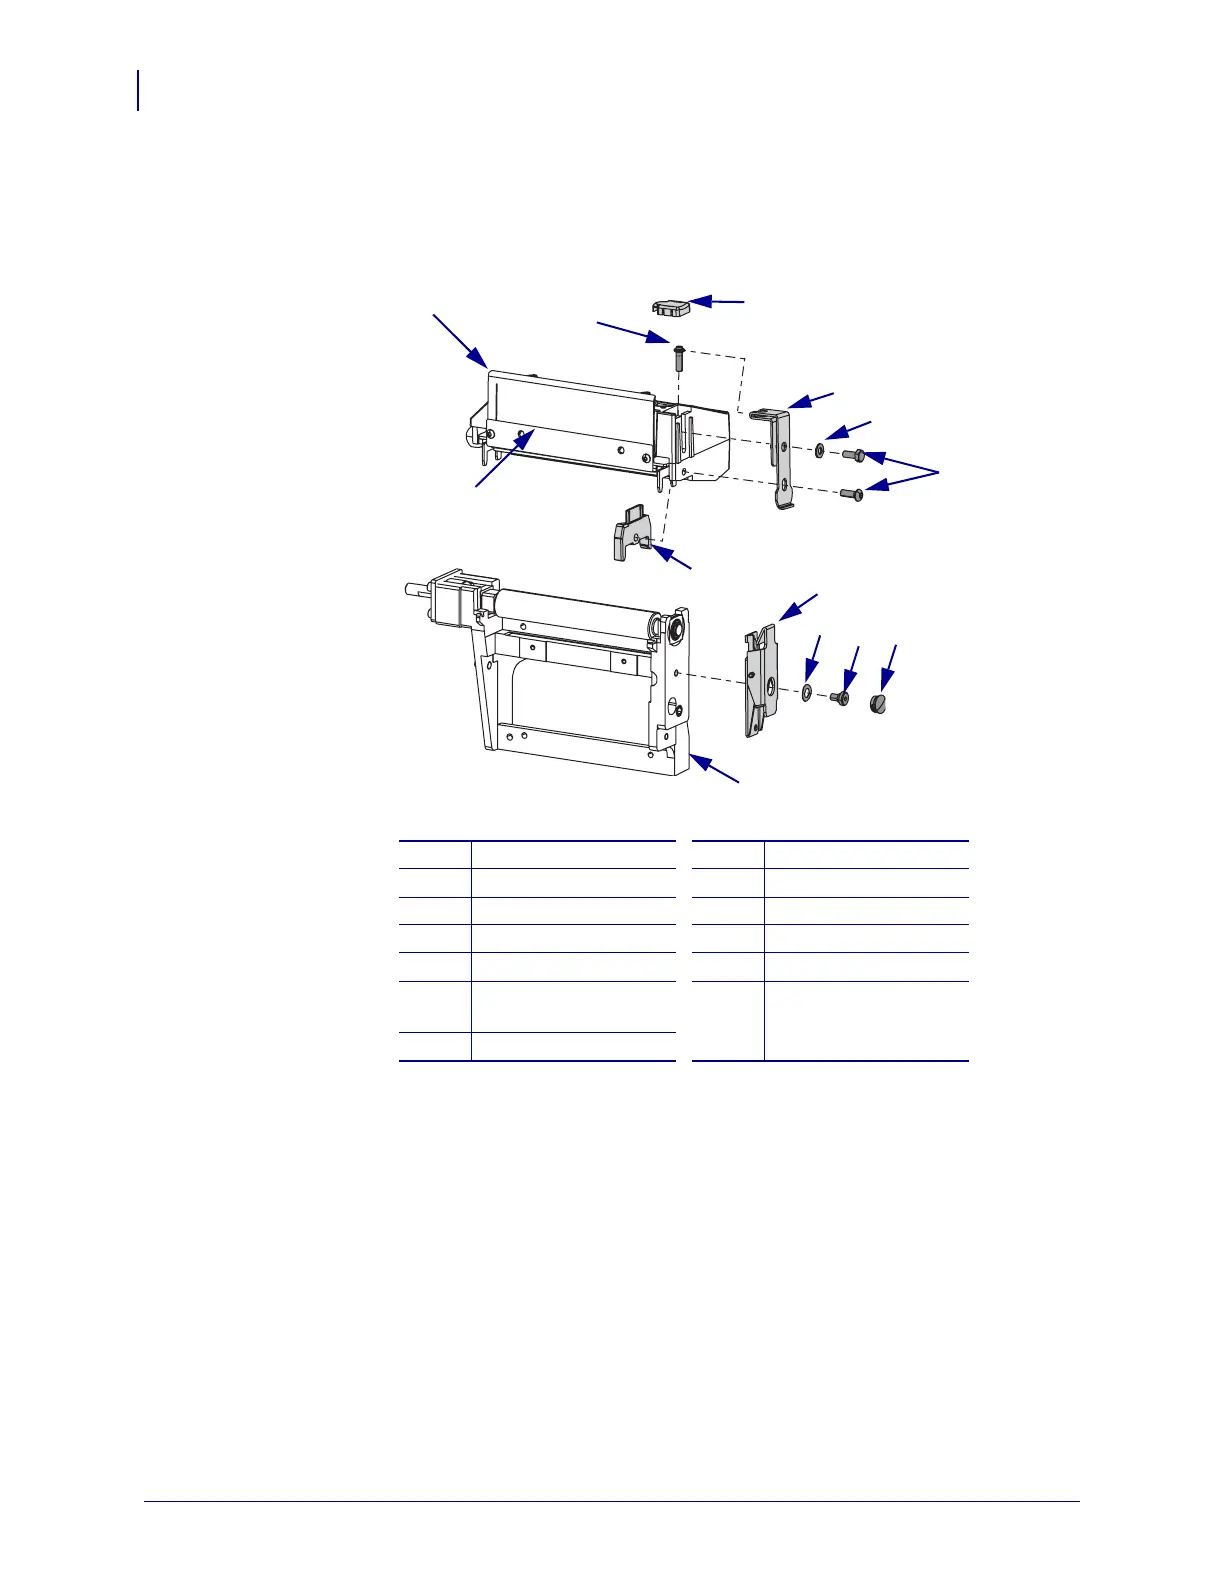
3. See Figure 67. Remove the strike plate cap by placing a small screwdriver under the front
edge and lifting upward.
Figure 67 • Remove the Latch Assembly
4. Remove the two screws and the washer securing the latch strike plate to the side of the
print mechanism.
5. Remove the adjustment screw from the print mechanism. You will have to pull out on the
bottom of the strike plate while removing the screw.
1
Print mechanism
8
Latch assembly
2
Adjustment screw
9
Wave washer
3
Strike plate cap
10
Shoulder screw
4
Strike plate
11
Plug
5
Washer
12
Platen housing
6
Strike plate mounting
screw (short)
13
Ribbon strip plate
7
Stabilizer
1
2
3
4
5
6
8
9
12
7
10
‘11
13
 Loading...