Remove and Replace the Touch Monitor 281
User Guide v 2.0 — March 2023 Maintenance
5. After the cable retaining bracket has been removed, carefully pull downward on the
Touchscreen (USB Type B) connector to disconnect it from its port and follow the same
step for the adjacent Power (Coaxial Jack 2.5mm) connector. Refer to callout 3 in
Figure 16-13.
6. On the back of the touch monitor, towards the right-hand side, find the cover for the
Video connector and remove the screw that secures it with a #4 Phillips screwdriver.
Refer to callout 4 in Figure 16-13.
7. After the cover has been removed, find the cable retaining bar and remove the screw
that secures it with the #4 screwdriver. Refer to callout 5 in Figure 16-13.
8. After the cable retaining bracket has been removed, carefully pull downward on the
Video (Mini DisplayPort) connector to disconnect it from its port. Refer to callout 6 in
Figure 16-13.
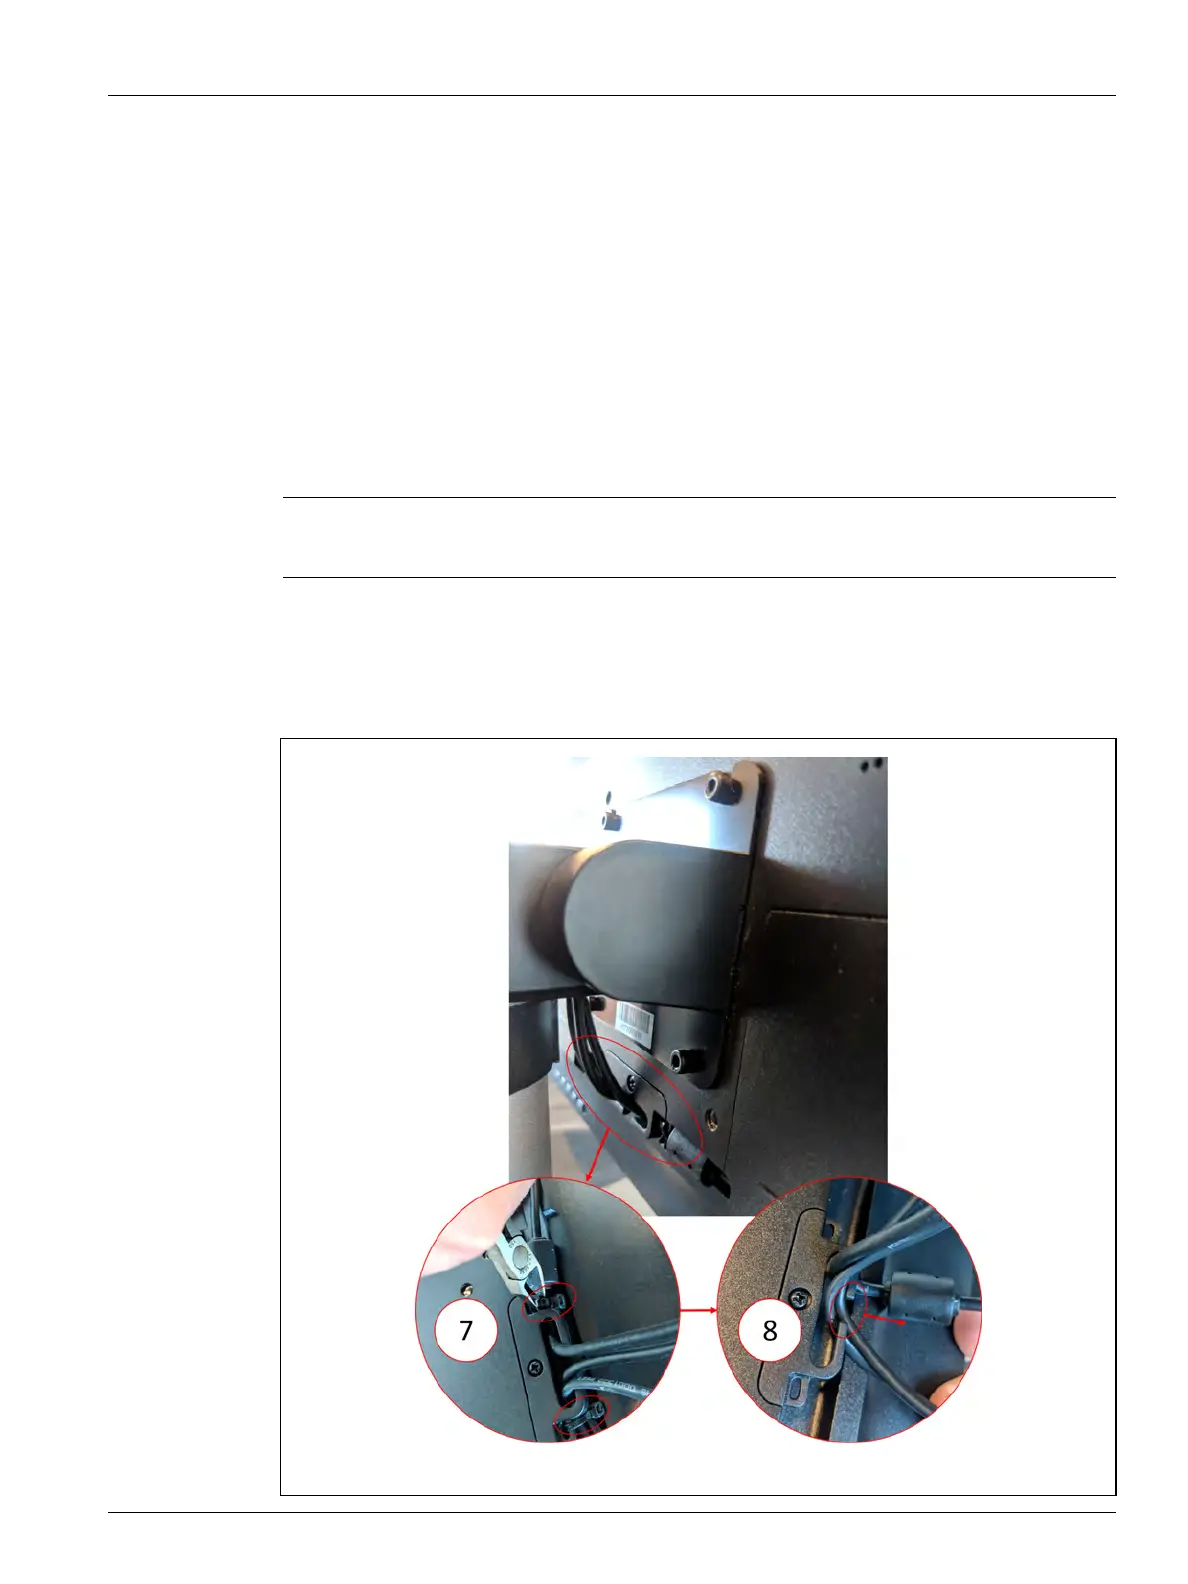
9. On the back of the touch monitor, towards the lower center area, find the “C” shaped
cable retaining clip and cut the cable ties to either side of it. Refer to callout 7 in
Figure 16-14.
10. Remove the cables from the retaining clip. Refer to callout 8 in Figure 16-14.
CAUTION!
Be careful not to damage the cables.
Figure 16-14 Retaining Clip and Cable Removal
 Loading...