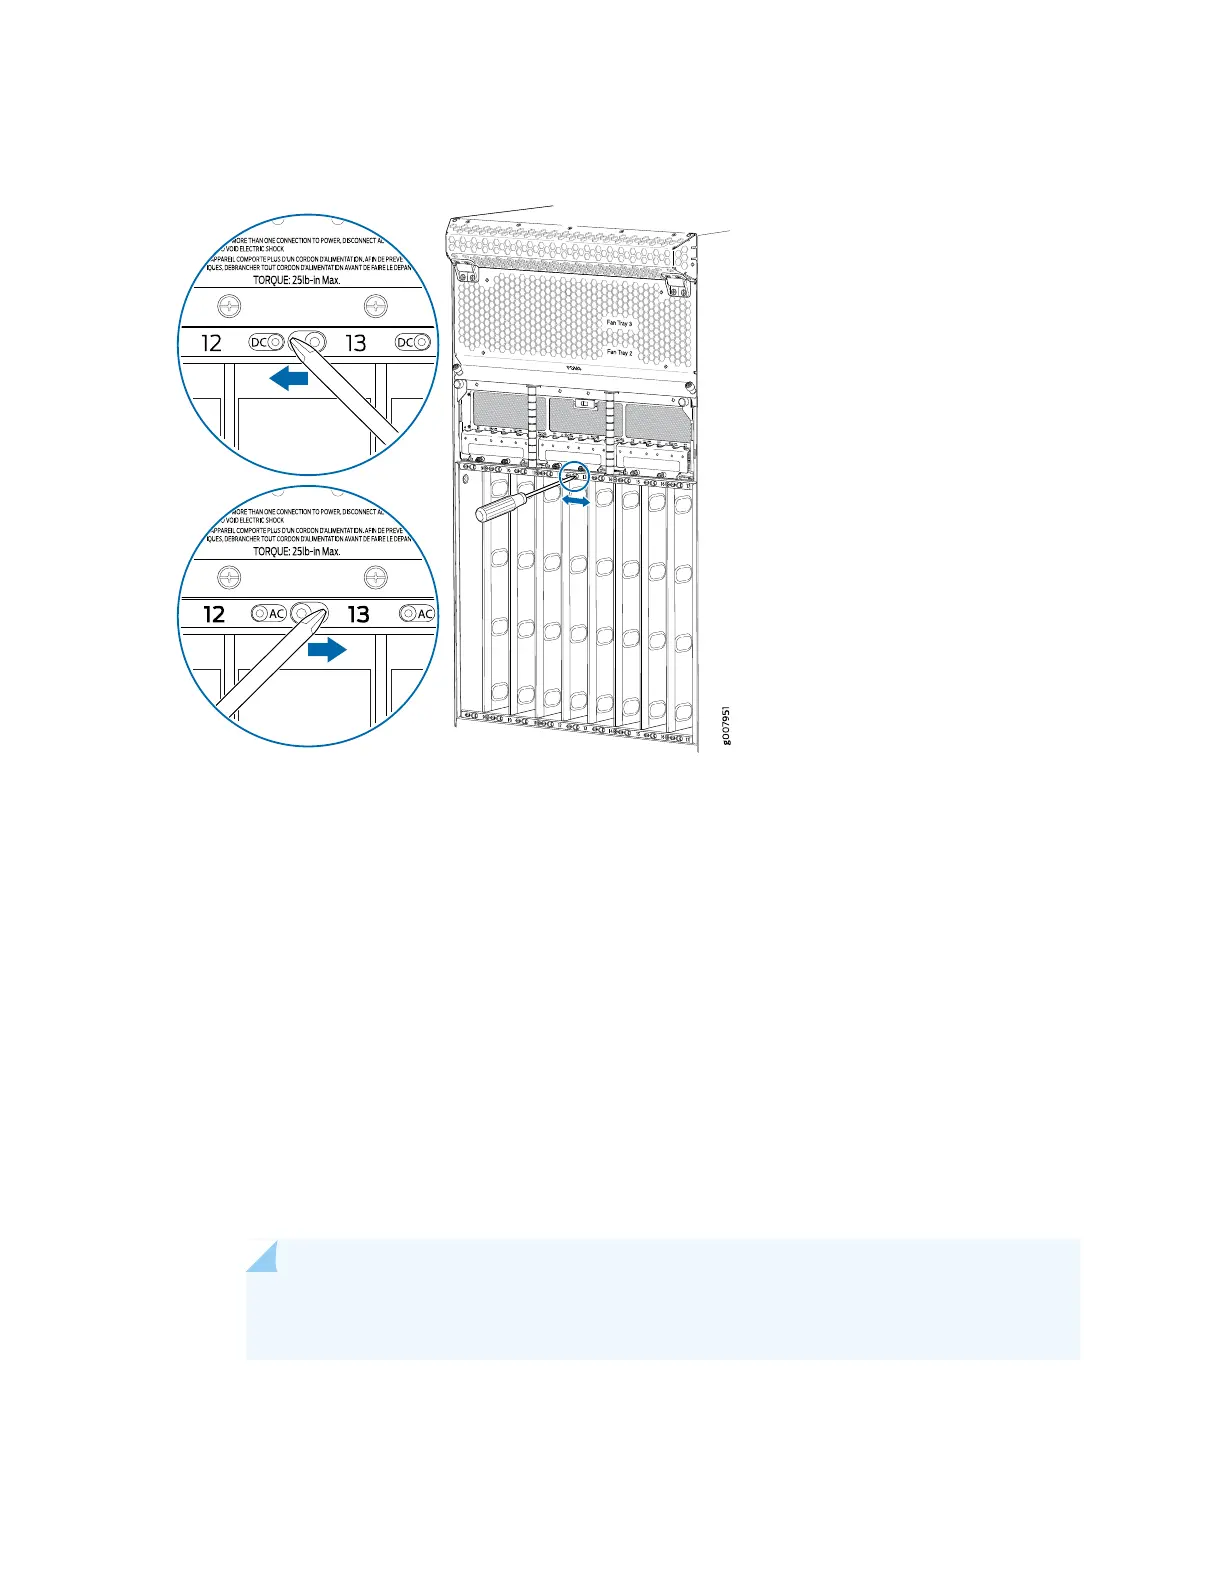
Figure 209: Changing the AC and DC Setting on an MX2000 Router
8. Reinstall the screws removed in step 6 and tighten them. Apply between 7 lb-in (0.8 Nm) and 9 lb-in.
(1.01 Nm) of torque to each screw.
9. Install the PSMs. See “Installing MX2000 Router DC Power Supply Modules (-48 V)” on page 309 or
“Installing MX2000 Router AC Power Supply Modules” on page 415.
10. Install the PDMs. Depending on your configuration, see:
•
Installing an MX2000 Router Three-Phase Wye AC Power Distribution Module on page 377
•
Installing an MX2000 Router Three-Phase Delta AC Power Distribution Module on page 365
•
Installing an MX2000 Single-Phase AC Power Distribution Module on page 385
•
Installing an MX2000 Router DC Power Distribution Module (-48 V) on page 394
11. Switch on the dedicated customer-site circuit breaker.
NOTE: The circuit breaker might bounce back to the off position if you move the breaker
too quickly.
435