2N8/2N7-3
1-2-26
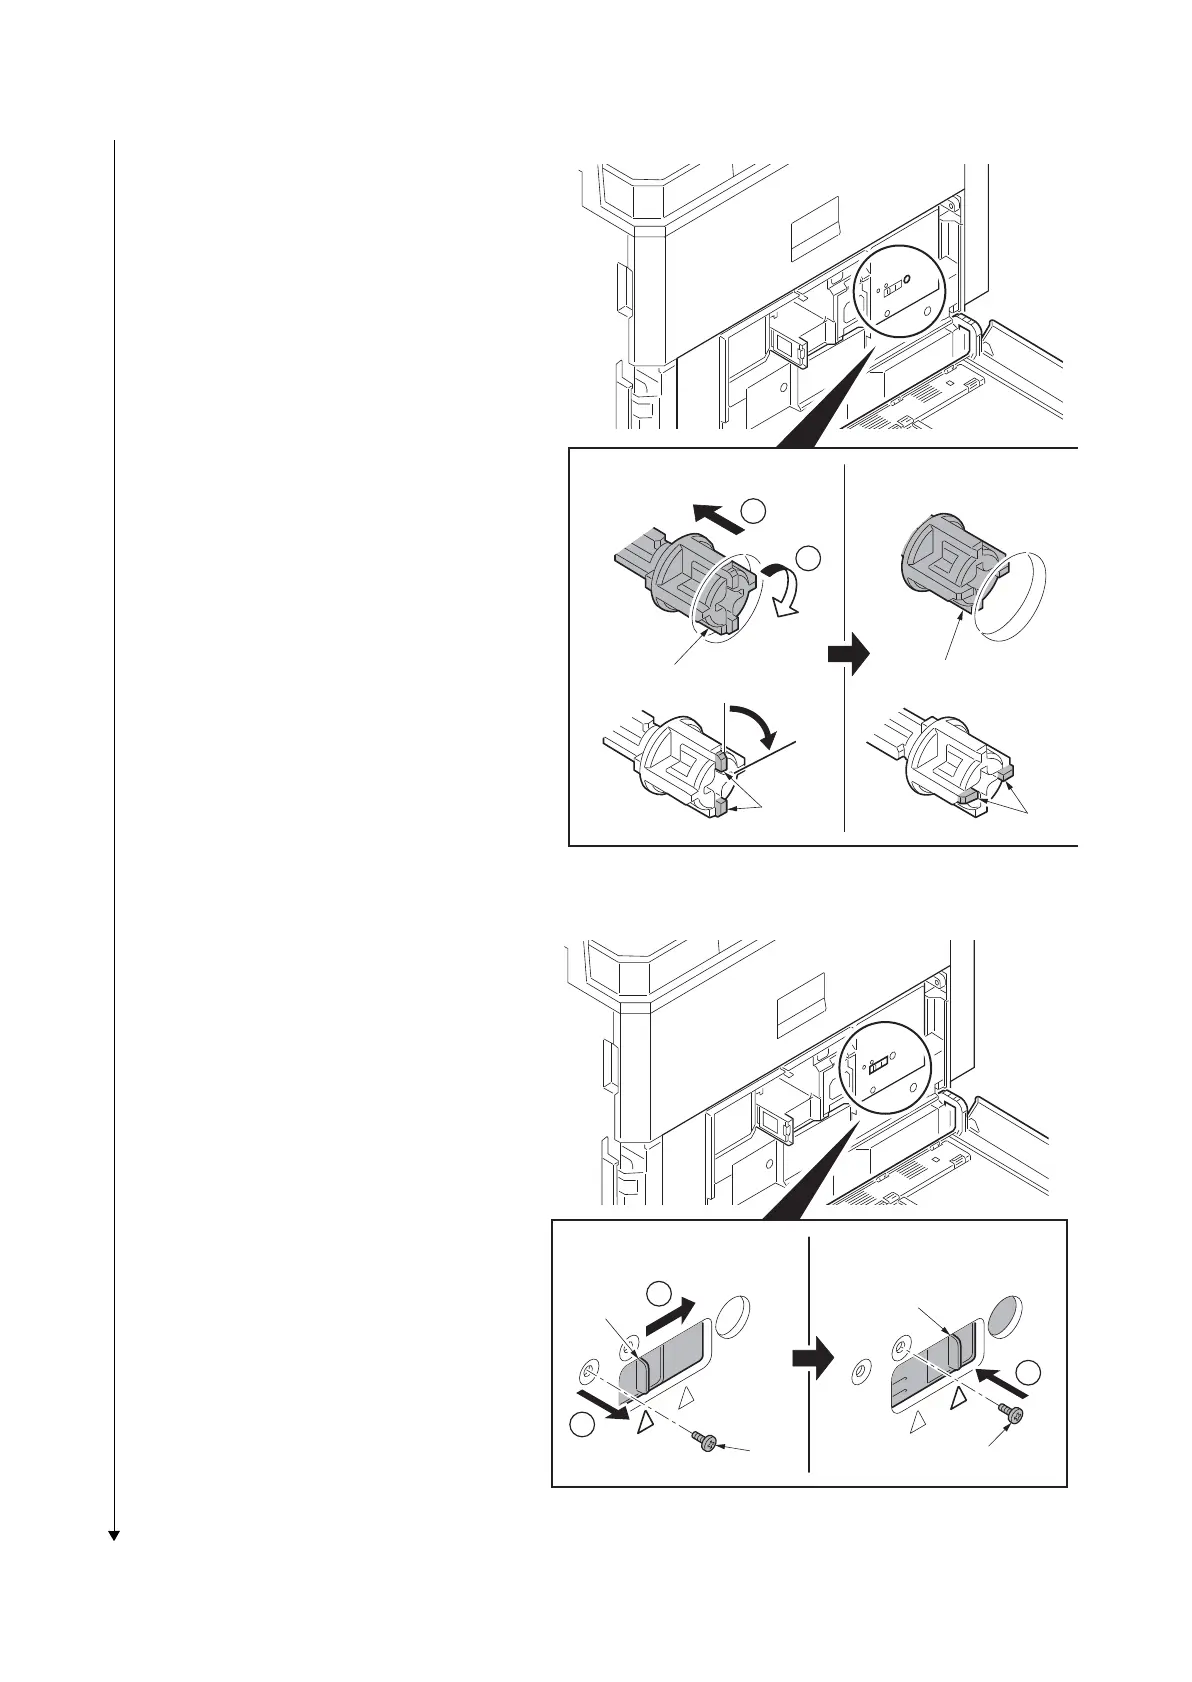
5. Press the fixing pin and rotate.
*: Fully insert the fixing pin with keeping the
protrusions vertical and rotate it by 90
degrees clockwise. Make sure that the
protrusions are then horizontal.
Figure 1-2-43
6. Remove a screw and slide the lever
right wards.
7. Fix the lever using the screw previously
removed at the right screw hole and
unlock the developer waste exit.
*: When the device is shipped again or
removed, use the reverse procedure to
lock in the developer waste exit. Failure
to observe this caution could result in
deteriorated print quality and/or C call
(C7460).
8. Close the front middle cover and fix the
cover using the two screws.
9. Close the paper conveying unit.
Figure 1-2-44
1
2
90q
[Locked] [Released]
Fixing pin
Fixing pin
Protrusions
Protrusions
1
2
3
[Locked] [Released]
Lever
Lever
Screw
Screw
 Loading...