Repair information 4-3
7525-63x
Front cover assembly removal
1. Remove the media tray.
2. Open the front cover.
3. Remove the front middle cover (optional). See “Front middle cover removal” on page 4-4.
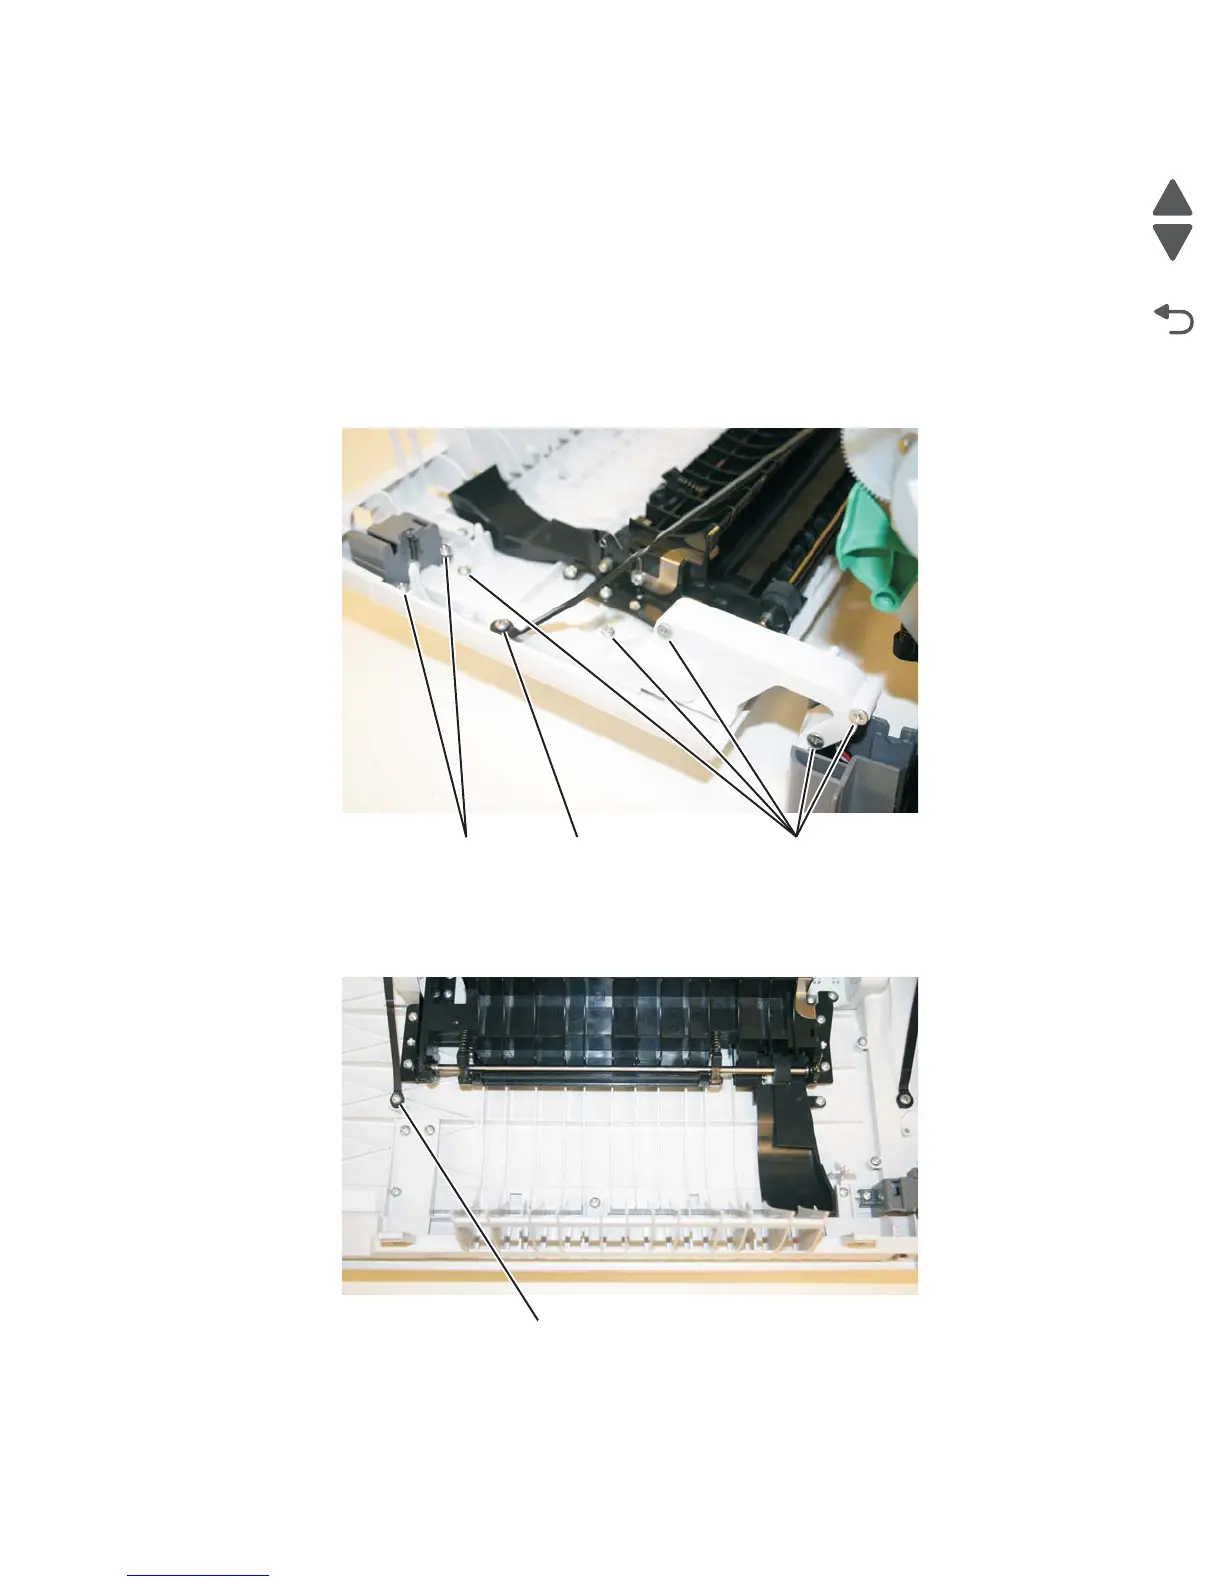
4. Remove the five screws (A) from the cable cover.
5. Remove the cable cover.
6. Remove the screw (B) securing the right restraining strap to the front cover.
Note: Support the door with one hand after removing the screw holding the restraining strap. This is the
longest of the eight screws. Two flat-headed Phillips screws are used in the door hinge.
7. Remove the two screws (C) securing the interlock and cable.
8. Route the cable through the right hinge.
Note: Make a note of the interlock sensor cable routing through the right hinge and front door.
9. Remove screw (D) securing the left restraining strap to the front door.
10. Lower the front cover to align the flats on the hinges, and remove the front cover.

 Loading...


