Repair information 4-63
7525-63x
Imaging unit (IU) removal
The imaging unit is customer replaceable unit and not a FRU.
Note: The imaging unit contains:
• Photoconductor unit
• Developer units
To remove only the photoconductor, remove the entire imaging unit, remove the developer units, place the
original developer units in the new photoconductor, and reinstall the imaging unit. When you replace the imaging
kit, you are replacing both the photoconductor and the developer units.
1. Open the front cover.
2. Lift the scanner unit by sliding the latch to the left.
3. Remove the right cover assembly. See “Right cover removal” on page 4-7.
4. Remove the waste toner bottle. See “Waste toner bottle removal” on page 4-73.
5. Remove the toner cartridges.
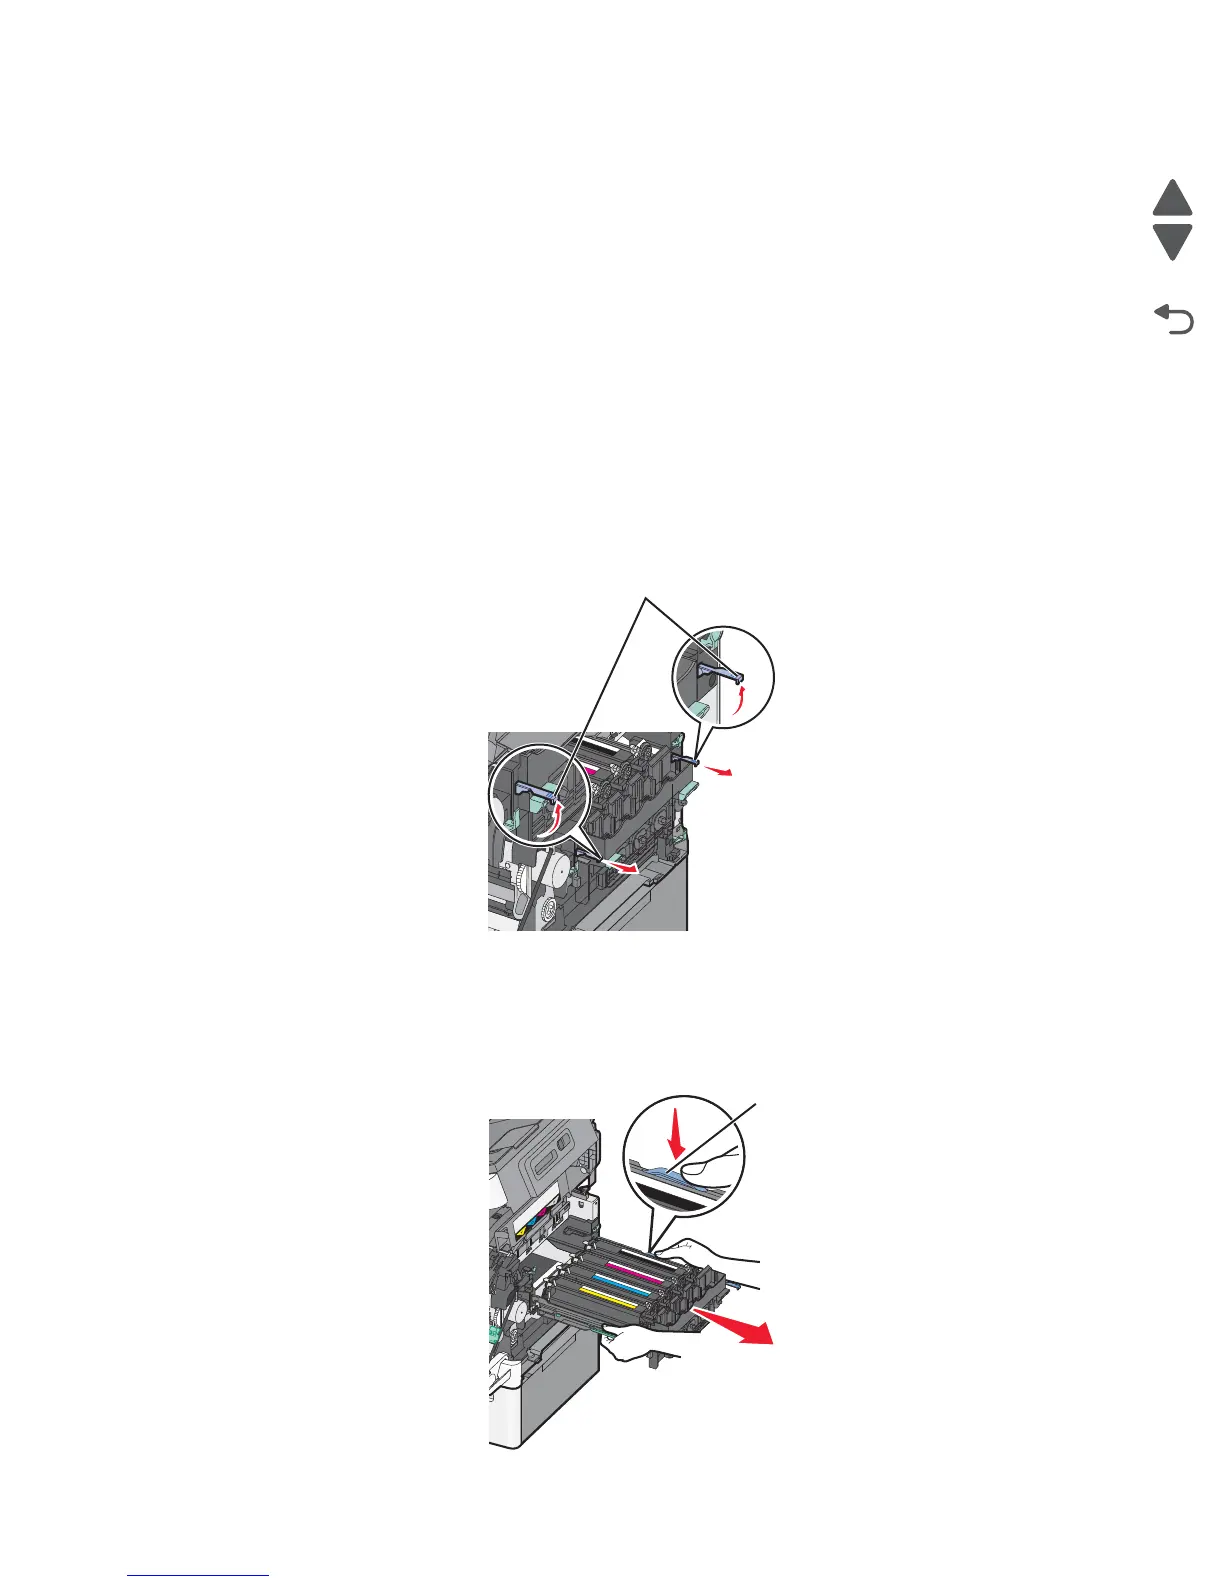
6. Lift the two latches (A) to unlock the imaging unit. Pull the two latches until the imaging unit meets
resistance.
7. Press and hold the handles (B), and pull the imaging unit straight out.
Warning: When pulling the imaging unit out, grab only the release levers (B). Do not touch the
photoconductors at the bottom of the imaging unit.
Note: Store the imaging unit in a dark place, or cover it with a blanket.

 Loading...


