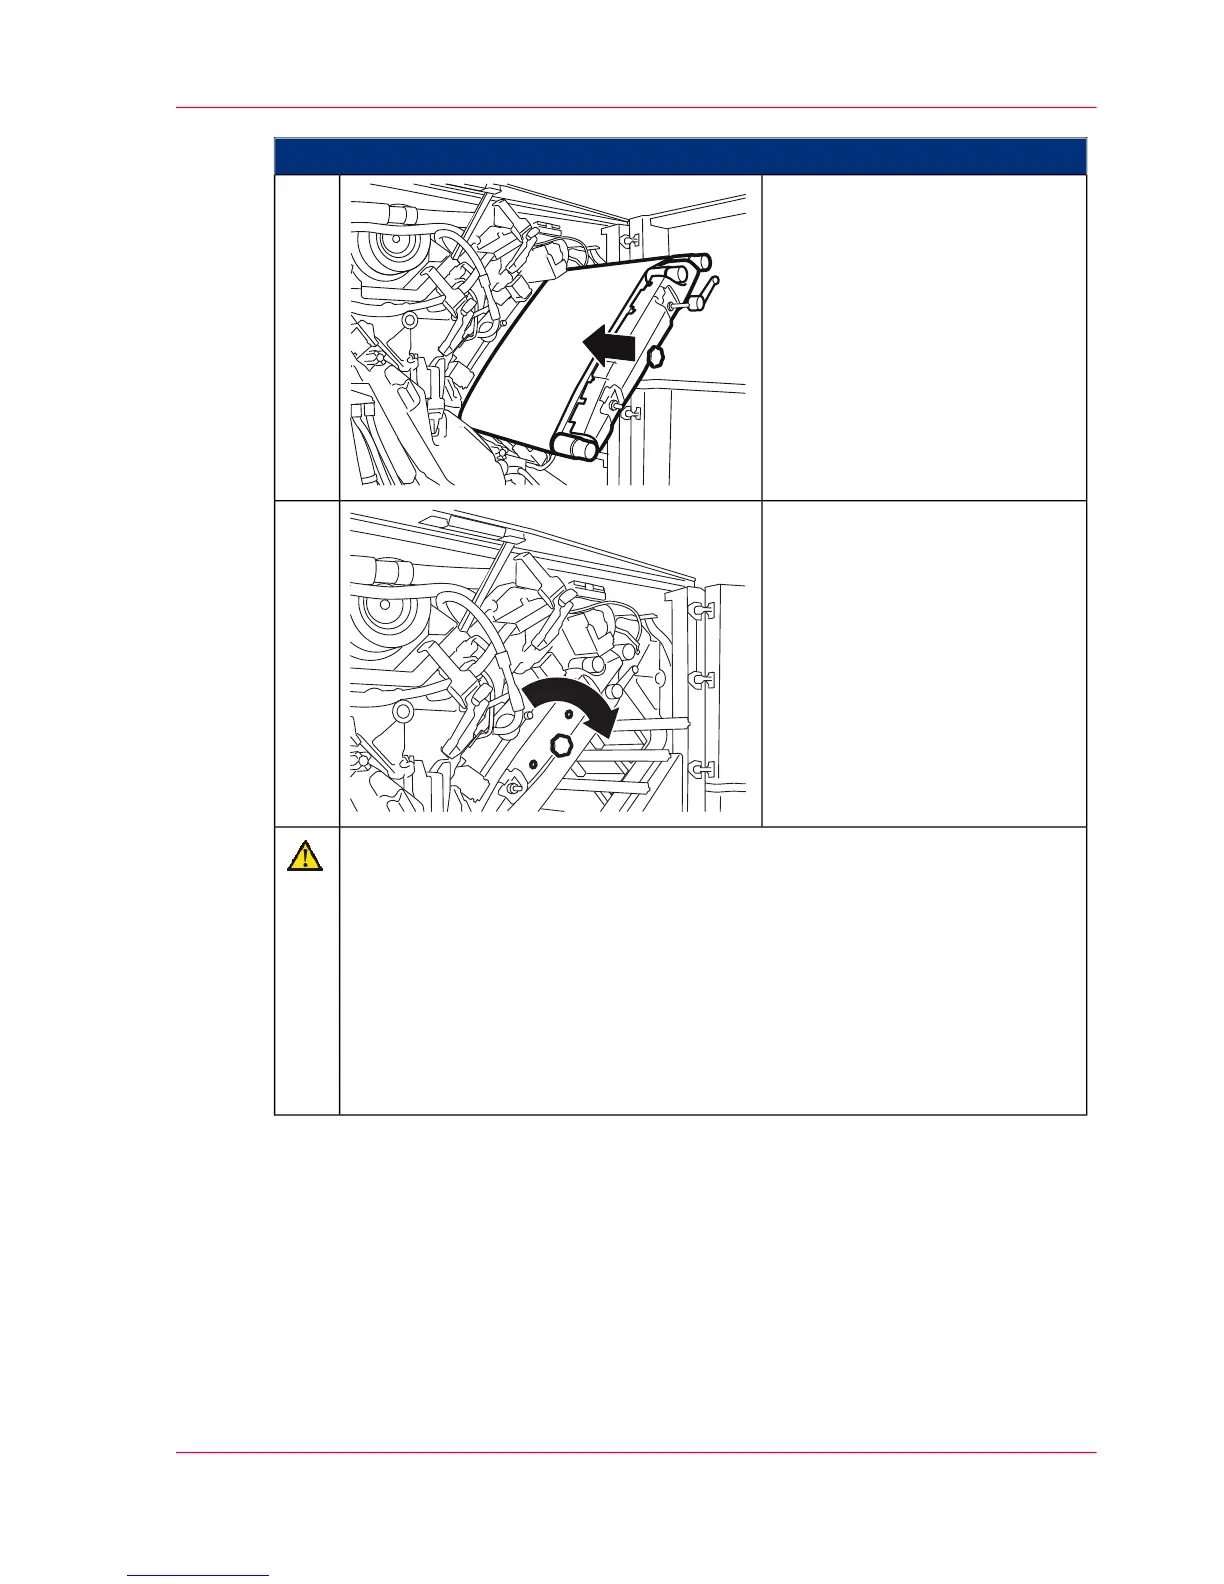
Proceed as follows:
Carefully push the photoconduc-
tor unit against the catch point
and push it into the printing
system.
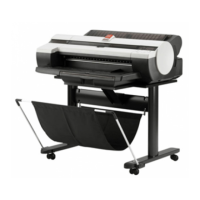
10.
Turn the handle clockwise to
tighten and lock the photocon-
ductor unit.
When the photoconductor unit
is locked, both color displays
near the handle change from
green to red.
11.
Caution
The movement of the photoconductor belt is checked by the device control.
If the test run is not successful, the photoconductor belt was not pushed up to
the mark. In this case, again:
■
Release the locking device of the photoconductor unit
■
Pull out the photoconductor unit
■
Release the belt tensioner
■
Wearing gloves, push the photoconductor belt to the mark and repeat the
work steps from step 8 onwards.
Chapter 9 - Replacing Expendables 361
Insert a photoconductor belt in the upper print unit