6 ECG, Arrhythmia, ST and QT Monitoring
135
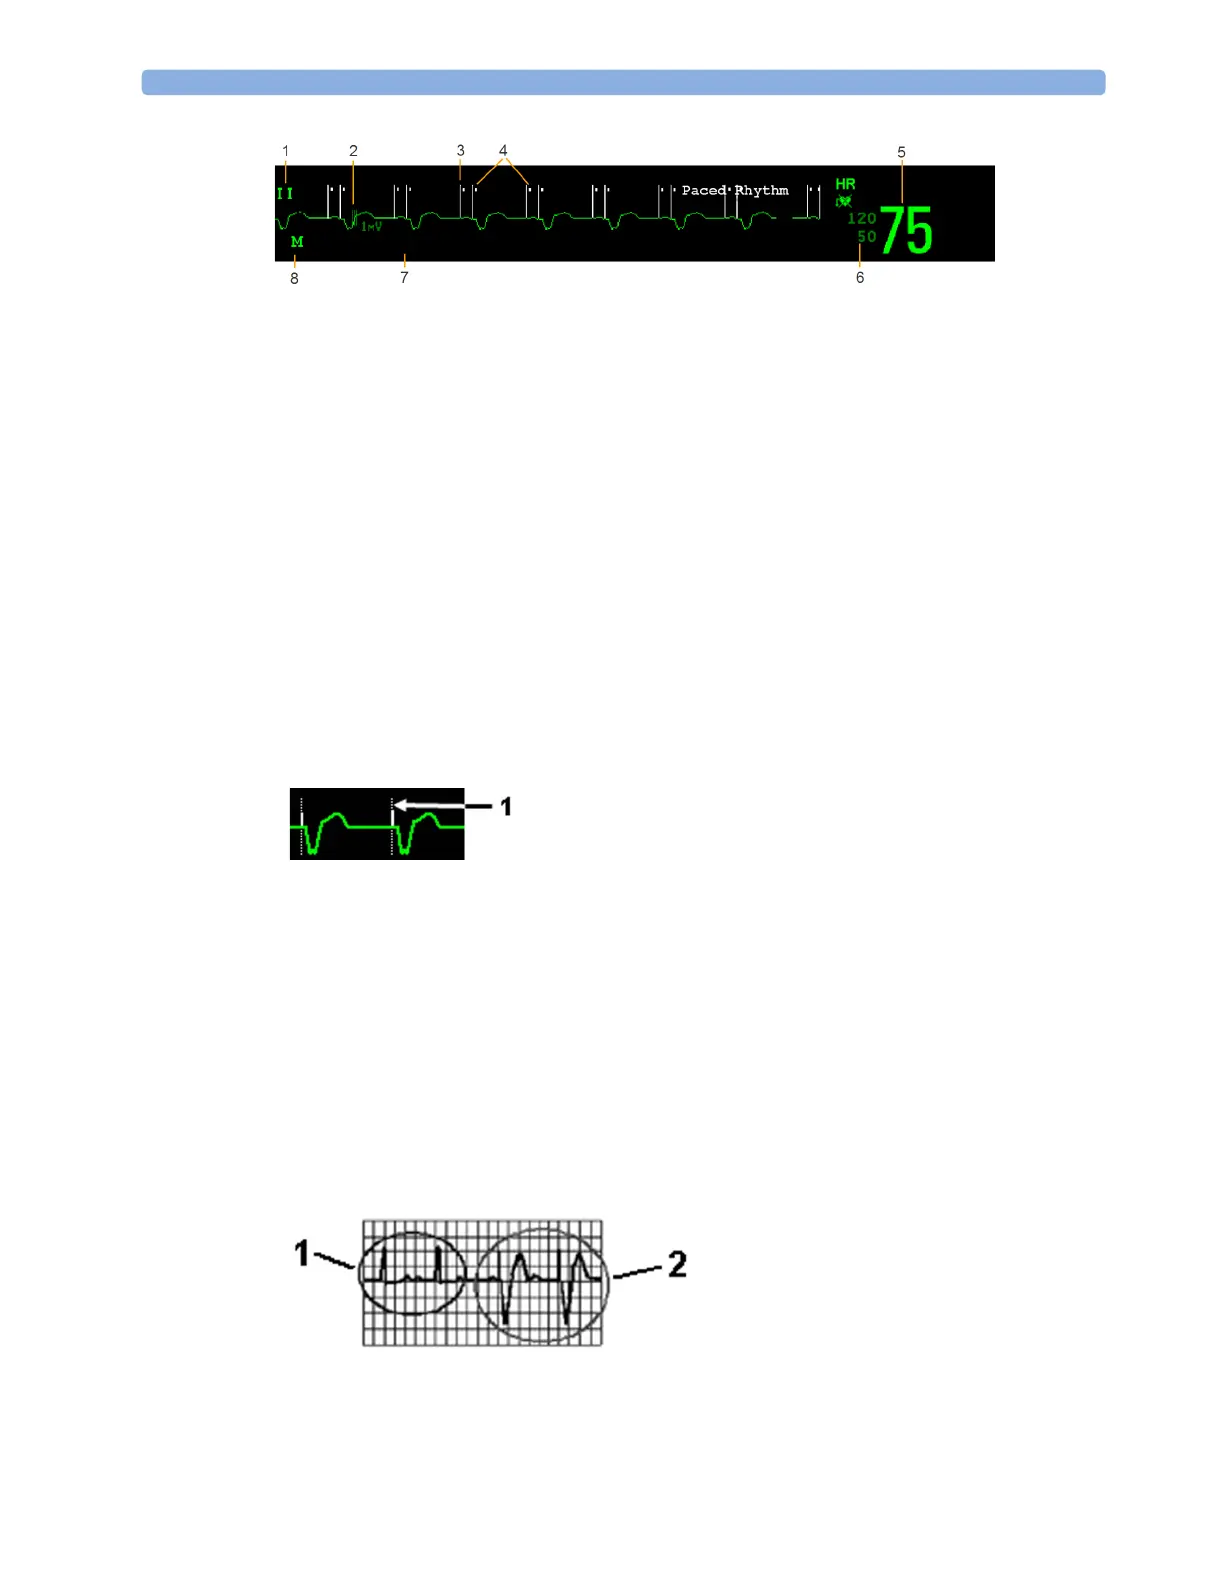
1
Lead label of the displayed wave
2 1 mV calibration bar
3 Pacer spikes
4 Pace pulse markers
5 Current heart rate
6 Current heart rate alarm limits and paced mode symbol
7 EASI lead placement label (located here when present)
8 ECG Filter label
ECG HR numeric: This is the heart rate derived from the monitored ECG.
Pace pulse markers: These are shown if the
Paced Mode status has been set to On, the pacer spikes
are not configured to have a fixed size, and the patient has a paced signal.
Pacer Spikes: The pacer spikes are shown in white, unless the ECG wave is white, then they will be
green. If the pacer spikes have been configured to have a fixed size, they will be displayed in the
background as a dotted line.
Defibrillator synchronization marks: If an HP/Agilent/Philips defibrillator is connected, or the 2nd
Sync Out channel is configured to
ECG SyncPuls and a sync cable is plugged in, the synchronization
marks (vertical lines on the ECG wave) are shown on the ECG wave. The synchronization marks will
be shown in yellow, unless the ECG wave is yellow, then they will be green.
ST numerics in ECG wave: ST numerics can be configured to show underneath the ECG wave on
the left side.
Monitoring Paced Patients
An ECG optimized for monitoring a paced patient should look like this:
You should choose a lead as primary or secondary lead that has these characteristics:
1 Pacer spikes configured to have a fixed size
1 Normal Beats
2 Pace Pulses/Pace Beats