26 Event Surveillance
338
Setting Triggers for NER and Basic Event Surveillance
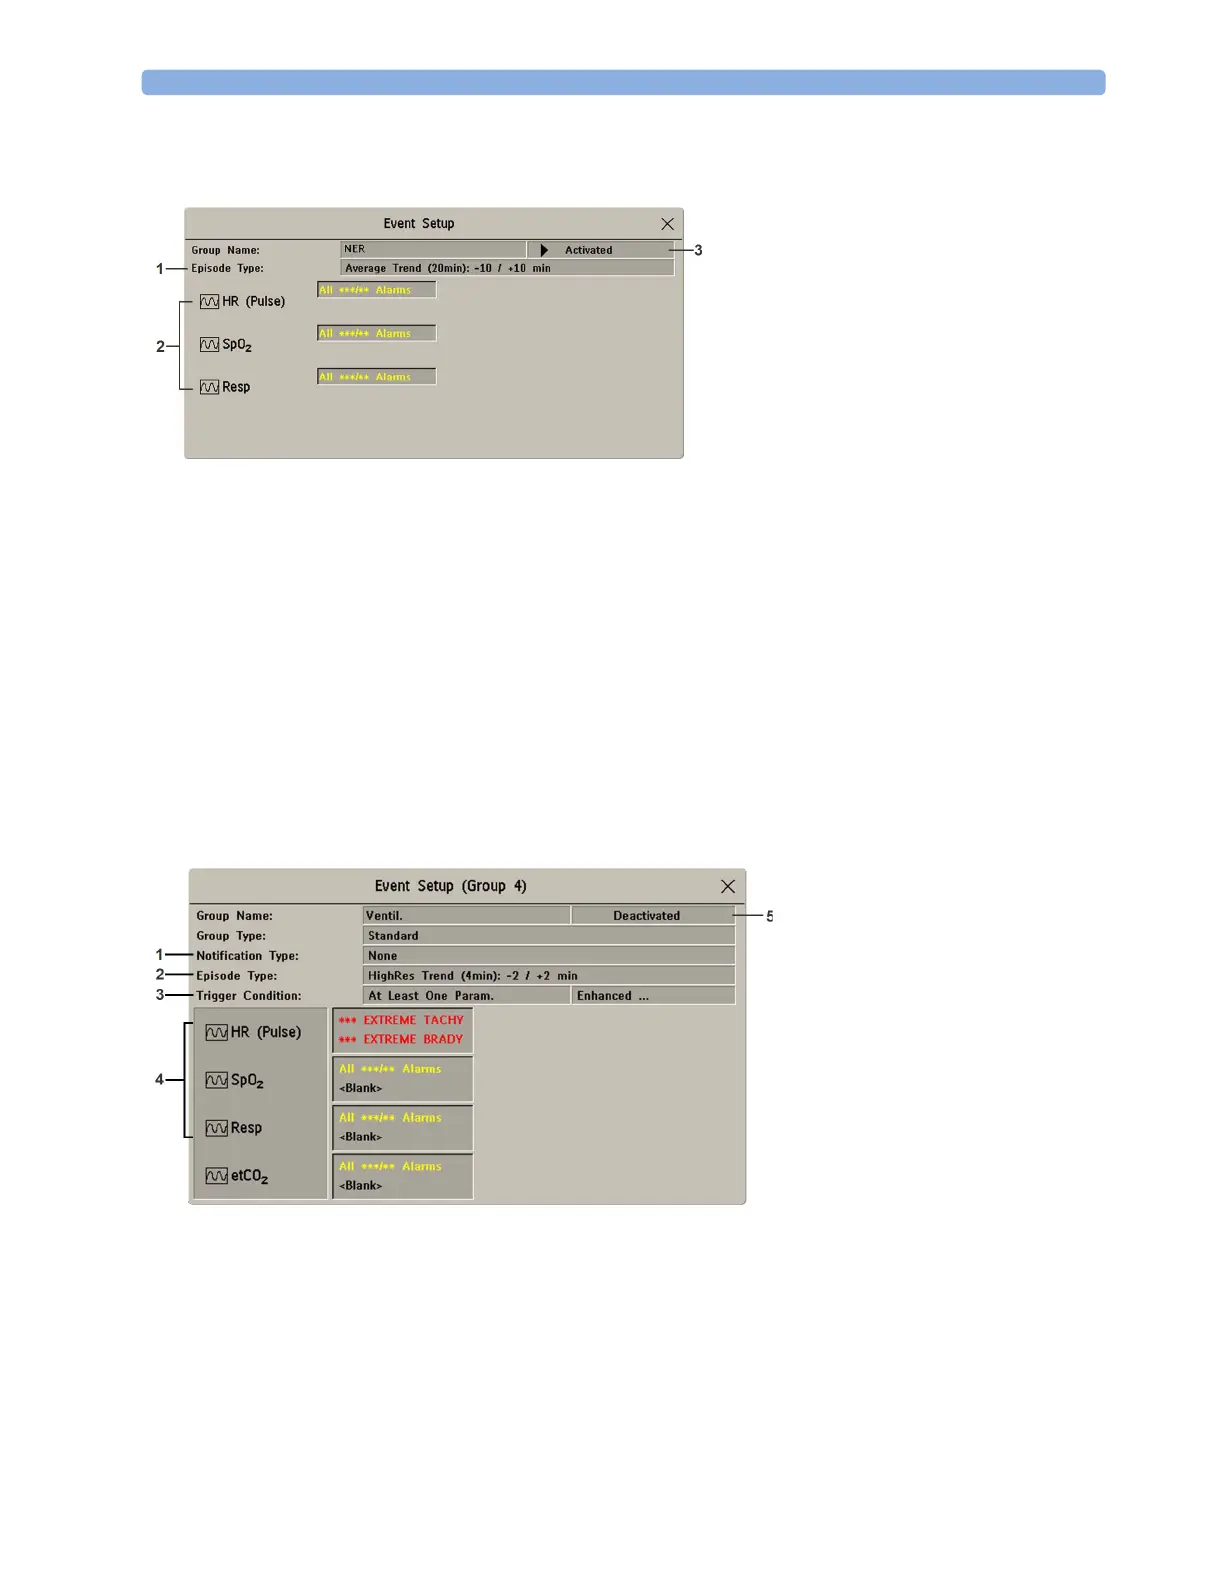
1 Select Main Setup then Event Surveill. followed by Setup Events to enter the Event Setup
window.
2 Select the name of the current episode type to set the episode pre/post time.
3 Set the event trigger for each measurement. Select each trigger name and select, if available, either
an alarm trigger, or a user-defined trigger from the pop-up trigger list. If you select a user-defined
trigger, set the required threshold level and delay time.
4 Set the trigger status to Activated to start event triggering. If the status is Deactivated event
surveillance is effectively switched off.
5 Select Confirm to confirm your changes.
Setting Triggers and Notification for Advanced Event Surveillance
1 Select the group name to enter the setup window for that group.
2 Set the trigger status to Activated, to have this event group trigger events, or Deactivated.
3 Set the episode type.
Select the name of the current episode type and select an episode type from the pop-up list. The
pre/post episode time for the selected episode type is displayed.
1 The Episode Type determines
the pre and post time.
2 Measurements used as event
triggers.
3 Current status: Activated or
Deactivated
1 Notification Type shows the
currently configured notification
2 Episode Type determines the pre
and post time
3 Trigger Condition shows the
currently configured trigger
requirements
4 Measurements used as event
triggers
5 Current status: Activated or
Deactivated