Section09PROPULSION
Subsection 01 (JET PUMP)
F01J1MA
1
2
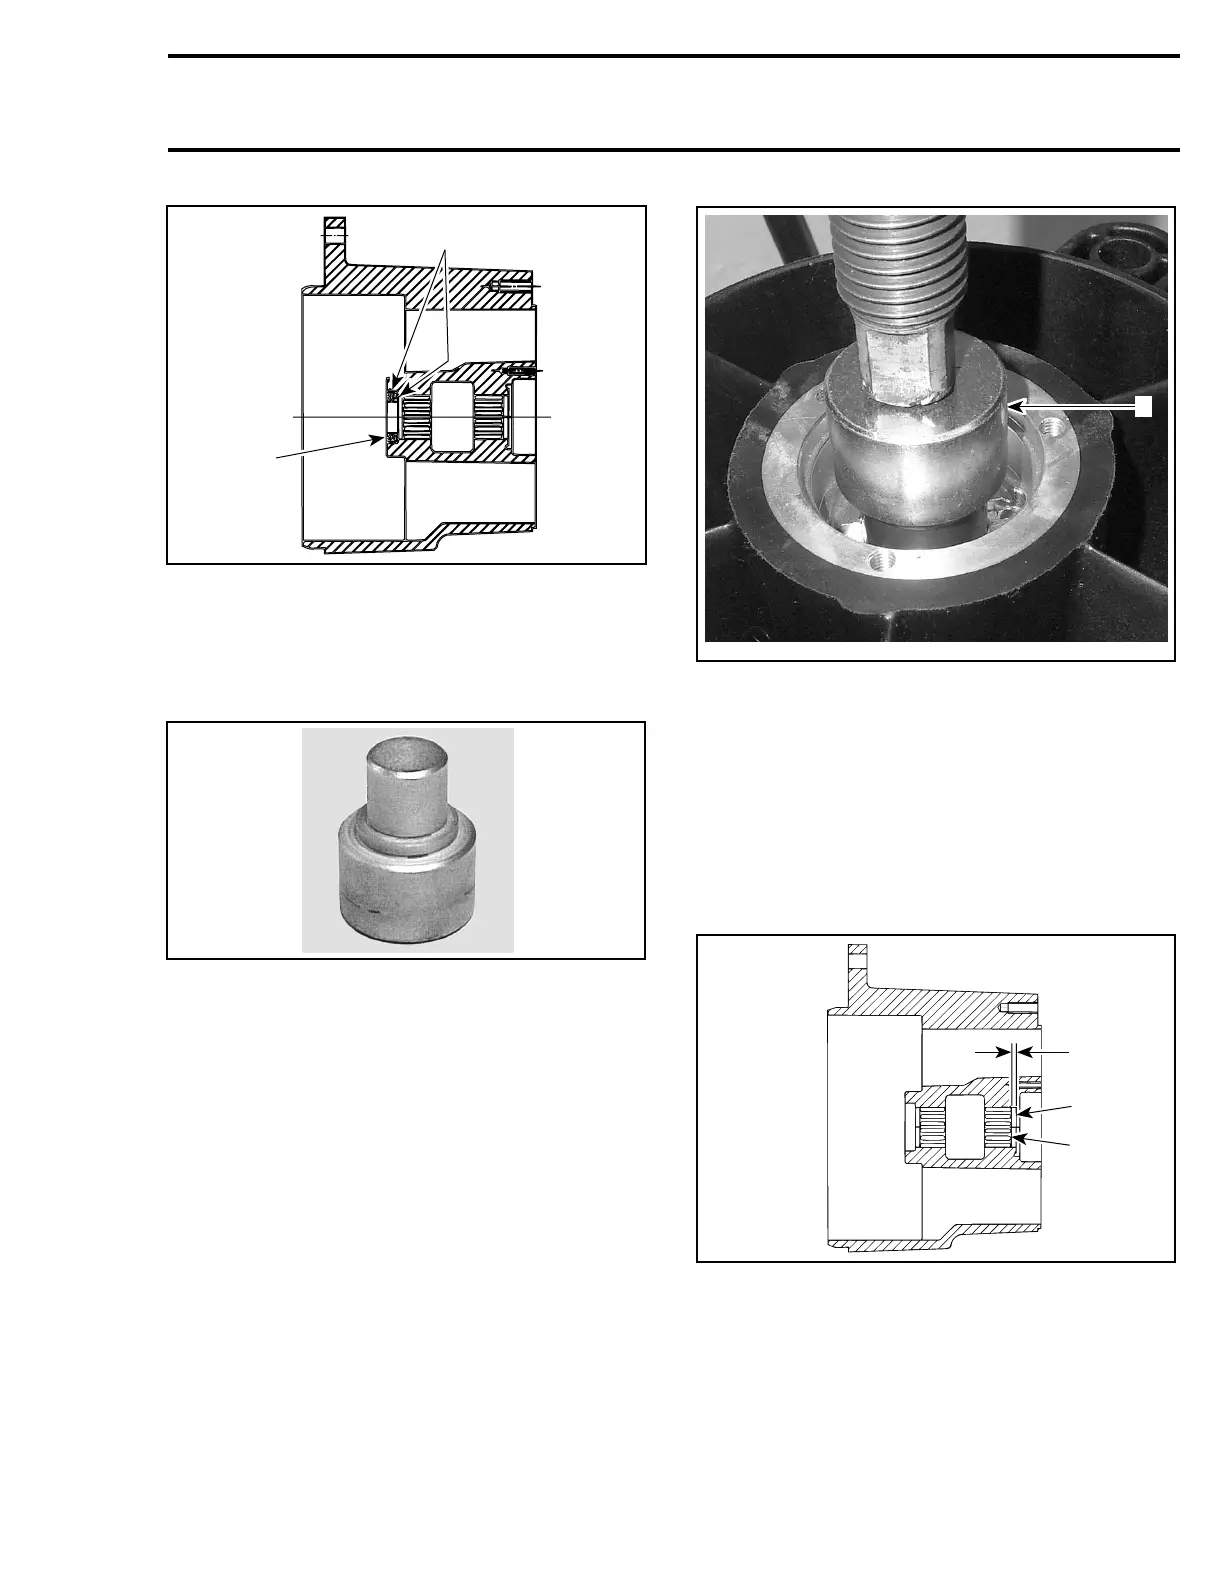
1. Loctite 518 all around and behind
2. Spring of seal lip this side
Venturi Side
For the bearing no. 17 on venturi side use the inner
bearing installer tool (P/N 529 035 609).
F08B01A
CAUTION: Failure to use this tool will cause
major damage to the pump.
Stamped end of bearings (showing identification
markings) must be located toward outside of
housing.
Properly insert bearing on tool. Using an arbor
press only, push tool until tool flange contacts
housing.
CAUTION: Never hammer the bearing into its
housing.
F16J09A
1
1. Press on tool until it stops
CAUTION: These tools have been designed
to properly position bearing, thus provid-
ing space for lubrication purposes. The tool
flanges allow this. If a different pusher type
is being used, components must be properly
positioned as follows.
Bearingonventurisidemustbe2to4mm(.080-
.157 in) inside reservoir measured from thrust
washer seat. Refer to following illustration.
F01J5YB
A
1
2
1. Thrust washer seat
2. Stamped end of bearing
A. 2-3mm(.080-.118in)
Thrust Washer
Position jet pump housing with the stator vanes
on top.
Insert thrust washer no. 14 in the stator seat.
smr2005-062 245