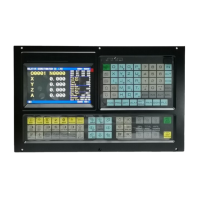
TOMATECH AUTOMATION
No. X Z T R
00 0 0 0 0
01 16.380 -24.562 0 0
In machining, the actual external diameter measured of workpiece is Ф55.561, so the
offset
value of No.01 can be altered as follows table:
No. X Z T R
00 0 0 0 0
01 16.201 -24.562 0 0
Note: To backup and restore the tool offset values, the relevant operations may be performed on
PC via
communication.
7.5.4 Clearing the offset values
1) Move the cursor to the offset number to be cleared;
2) When the offset value of X axis is to be cleared, is pressed, then is done, the
offset will be cleared. Other axis clearing is done like that;
Note: The offset clearing in the tool offset page doesn’t mean that the system in under the state
with no
offsetting, if the system is needed to be in this state, the offsetting is required to be executed,
which is
shown as follows:
Execute a positioning command in T0100 state or perform a machine zero return. After the
offsetting is
finished, the “□□”in “T○○□□” shown at the right bottom of the screen will not be backlighted.
7.5.5 Setting and altering the tool wear
To prevent the mistaken operation of the setting and alteration of the offset value (decimal
point
missed, mislocated etc.), which may cause the tool collision by oversize offset value, for
the visual
judgement for the tool wear by the operator, the TOOL WEAR window is set in
thisTAC-1002T
system. When the offset value is needed to be altered due to the inaccurate dimensions
by the tool
wear, it may set or alter the wear value. The wear input range is defined by the data
parameter
No.140, and they are saved even at power down.
The setting and alteration methods for the tool wear are approximately identical to that of
the tool
offset, and the wear value is input by U(X axis), W(Z axis), V(Y axis).
16.380-(55.561-55.382)
254

 Loading...