01/02
4-85
8825/8830 Printer
REP 9.20
Repairs and Adjustments
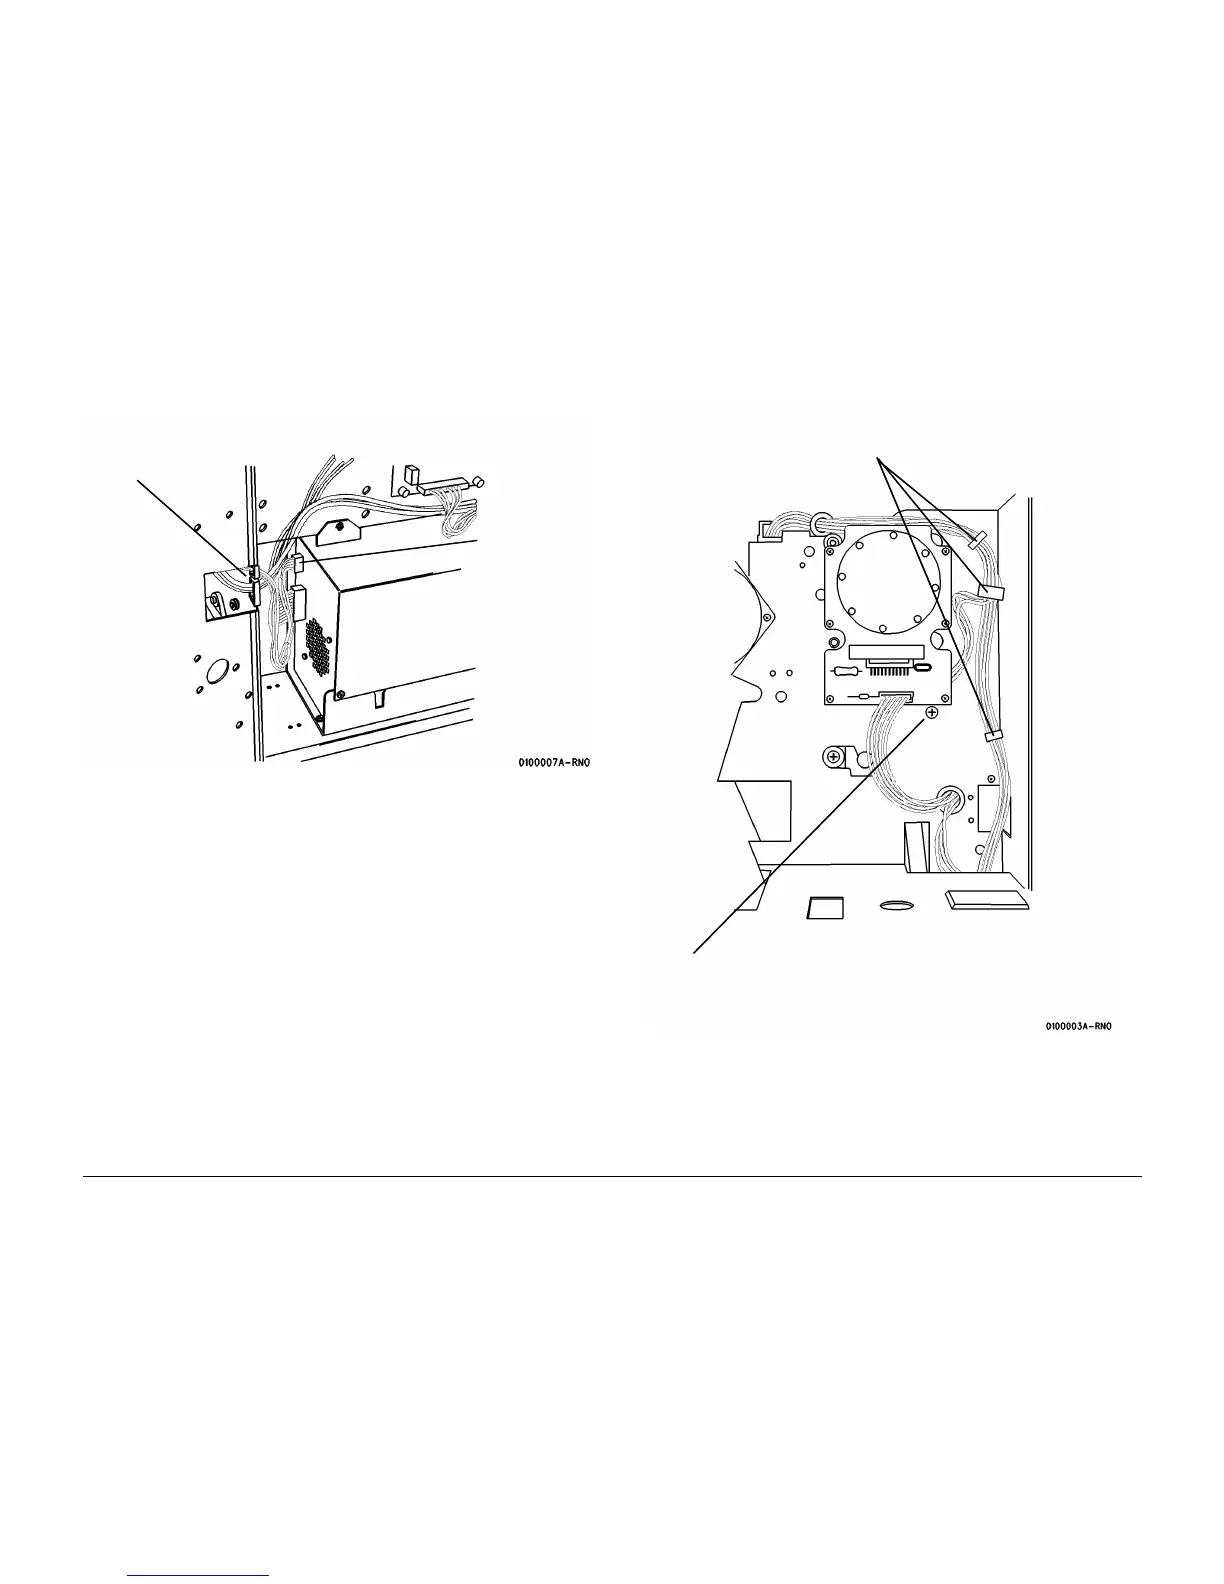
13. (Figure 7): Disconnect A5P2 from the Low Voltage Power Supply and release the harness
from the cable clamps.
Figure 7 Preparing the Harness for Removal
14. (Figure 8): Disconnect the Ground Wire and release the harness from the cable clamps.
Figure 8 Preparing the Harness for Removal
NOTE: Observe the way that the spring rests on the frame, underneath the cable clamp. This
is how the reassembled parts must fit.
2
Release the har-
ness from the
cable clamps
1
Disconnect A5P2
1
Remove the screw to
disconnect the Ground
Wire
2
Release the harness from the
cable clamps

 Loading...


