892-0000010B OM
227
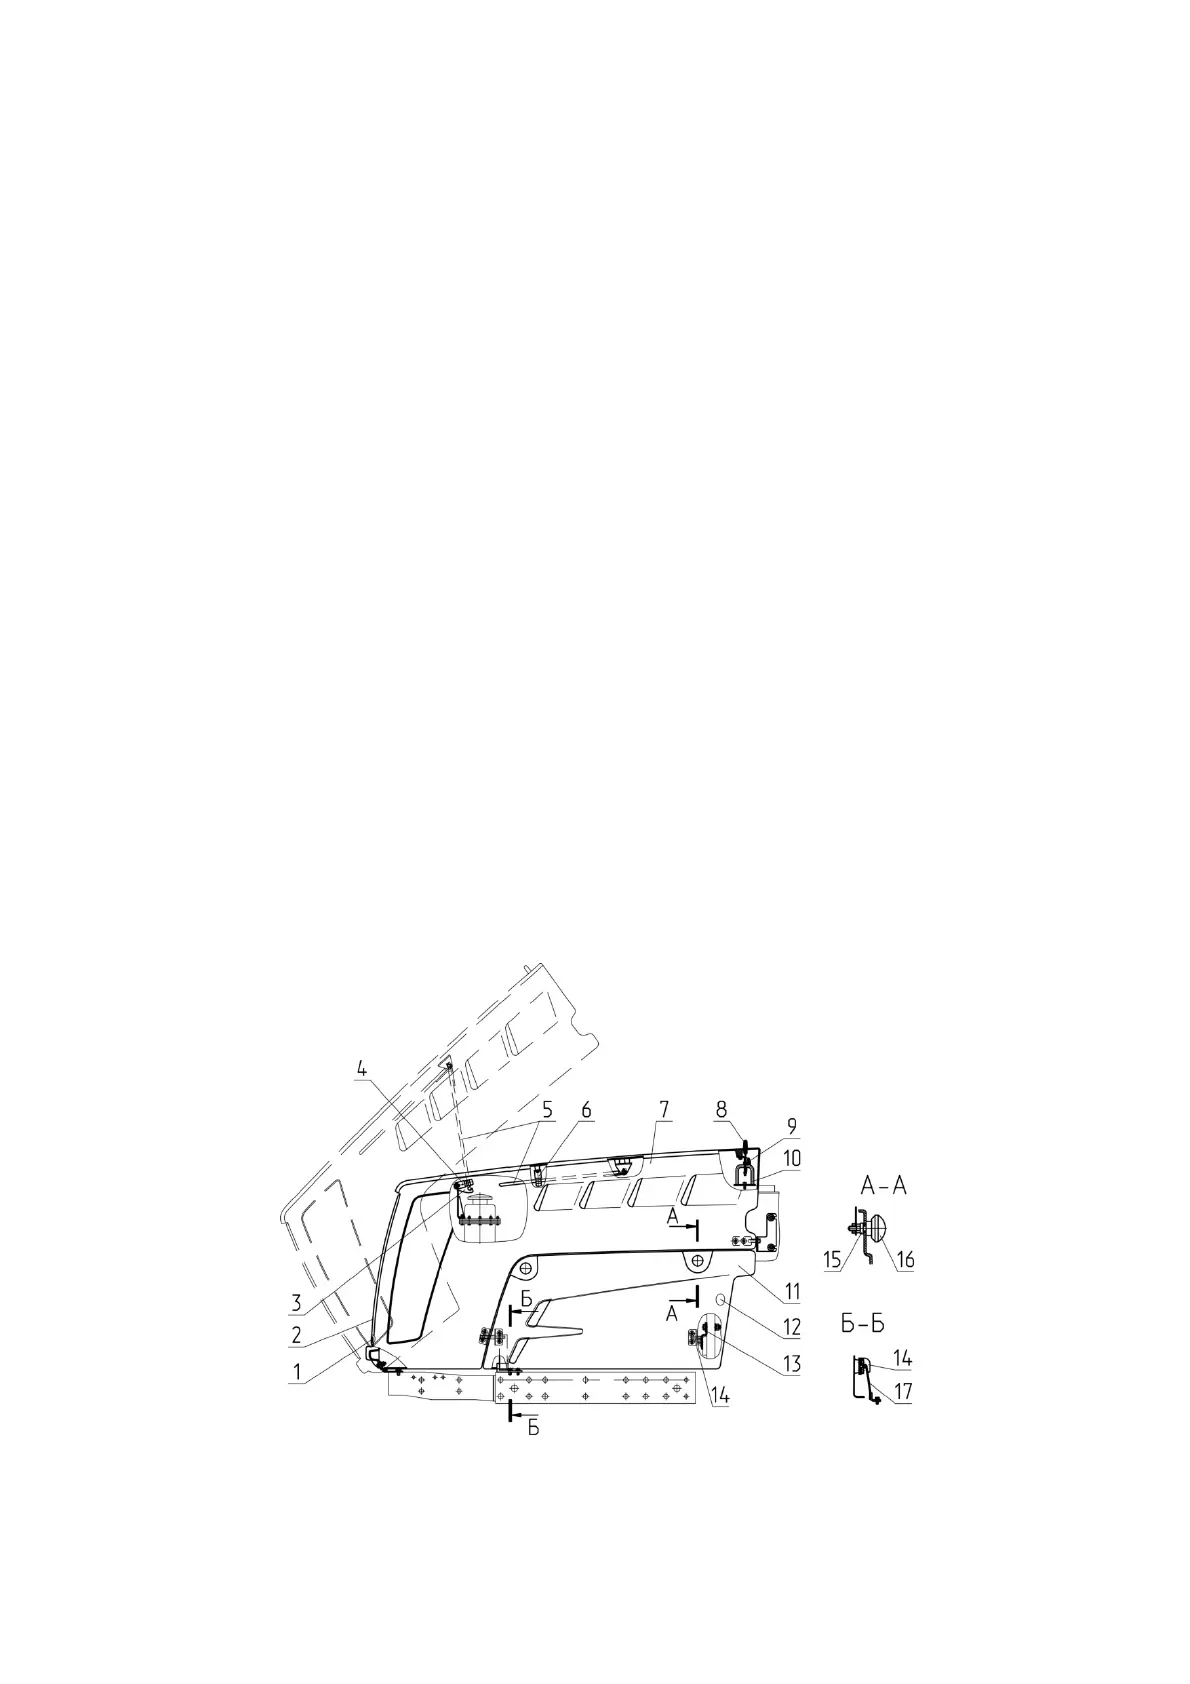
6.2.2 Providing access to the tractor components for maintenance of tractors with a plastic
bonnet 950.1- 8402020.
Before carrying out maintenance work, it is necessary to remove both sidewalls 11
and 12 (Figure 6.2.2), the monocyclone and lift bonnet 7.
To remove the monocyclone, pull it up.
To remove sidewalls 11 and 12, do the following:
- unscrew handles 16 in four places;
- release sidewalls 11 and 12 from screws 15 in four places, pulling towards you;
- remove sidewalls 11 and 12, lifting them first;
To raise bonnet 7, do the following:
- release lock 9 from engagement with bracket 10 by pulling handle 8 towards you;
- raise bonnet 7;
- fix bonnet 7 in the open position, using rod 5 in bracket 3 and clamp 4;
WARNING: BEFORE PERFORMING ANY MAINTENANCE OPERATION UNDER
THE BONNET, MAKE SURE IT IS SECURE IN THE RAISED POSITION!
To provide access to components and parts located directly under bonnet 7 (in the
closed position) in the front part of the tractor, the following must be done:
- unscrew bolts 1 in two places;
- remove grill 2.
To install grill 2 on bonnet 7, do the following:
- install grill 2 and secure with bolts 1 in two places.
To lower and close bonnet 7, do the following:
- slightly lift bonnet 7 to release rod 5 from bracket 3;
- release rod 5 from clamp 4, pulling rod 5 back;
- secure rod 5 in clamp 6 on bonnet 7;
- take bonnet 7 to the lower position until there is a specific click (lock 9 is triggered).
To install sidewalls 11 and 12, do the following:
- install hooks 14 on sidewalls 11 and 12 in four places onto brackets 13 and 17;
- align holes in brackets 11 and 12 with screws 15 in four places;
- tighten handles 16 in four places.
1 – bolt; 2 – grill; 3 – bracket; 4 - clamp; 5 - rod; 6 - clamp; 7 – bonnet; 8 – handle, 9 – lock;
10 – bracket; 11, 12 – bracket; 13 – bracket, 14 – hook, 15 – screw, 16 – handle, 17 –
bracket
Figure 6.2.2 – Diagram of the mechanism for raising, fixing and lowering the hood.