892-0000010B OM
272
6.4.6.3 Operation 60. Injection beginning check and fuel spraying quality check of
injectors.
The injector is considered to be operable if it sprays fuel in form of fog from all five
openings of the sprayer without separately flying drops, solid jets and condensations. The
beginning and the end of injection shall be distinct, drops on sprayer tip are not allowed.
ATTENTION: THE INJECTORS SHALL BE CHECKED, ADJUSTED AND
CLEANED ONLY AT THE STAND IN THE DEALER’S SPECIALIZED WORKSHOP!
Take the injectors out and replace them. To do this, proceed as follows:
- Prior to disconnection or loosening of any fuel system parts, clean fully the adjacent
working surfaces;
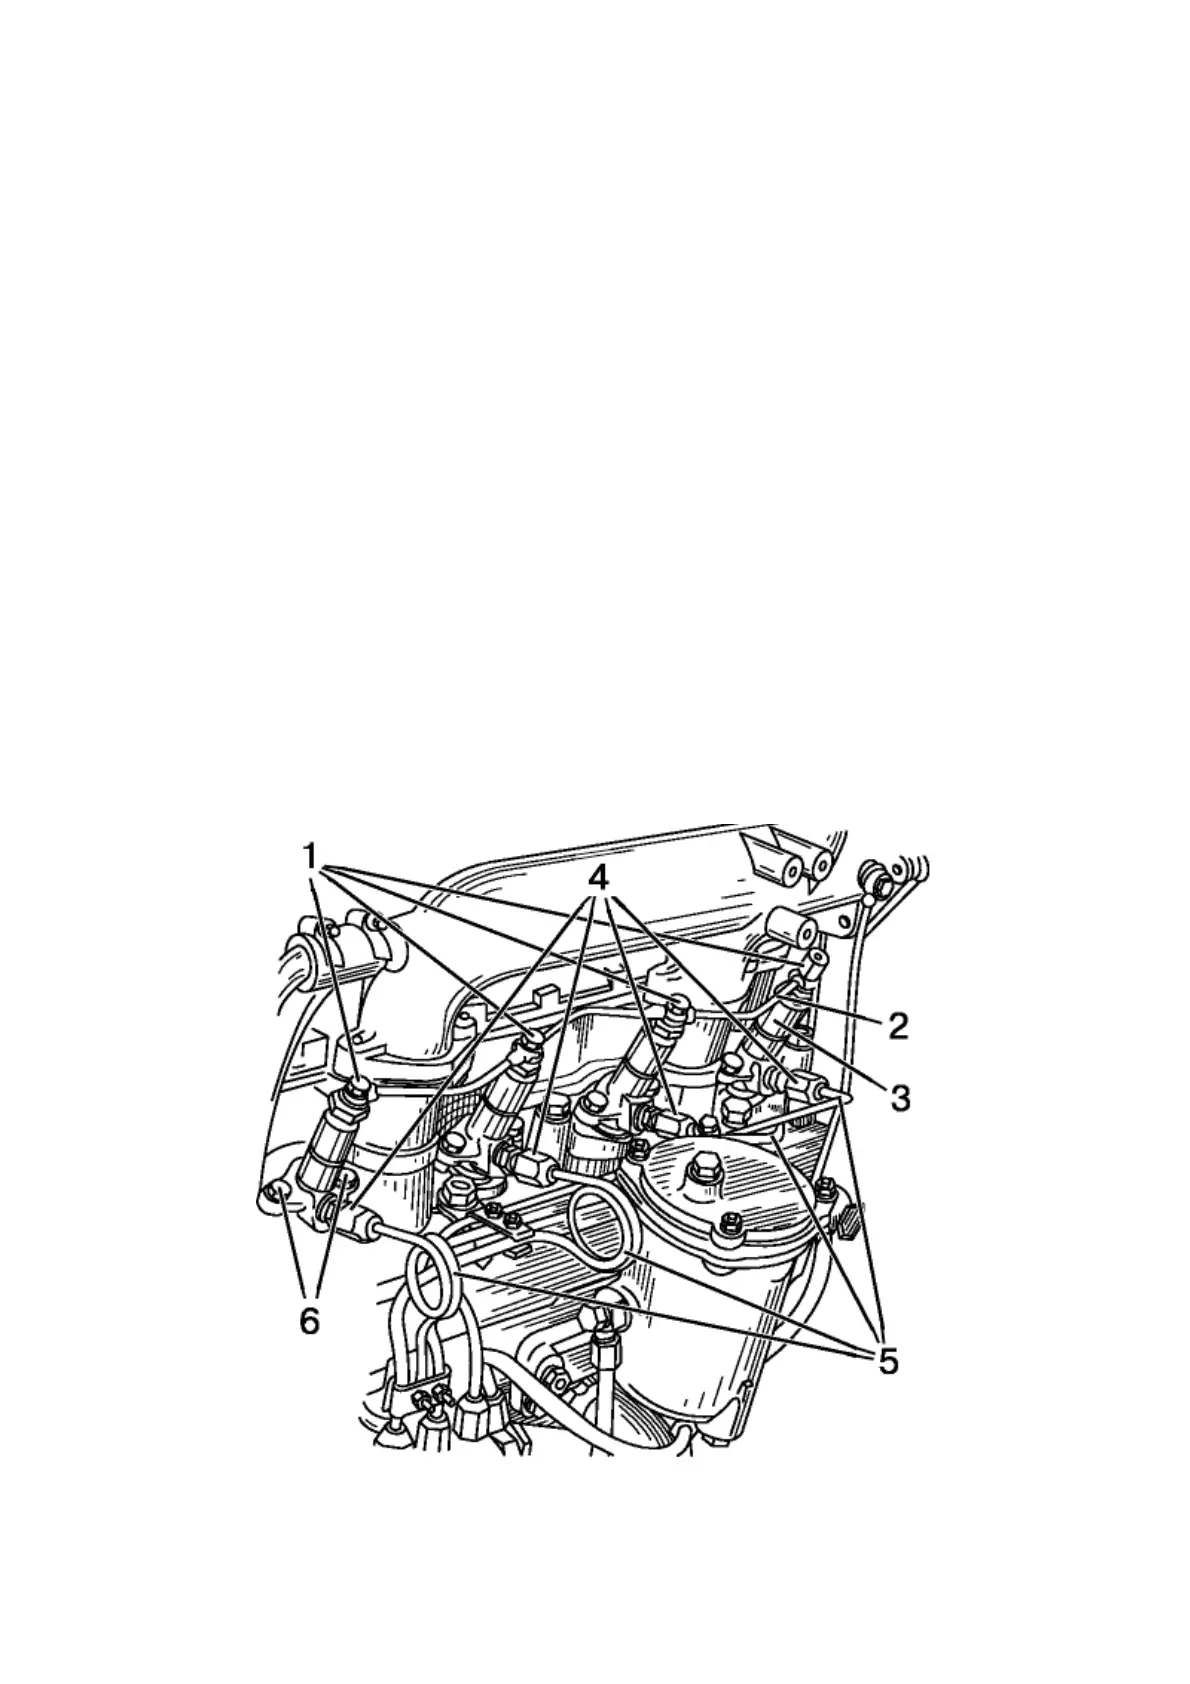
- Turn out the nuts 4 (Figure 6.4.52) and disconnect the high-pressure fuel pipe 5
from the injectors 3 and fuel pump;
- Turn out four bolts 1 of the drain line and take the drainage fuel pipe 2 away.
Discard copper sealing washers (two washers per each “banjo” bolt);
- Unscrew the bolts 6 fastening the injectors and remove the injectors 3;
- Send the injectors for servicing to dealer’s workshop;
- Install the verified, cleaned and adjusted injectors by performing the above spec-
ified step in the reverse order.
- Pump the fuel system, as specified in clause 6.4.5.14 “Operation 53. Replace of filter
or filter element of the fuel’s fine filter”
ATTENTION: USE NEW COPPER WASHERS DURING EACH INJECTOR INSTALLATION!
Note – It is convenient to have the replacement kit of checked and adjusted injec-
tors for quick mounting to the engine.
1 – bolt; 2 – drainage fuel pump; 3 – injector; 4 – nut; 5 – high-pressure fuel pump;
6 – injector fastening bolt.
Figure 6.4.52– Dismantling the injectors from the engine