Care & Maintenance
189
PN: 905K520652 v2.8
Three manikin battery indicator lights are located on the left side of the manikin.
• All three indicator lights are illuminated and not blinking: The manikin’s batteries
are fully charged
• Two indicator lights are illuminated and not blinking: The manikin’s batteries have
less than 50% power remaining
• One indicator light is illuminated and not blinking: The manikin’s batteries have less
than 20% power remaining
• One indicator light is illuminated and blinking: The manikin’s batteries have less than
15% power remaining
• One light is illuminating at one time in sequence from left to right: The manikin’s
batteries are charging
Note: The batteries charge at a slower rate if the simulator is powered on while the AC adapter is
plugged in.
An external battery charger can be purchased to charge the batteries outside of the simulator.
WARNING: If the simulator is still in use, ensure that the AC adapter is plugged into the simulator and a
working power source prior to removing both batteries.
To charge the simulator batteries using the external battery charger:
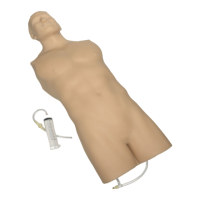
1. Locate the battery compartment cover on the left side of the manikin’s torso
2. Pull down on the silver security pin and pull the cover away from the torso
The Battery Compartment and Ports with Cover
The cover is removed and the batteries are visible in the manikin.
3. Remove the batteries from the simulator by pulling on the tabs and lifting the batteries
out of the battery compartment
Note: Ensure that the battery tab is accessible and not tucked into the battery
compartment.
4. Plug the external charger into a power source
5. Insert the batteries into the external charger charging station