EasyManuals Logo

GE LOGIQ P9 Service Manual

GE LOGIQ P9
602 pages
To Next Page IconTo Next Page
To Previous Page IconTo Previous Page
Page #149 background imageLoading...
Page #149 background image
GEDRAFT LOGIQ P9/P7
D
IRECTION 5604324, REVISION 11 DRAFT (JANUARY 24, 2019) SERVICE MANUAL
Chapter 4 - Functional Checks 4-9
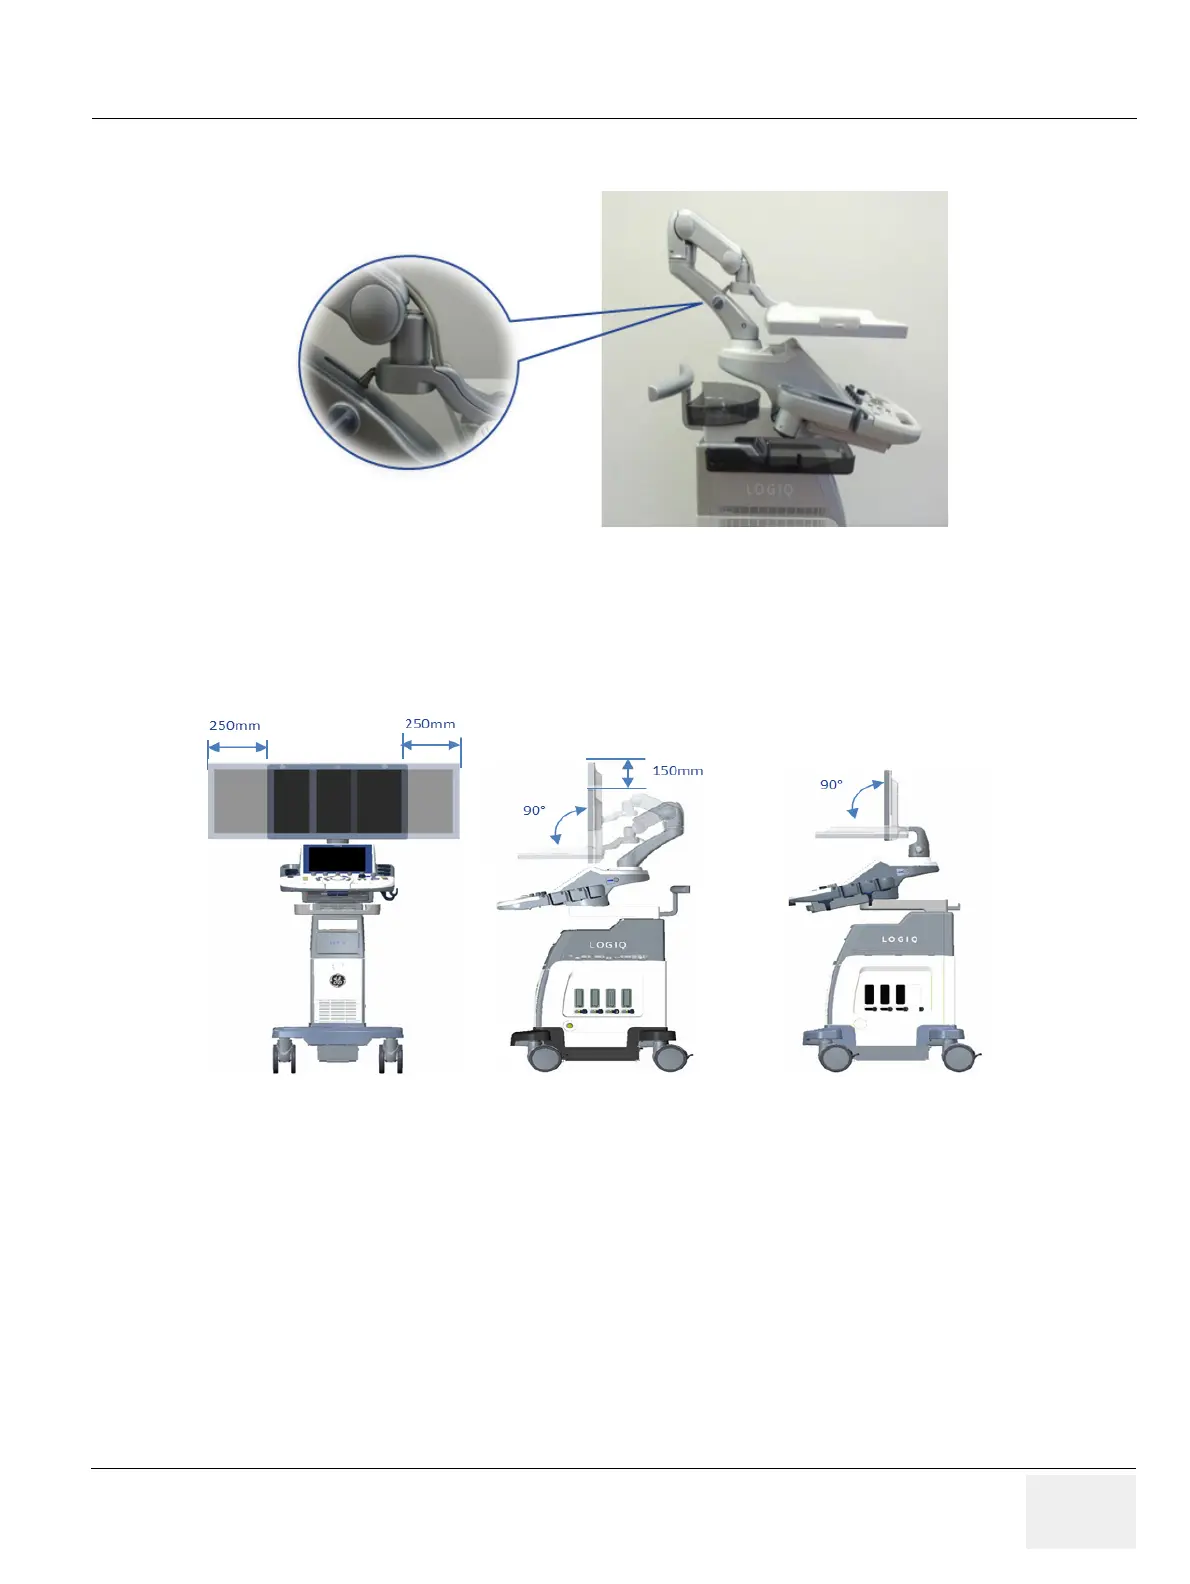
4-3-2-2 LCD ARM
1) Loosen LCD Arm LOCK (see: Figure 4-5)
.
Figure 4-6 LCD ARM Lock
2) Verify LCD Monitor can move up/down (vertically) and left/right (horizontally).
NOTE: LCD Monitor can move approximately 150mm vertically and 250mm horizontally (see: Figure 4-6).
Figure 4-7 LCD Movement
a, b : LOGIQ P7/P9 with Flexible Arm
c : LOGIQ P7/P9 with Fixed Arm
3) Engage LCD Arm LOCK.
4) Align LCD Arm along center line of the system.
5) Verify LCD Panel is locked to position and LCD ARM does not move.
a
b
c

Table of Contents

Other manuals for GE LOGIQ P9

Questions and Answers:

Question and Answer IconNeed help?

Do you have a question about the GE LOGIQ P9 and is the answer not in the manual?

GE LOGIQ P9 Specifications

General IconGeneral
TypeUltrasound System
3D/4D ImagingYes
ElastographyYes
ConnectivityDICOM, USB, Ethernet, HDMI
Doppler ModesColor Doppler, Power Doppler
Probesconvex, linear, phased array
Imaging ModesM-Mode, Color Doppler, Power Doppler
PortabilityCart-based
ApplicationsVascular, Cardiac, OB/GYN, Musculoskeletal
WeightApprox. 80 kg
Touch Panel10.1-in touchscreen

Related product manuals