GEDRAFT LOGIQ P9/P7
D
IRECTION 5604324, REVISION 11 DRAFT (JANUARY 24, 2019) SERVICE MANUAL
Chapter 4 - Functional Checks 4-22
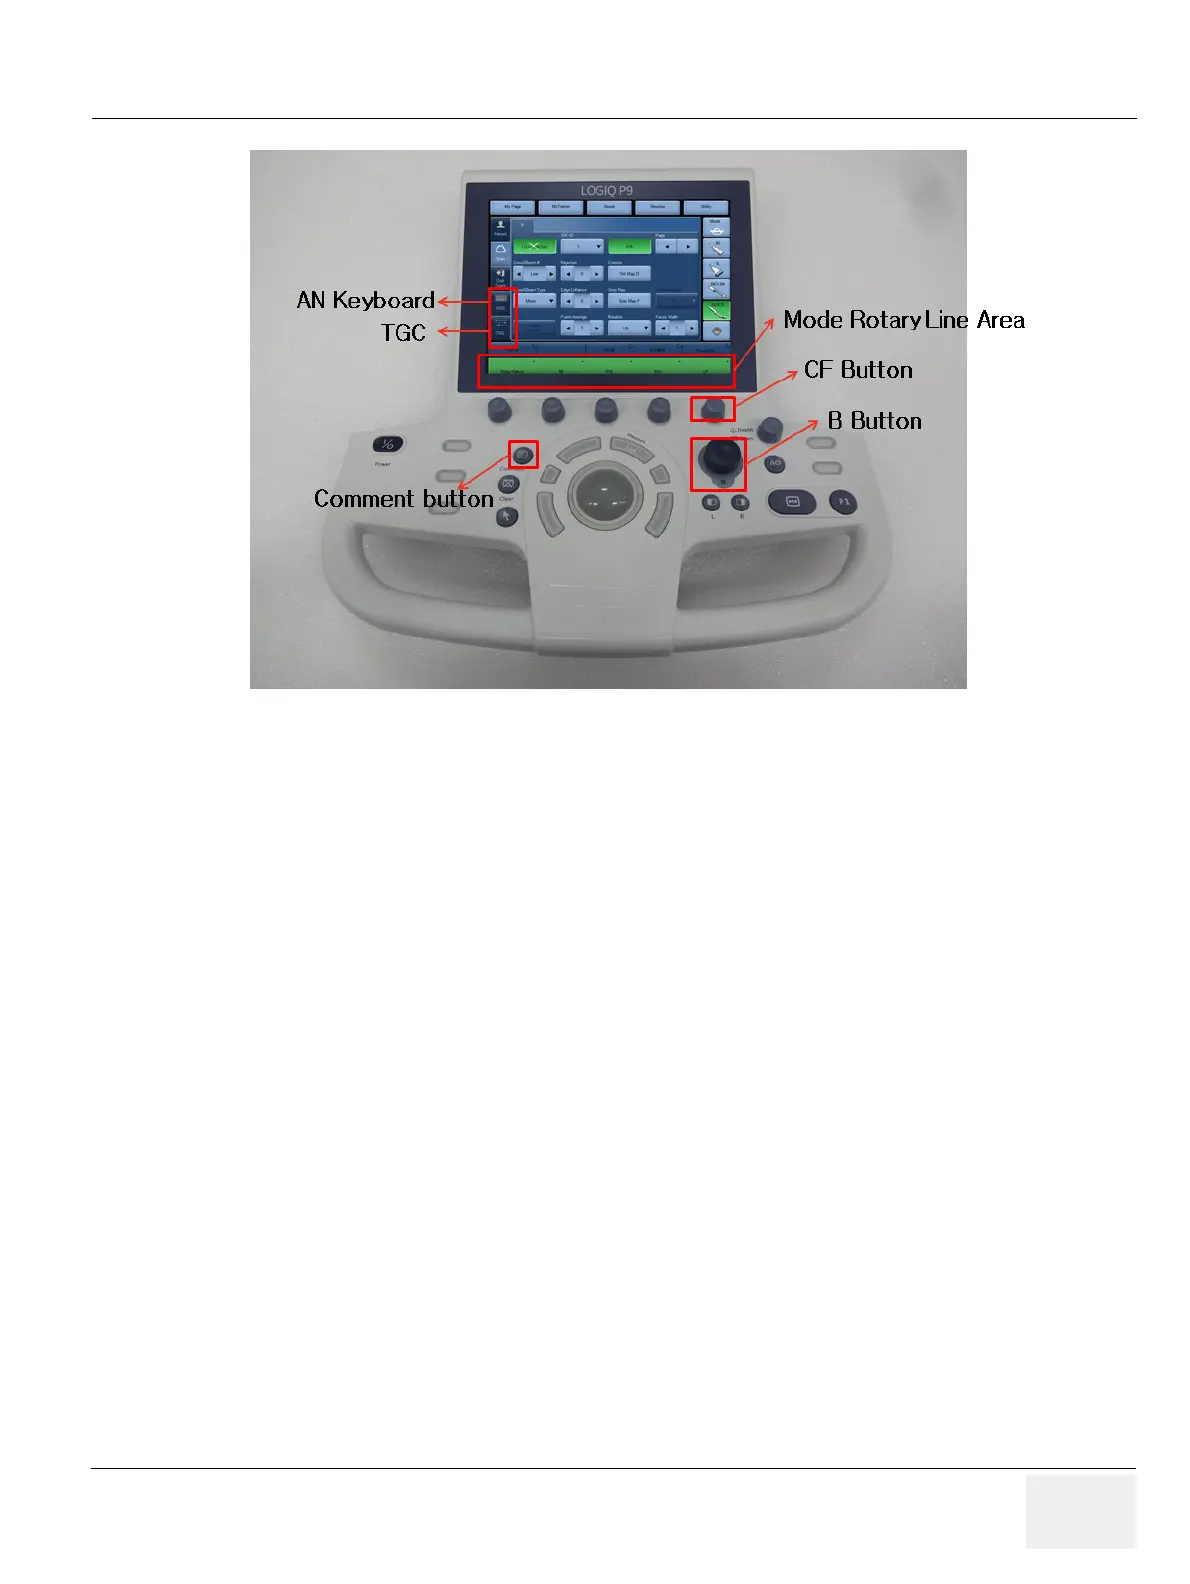
Figure 4-20
6) Connect any probe. (if not connected)
7) Go to Live CF Mode. (Mode Rotary Line Area in touch panel, Press “CF” Mode button, unfreezes.)
8) Turn “GAIN” encoder around CF Mode button and verify ROI gain change.
9) Operate TGC sliders(Select TGC in touch panel) and verify B image gain change.
10) Press “COMMENT” key.
11) Select ‘KBD’ in touch panel and Type in arbitary strings. Verify keyboard is functional
12) Type in arbitary strings from A/N Keyboard(If installed). Verify keyboard is functional.
4-3-5-2 DVD Drive Test
1) Insert Blank CD-R or DVD-R Media into Optical Drive.
2) Select UTILITY -> SYSTEM -> Backup Restore.
3) Select “CD/DVD” in “MEDIA” list.
4) Select “User Define Configuration checkbox” in Backup and Press “Backup”.
5) Start backup into Media by pressing “OK” Button.
6) Verify “Finished OK” message appears.
4-3-5-3 LAN Port Test
1) Plug the Ethernet Cable to connect local area network.
2) Verify that Local area network connection is recognized.
 Loading...


