EasyManuals Logo

GE LOGIQ P9 Service Manual

GE LOGIQ P9
602 pages
To Next Page IconTo Next Page
To Previous Page IconTo Previous Page
Page #470 background imageLoading...
Page #470 background image
GERAFT LOGIQ P9/P7
D
IRECTION 5604324, REVISION 11 DRAFT (JANUARY 24, 2019) SERVICE MANUAL
8-144 Section 8-28 - Replacement of the Harness Cable and OPIO Cable Assy
Figure 8-167 Removal of Harness Cable Assy
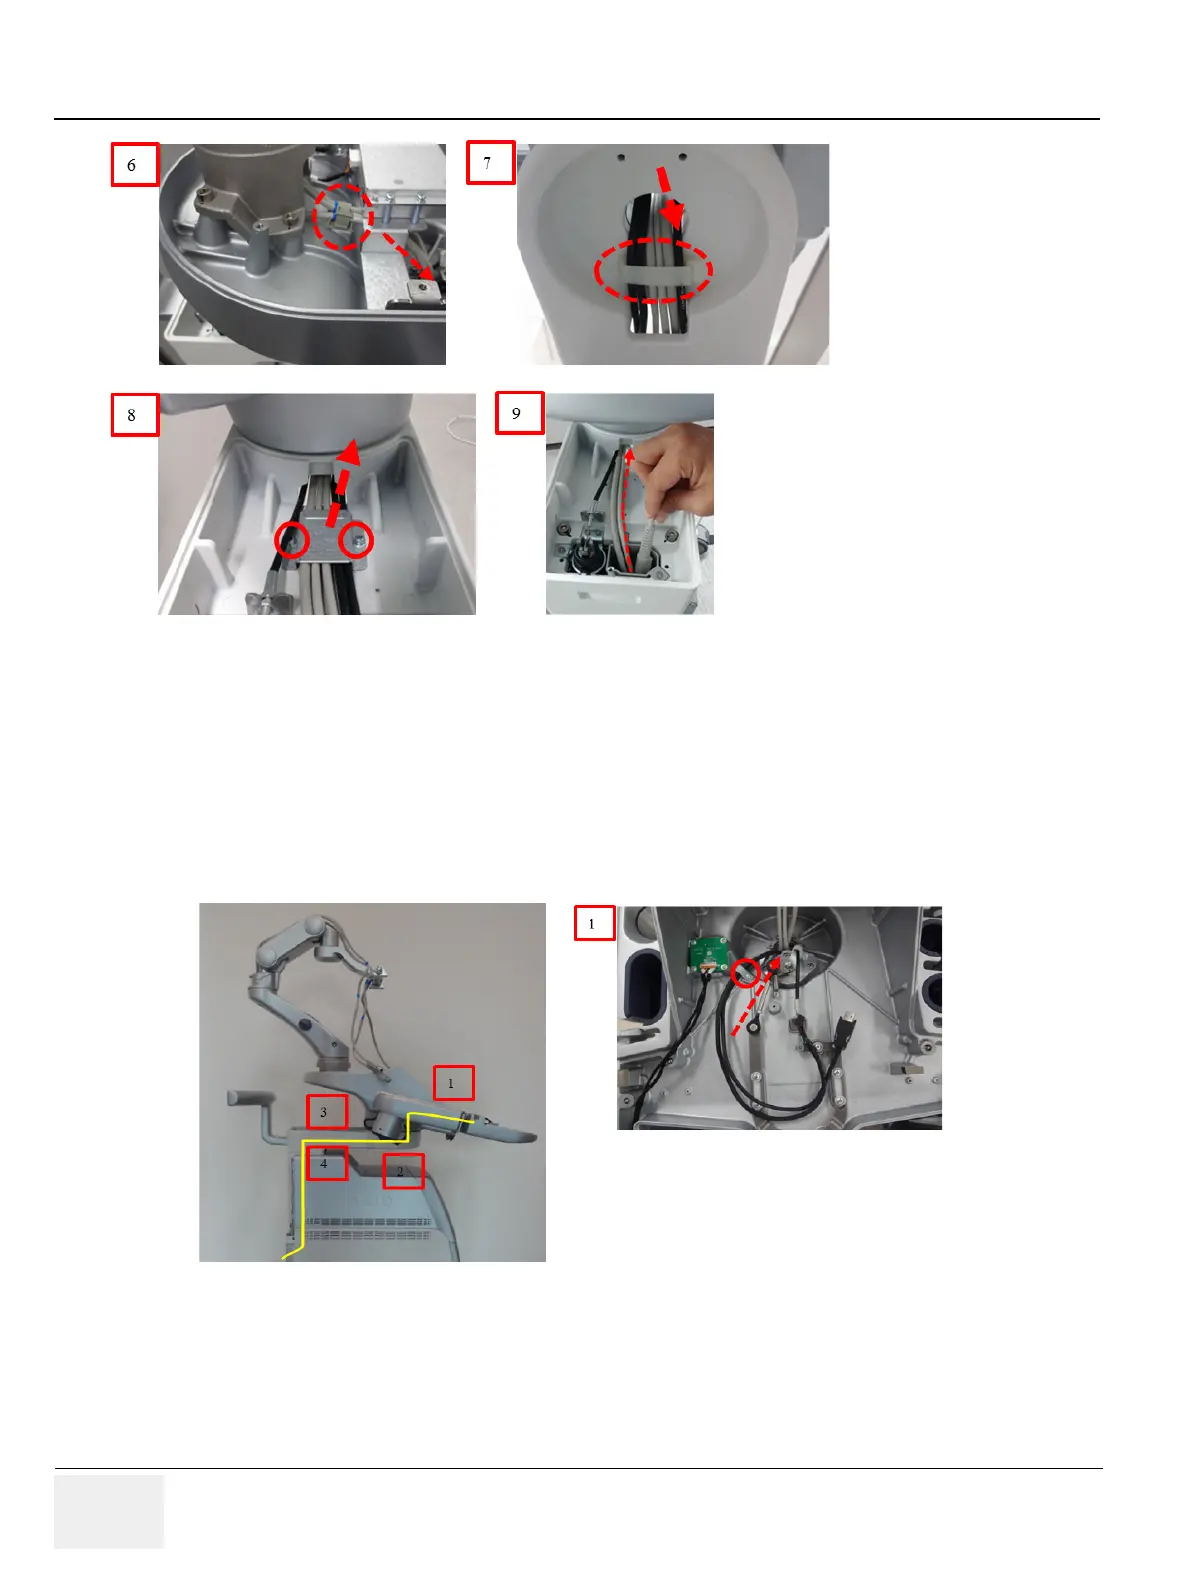
8-28-5 Removal Procedure (OPIO Cable Assy)
1) Unscrew 1 screw, remove cable clamp, and then loosen cable through hole.
NOTE: There is cable position marker at this location.
2) Release the cable holder and carefully pull down cables.
3) Unscrew 2 screws and remove Link arm cable fix brkt.
4) Carefully pull up cables and remove cables
Figure 8-168 Removal of Harness Cable Assy
8-28-6 Installation Procedure
Install components in reverse order of removal. Replace the cut cable ties with new ones of the
appropriate length.

Table of Contents

Other manuals for GE LOGIQ P9

Questions and Answers:

Question and Answer IconNeed help?

Do you have a question about the GE LOGIQ P9 and is the answer not in the manual?

GE LOGIQ P9 Specifications

General IconGeneral
TypeUltrasound System
3D/4D ImagingYes
ElastographyYes
ConnectivityDICOM, USB, Ethernet, HDMI
Doppler ModesColor Doppler, Power Doppler
Probesconvex, linear, phased array
Imaging ModesM-Mode, Color Doppler, Power Doppler
PortabilityCart-based
ApplicationsVascular, Cardiac, OB/GYN, Musculoskeletal
WeightApprox. 80 kg
Touch Panel10.1-in touchscreen

Related product manuals