EasyManuals Logo

GE LOGIQ P9 Service Manual

GE LOGIQ P9
602 pages
To Next Page IconTo Next Page
To Previous Page IconTo Previous Page
Page #402 background imageLoading...
Page #402 background image
GERAFT LOGIQ P9/P7
D
IRECTION 5604324, REVISION 11 DRAFT (JANUARY 24, 2019) SERVICE MANUAL
8-76 Section 8-11 - Replacement of Monitor and LCD Arm Plastic Covers
8-11-6 LCD Arm Plastic Covers Remove Procedure
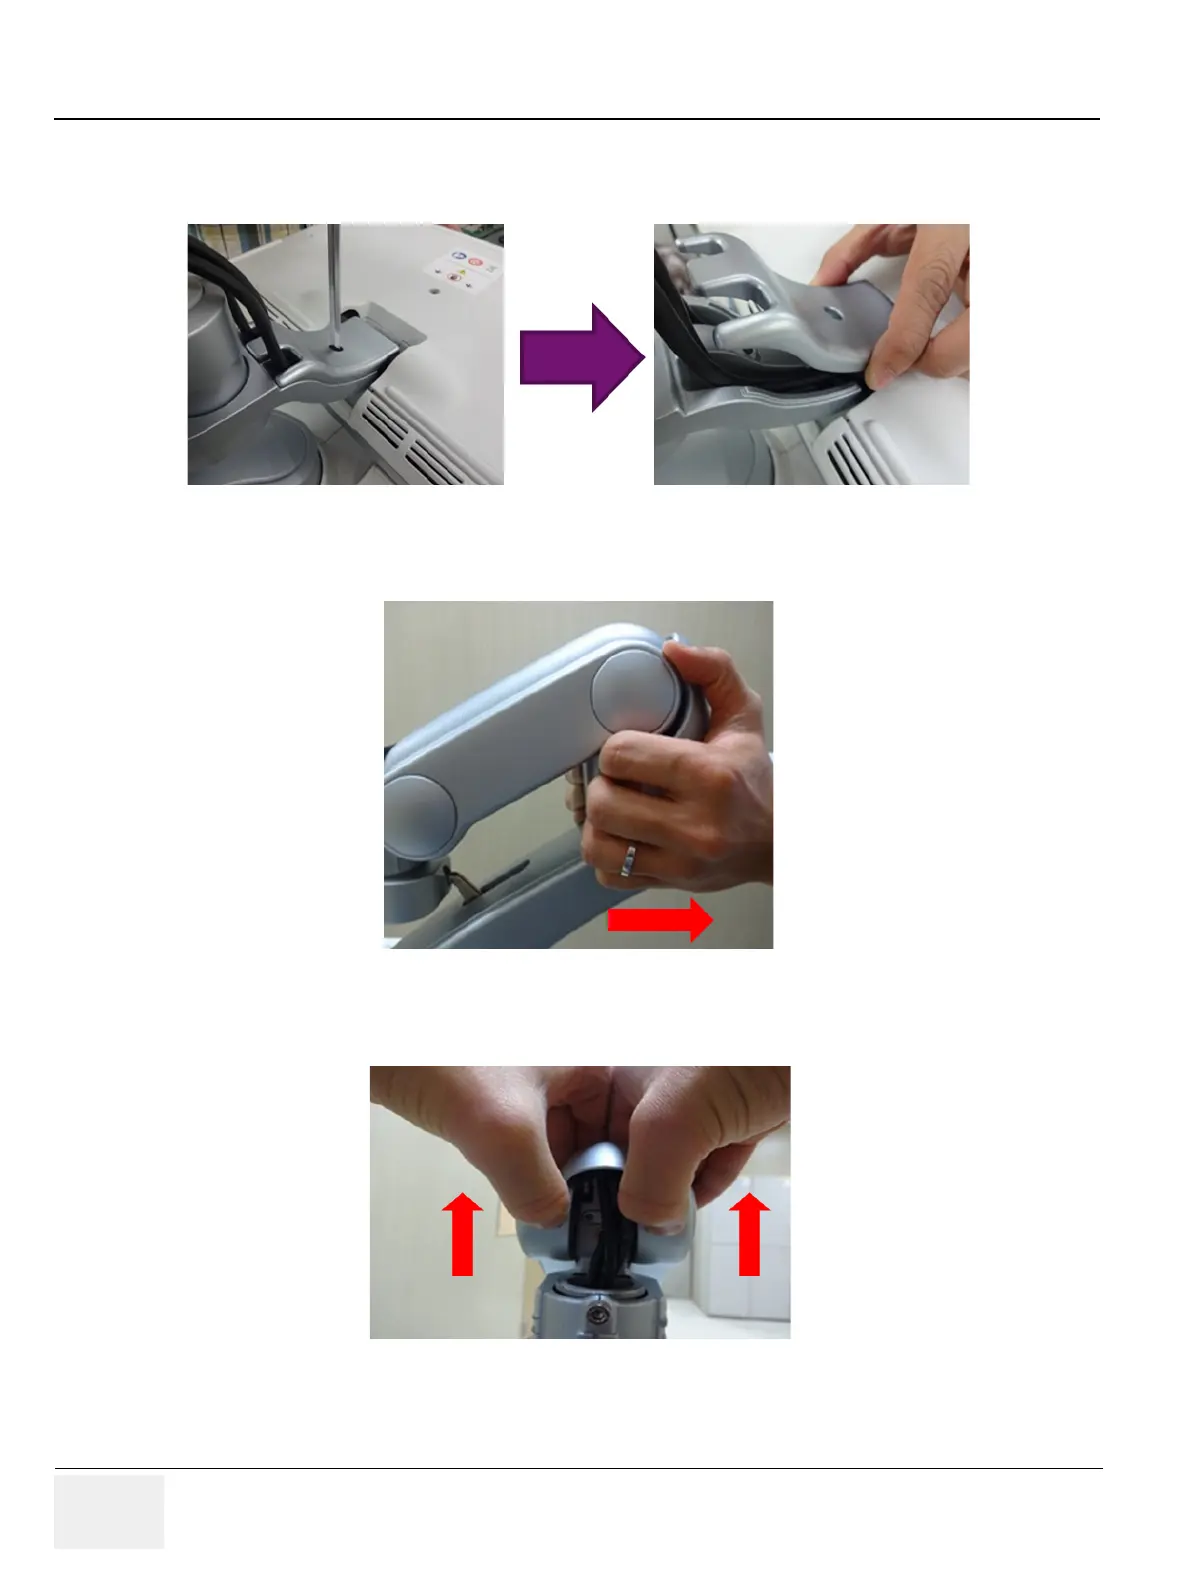
1) Unscrew 1 screw, than remove 3rd Arm Cover. Refer to the figure below.
2) Remove 2nd Axis Cover. Refer to the figure below.
3) Remove 2nd Arm Cover. Refer to the figure below.
Figure 8-64 Removing the 3rd Arm Cover
Figure 8-65 Removing 2nd Axis Cover
Figure 8-66 Removing 2nd Arm Cover

Table of Contents

Other manuals for GE LOGIQ P9

Questions and Answers:

Question and Answer IconNeed help?

Do you have a question about the GE LOGIQ P9 and is the answer not in the manual?

GE LOGIQ P9 Specifications

General IconGeneral
TypeUltrasound System
3D/4D ImagingYes
ElastographyYes
ConnectivityDICOM, USB, Ethernet, HDMI
Doppler ModesColor Doppler, Power Doppler
Probesconvex, linear, phased array
Imaging ModesM-Mode, Color Doppler, Power Doppler
PortabilityCart-based
ApplicationsVascular, Cardiac, OB/GYN, Musculoskeletal
WeightApprox. 80 kg
Touch Panel10.1-in touchscreen

Related product manuals